
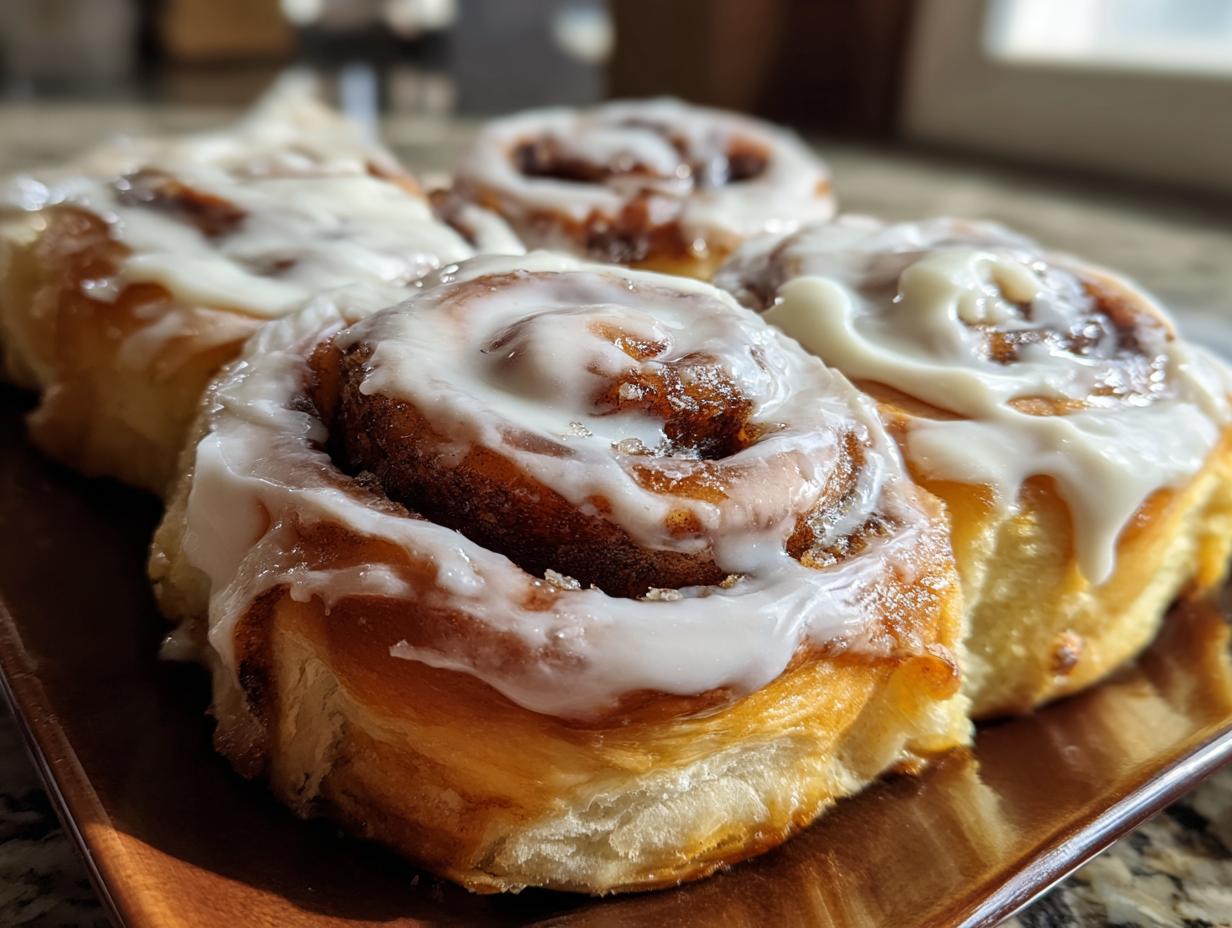
Oh, honestly, is there anything better than waking up to the smell of a true, homemade cinnamon roll baking in the oven? It just stops everything, doesn’t it? I remember feeling so overwhelmed by city life until I started seeking out that grounding joy again. That’s exactly what this recipe is about—creating something deeply satisfying without turning baking into a chore. Trust me, this foolproof recipe delivers those incredibly soft, gooey, bakery-quality cinnamon rolls we all dream about. At Misty Plate, we believe making magic like this should be accessible, and this sweet breakfast recipe proves that a little time invested creates the best kind of everyday celebration.
- Why This is the Best Cinnamon Roll Recipe You Will Make
- Gathering Ingredients for Your Homemade Cinnamon Roll
- Step-by-Step Instructions to Make the Perfect Cinnamon Roll Dough
- Assembling and Cutting the Gooey Cinnamon Roll Filling
- Tips for Success When Baking Your Easy Cinnamon Rolls
- Creating the Ultimate Cream Cheese Icing
- Storage and Reheating for Leftover Cinnamon Roll Treats
- Frequently Asked Questions About Making Cinnamon Rolls
- Estimated Nutritional Information for This Cinnamon Roll Recipe
Why This is the Best Cinnamon Roll Recipe You Will Make
I’ve messed up so many batches trying to find the perfect balance, but this recipe just nails it every single time. It’s not just about throwing ingredients together; it’s about making sure every element supports the final, pillowy texture of our homemade cinnamon roll. We want that rich, buttery dough holding onto impossibly sweet filling without falling apart.
- The ratio of cinnamon to sugar in the filling is spot-on for maximum gooeyness.
- The dough produces those amazing pull-apart layers that make you reach for a second one instantly.
- The final cream cheese icing is bright enough to cut through the richness of the swirl.
Achieving Bakery-Quality Soft Rolls
The secret to rolls that actually feel like you bought them from a professional bakery comes down to temperature control. You absolutely must use room temperature eggs; cold eggs shock the yeast and stiffen the developing gluten structure, which means tougher rolls. Also, the butter in the dough needs to be softened perfectly—it should give easily when pressed but shouldn’t look oily.
When you cream that softened butter with the sugar and then gently incorporate your eggs, you are creating microscopic air pockets. Those pockets expand during the rising and baking, giving you that signature light, yet substantial, crumb that makes this yeast roll recipe famous in my house.
Gathering Ingredients for Your Homemade Cinnamon Roll
Before we even touch the mixer, we need to gather our supplies. I promise, you don’t need anything fancy or exotic for this recipe; everything here is something you can grab at your local grocery store, which fits perfectly with our philosophy of making great food accessible. Having everything measured out and ready to go makes the whole process that much more relaxing. After all, baking should feel like a joy, not a scavenger hunt! If you’re interested in the story behind Misty Plate and why we focus on real ingredients, you can read more about us here.
Here’s the breakdown. Remember, preparation is key for the best results:
For the Dough:
- 1 cup whole milk, warm (about 110°F)
- 2 1/4 teaspoons active dry yeast
- 1/2 cup granulated sugar, plus 1 teaspoon for yeast
- 1/2 cup unsalted butter, softened
- 2 large eggs, room temperature
- 4 cups all-purpose flour, plus more for dusting
- 1 teaspoon salt
For the Filling:
- 1/2 cup unsalted butter, softened
- 1 cup packed light brown sugar
- 2 tablespoons ground cinnamon
For the Icing:
- 8 ounces cream cheese, softened
- 1/2 cup unsalted butter, softened
- 3 cups powdered sugar
- 1 teaspoon vanilla extract
- 1-2 tablespoons milk
Ingredient Notes and Substitutions for Your Sweet Breakfast Recipe
Let’s talk substitutions, because stuff happens! If your eggs somehow ended up straight from the fridge, don’t panic—just place them in a bowl of warm (not hot!) water for about five minutes before using them. That little soak helps take the chill off so they mix better into the dough.
For the filling, I’m very specific about using light brown sugar because of the molasses it adds, which deepens the flavor profile wonderfully, but honestly, white sugar alone just won’t give you that rich caramel note we’re looking for in a homemade pastry.
Also, please notice required precision on the milk temperature for the yeast—too hot kills it dead, too cold makes it lazy! We want that foamy action quickly, so trust the 110°F mark if you have a thermometer handy.
Step-by-Step Instructions to Make the Perfect Cinnamon Roll Dough
Okay, now we get down to the technique that separates a good roll from a truly great, soft, fluffy homemade cinnamon roll: handling the yeast! This is where people often worry, but honestly, if you just pay attention to a couple of details, you’ll be fine. First, activate your yeast—that means warm milk, a touch of sugar, and the yeast itself. We’re waiting for it to get foamy. If it doesn’t foam after about ten minutes, your milk was too hot or the yeast is old, and we need to start over. Don’t skip this check!
Once you have that beautiful foam, dump in the rest of the bowl ingredients and start mixing. When you use the stand mixer, start slow so flour doesn’t fly everywhere—oops! Then, let it knead on medium speed for a solid six to eight minutes. You’re looking for shiny dough that pulls cleanly away from the sides of the bowl. That elasticity is crucial for those perfect swirls later on.
The First Rise: Patience for Fluffy Yeast Roll Recipe Success
After kneading, transfer your dough to a lightly oiled bowl. I like to swirl it around so the whole ball gets coated in that oil—it prevents a dry skin from forming while it rests. Cover the bowl tightly; I always use plastic wrap and then maybe a clean kitchen towel over that, just to keep things cozy.
Now, we wait. Yeast works best when it’s warm and happy. Find a nice, draft-free spot in your kitchen. Maybe turn the oven off and put the bowl inside for an hour. We need that dough to double in size, which takes between an hour to an hour and a half, depending on how warm your kitchen is. Why double? Because that doubling process is making all those internal tunnels and air pockets that will make your final pastry impossibly light and airy once baked.
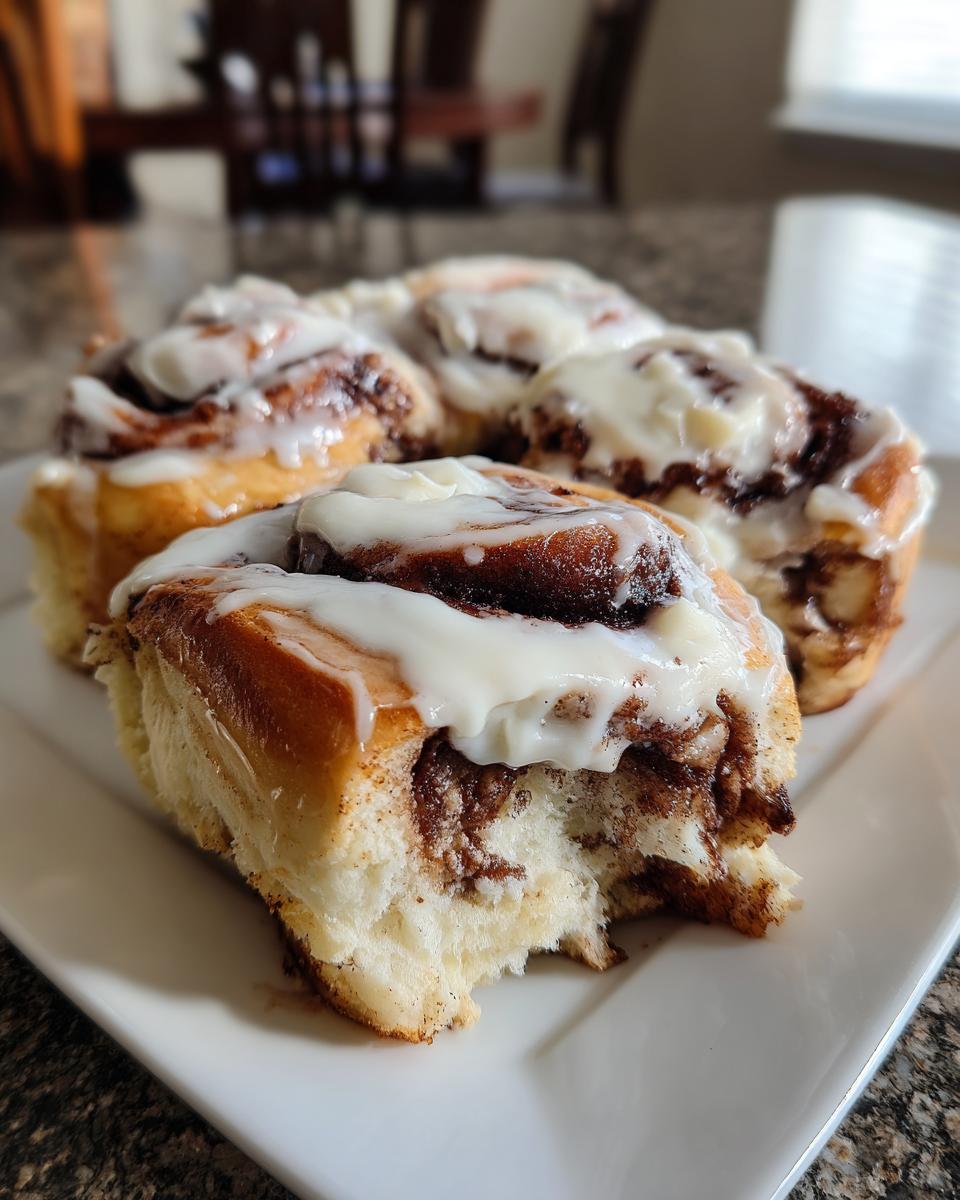
Assembling and Cutting the Gooey Cinnamon Roll Filling
Once that dough has doubled, gently deflate it—don’t punch it like a bully, just gently press the air out. Turn it onto a surface lightly dusted with flour. This is where precision helps us get that perfect swirl in our homemade cinnamon roll. You need to roll this out into a big rectangle, measuring about 12 inches by 18 inches. I keep a ruler handy because the thickness matters here!
Next, grab that delicious cinnamon-sugar butter mixture we made earlier. Spread it everywhere! But here is my one huge trick: leave about a one-inch border clear along one of the long edges. This naked strip is going to act like the glue for our log.
Starting on the opposite, fully coated side, roll that dough up as tightly as you possibly can without tearing it. Don’t be shy! Roll it snug! Once you reach that naked edge, pinch that seam down hard to seal it shut. If you skip sealing, all that gooey filling leaks out into your pan instead of staying inside the perfect cinnamon roll.
Finally, take a piece of unflavored dental floss or a very sharp knife and slice that log into 12 even pieces. Try to cut in one smooth motion rather than sawing back and forth—that keeps the sides neat!
Tips for Success When Baking Your Easy Cinnamon Rolls
We’ve mixed that rich dough and carefully rolled our sweet breakfast recipe, so now for the final couple of critical steps before they hit the oven! After slicing the rolls, place them in that greased pan and cover them again loosely. They need a second rise—usually 30 to 45 minutes. You want them to look puffy and feel soft when lightly touched, but if they look like they might merge into one giant roll, you’ve gone too far! It’s called over-proofing, and it can lead to sad, deflated cinnamon rolls.
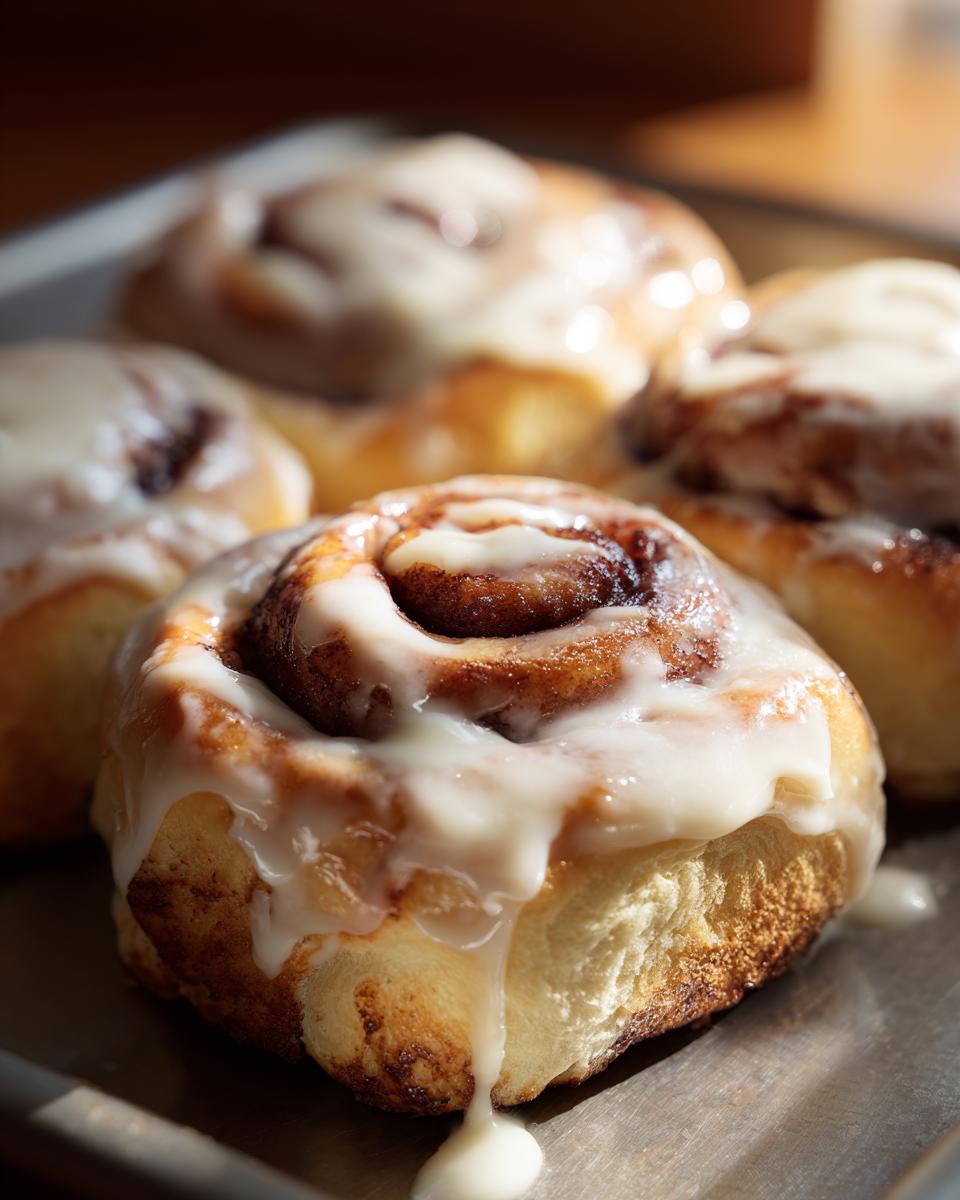
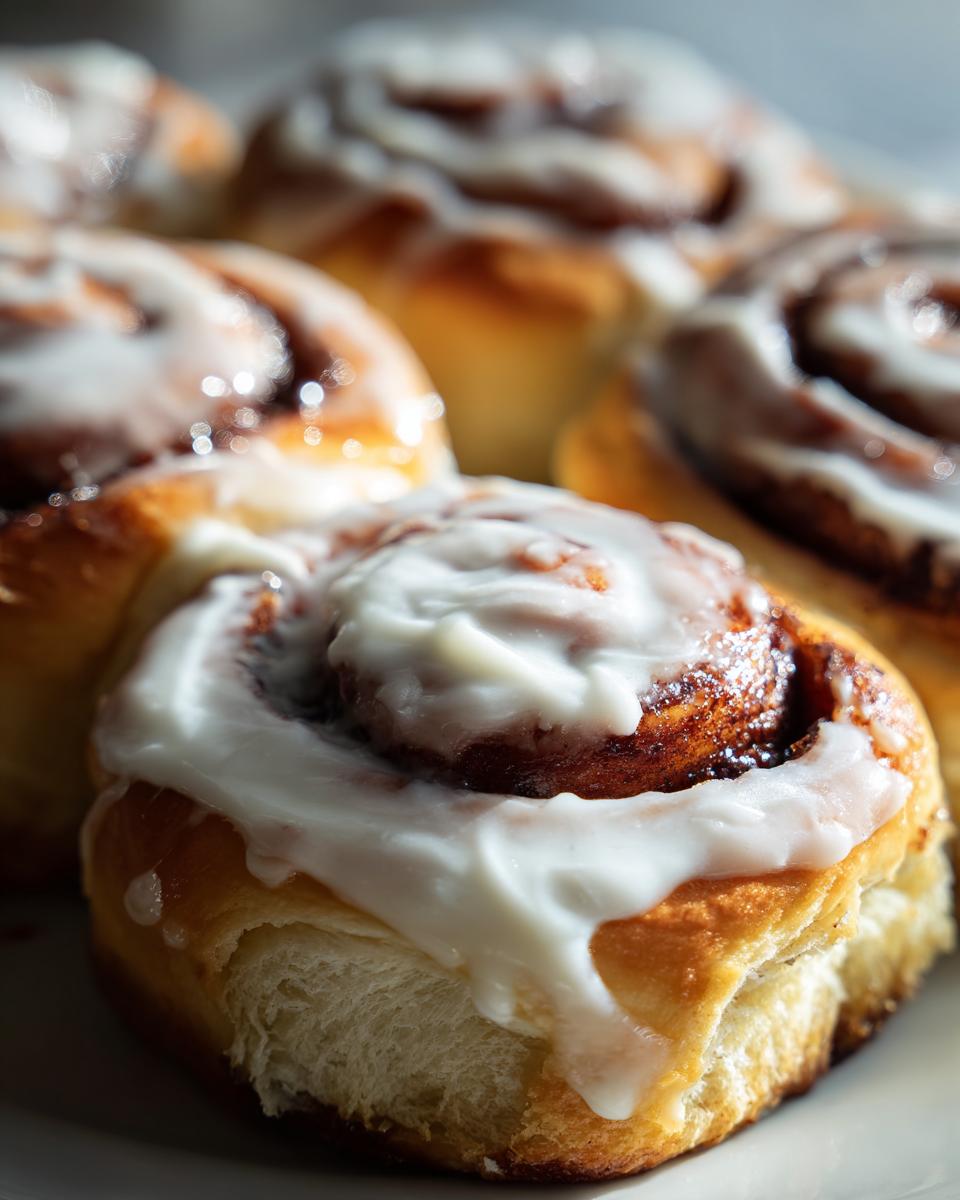
Here’s my favorite trick, lifted right from bakery secrets: once you put your rolls in the 375°F oven, cover the pan tightly with foil for the first 15 minutes. Keeping the foil on traps steam and heat, making the inside of these easy cinnamon rolls unbelievably soft. Then, pull the foil off for the final 5 to 10 minutes so the tops can caramelize and get that beautiful golden-brown color we are aiming for!
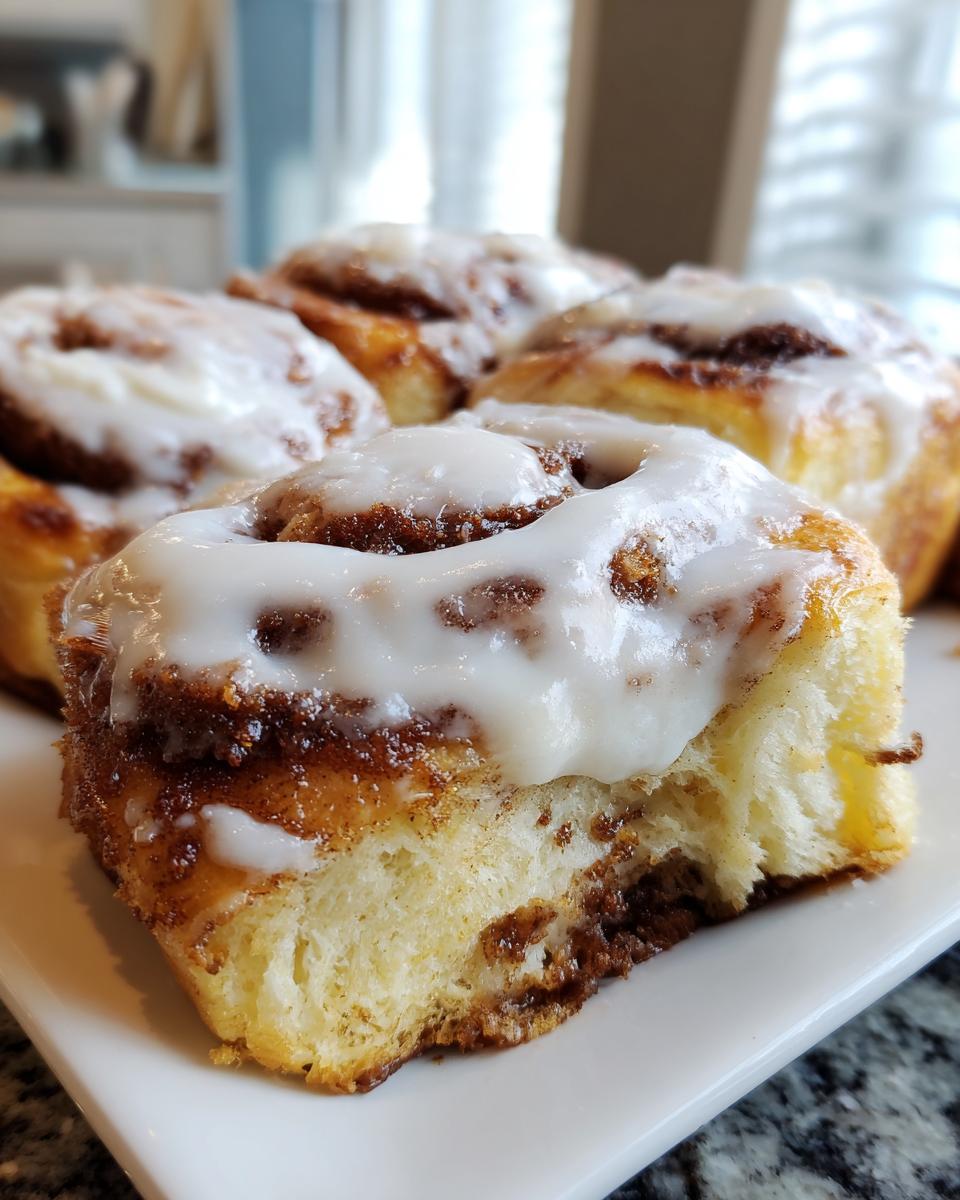
Creating the Ultimate Cream Cheese Icing
Okay, the rolls are out of the oven, golden and smelling divine, but they aren’t finished until that icing hits them. Nothing ruins a perfect batch like an icing that’s too runny or, worse, grainy! The key here is twofold: make sure your cream cheese and butter are completely softened—we mean almost mushy—before you start beating them. If they are cold, those lumps will never disappear.
Start them off in the mixer until they look uniformly creamy. Then, you add your powdered sugar slowly, in stages. If you dump all three cups in at once, you’re going to have a sugar cloud in your kitchen that will coat everything, trust me! Once the sugar is mostly incorporated, you start adding the milk, tablespoon by tablespoon. It will look thick, maybe too thick, but keep beating! That last splash of milk is what smooths the texture out into that perfect, spreadable consistency.
Serving Suggestions for Your Homemade Pastry
These rich, sweet homemade pastries are hearty, so you need something to balance them out. My absolute favorite pairing is a seriously strong, hot black coffee. The bitterness just cuts right through that buttery goodness and the sweet icing perfectly.
On a weekend morning, serving these alongside a big bowl of fresh berries—strawberries, blueberries, maybe some raspberries—adds a lovely, bright contrast. The slight tartness keeps the whole brunch from feeling too heavy. It just makes everything feel more balanced and special, like you put thought into the whole spread.
Storage and Reheating for Leftover Cinnamon Roll Treats
Even the best homemade cinnamon roll never lasts long, but if you happen to have any leftovers—which, good for you for having self-control!—storage is easy. Keep them in an airtight container at room temperature for up to three days. Don’t put them in the fridge; the cold air makes yeasted dough go hard faster than anything!
To bring that fresh-baked softness back to your slightly older cinnamon roll, I have two favorite methods. For a single serving, zap it for about 15 seconds in the microwave; it comes out steaming hot and gooey again. If you have a few rolls left, warm them covered loosely in foil at 300°F in the oven for about ten minutes. That usually does the trick to bring back that wonderful, soft texture!
Frequently Asked Questions About Making Cinnamon Rolls
Baking is all about learning, and sometimes that means running into little snags along the way! Don’t you worry if things don’t go exactly as planned the first time. That’s where experience comes in handy, and I’m happy to share some real-world fixes for common issues our readers run into when tackling this yeast roll recipe.
Can I make the dough for this sweet breakfast recipe ahead of time?
Oh yes, that’s one of the best things about making a dough with yeast! If you need an easier morning, you can absolutely prepare the dough completely, let it finish its first rise, gently punch it down, and then stick the whole oiled bowl mixture into the refrigerator overnight. The cold temperature slows the yeast way down. When you pull it out the next morning, let it sit on the counter for about 30 minutes just to take the absolute chill off, then proceed with rolling out the filling. It makes waking up to that amazing aroma so much simpler!
Why did my cinnamon roll filling leak out while baking?
This is usually a super easy fix! If your delicious filling escapes its sugary prison and turns into a giant sheet cake in the pan, it almost always comes down to two things: either you didn’t spread that butter-sugar mixture evenly right to the edges, or you didn’t seal that final seam tightly enough. When you roll the log up, you need to press that final edge firmly against the rest of the dough to lock it in. If the seam splits open during the second rise or baking, the molten filling just flows right out onto the pan floor.
Remember that little border we left clear? That’s essential! It helps the dough adhere to itself rather than sliding everywhere. A tight roll and a secure pinch at the end are your best defenses against filling leakage!
If you ever need to review our privacy standards while you’re in the kitchen, you can check out our Privacy Policy, but now, let’s get back to perfecting those rolls!
Estimated Nutritional Information for This Cinnamon Roll Recipe
I always feel a little hesitant putting numbers here because, honestly, when you’re making homemade pastry this decadent, you’re probably not worried about the macros, right? But for those who track things, I’ve pulled together the estimates based on the recipe above. We owe it to ourselves to know what we’re indulging in!
You can find the ingredient terms and conditions on our Terms of Use page if you need clarification on our testing methods. Just please remember:
These values are based on 12 generous servings and are calculated using standard ingredient databases. Your actual nutrition facts will change depending on the exact brands of butter, sugar, or milk you choose!
- Serving Size: 1 roll
- Calories: 450
- Sugar: 45g
- Sodium: 250mg
- Fat: 25g
- Saturated Fat: 15g
- Unsaturated Fat: 10g
- Trans Fat: 0g
- Carbohydrates: 55g
- Fiber: 2g
- Protein: 6g
- Cholesterol: 75mg
Even with those numbers, when you take that first bite of that warm, gooey roll fresh from the oven, you realize it’s worth every single calorie. It’s just pure, comforting joy baked into a spiral!
PrintSoft and Gooey Homemade Cinnamon Rolls with Cream Cheese Icing

Follow this straightforward recipe to make incredibly soft, fluffy homemade cinnamon rolls swirled with a rich cinnamon-sugar filling and topped with a sweet cream cheese glaze. This recipe yields bakery-quality sweet breakfast pastry.
- Prep Time: 30 min
- Cook Time: 25 min
- Total Time: 2 hr 40 min
- Yield: 12 servings 1x
- Category: Breakfast
- Method: Baking
- Cuisine: American
- Diet: Vegetarian
Ingredients
- 1 cup whole milk, warm (about 110°F)
- 2 1/4 teaspoons active dry yeast
- 1/2 cup granulated sugar, plus 1 teaspoon for yeast
- 1/2 cup unsalted butter, softened
- 2 large eggs, room temperature
- 4 cups all-purpose flour, plus more for dusting
- 1 teaspoon salt
- For the Filling:
- 1/2 cup unsalted butter, softened
- 1 cup packed light brown sugar
- 2 tablespoons ground cinnamon
- For the Icing:
- 8 ounces cream cheese, softened
- 1/2 cup unsalted butter, softened
- 3 cups powdered sugar
- 1 teaspoon vanilla extract
- 1–2 tablespoons milk
Instructions
- Activate the yeast: In a large bowl, combine the warm milk, 1 teaspoon of sugar, and the yeast. Let stand for 5 to 10 minutes until foamy.
- Make the dough: Add the remaining 1/2 cup sugar, softened butter, eggs, flour, and salt to the yeast mixture. Mix with a stand mixer on low speed until combined, then increase speed to medium and knead for 6 to 8 minutes until the dough is smooth and elastic.
- First rise: Place the dough in a lightly oiled bowl, turning once to coat. Cover the bowl with plastic wrap and let it rise in a warm place for 1 to 1.5 hours, or until doubled in size.
- Prepare the filling: While the dough rises, mix the softened butter, brown sugar, and ground cinnamon together in a small bowl until well combined. Set aside.
- Shape the rolls: Gently punch down the risen dough. Turn it out onto a lightly floured surface. Roll the dough into a large rectangle, approximately 12 by 18 inches.
- Spread the filling: Spread the cinnamon-sugar butter mixture evenly over the entire surface of the dough, leaving a small border on one long edge.
- Roll and cut: Starting from the long edge opposite the border, tightly roll the dough into a log. Pinch the seam closed. Cut the log into 12 equal rolls.
- Second rise: Arrange the rolls in a greased 9×13 inch baking pan. Cover loosely and let them rise again in a warm place for 30 to 45 minutes, or until puffy.
- Bake: Preheat your oven to 375°F (190°C). Bake for 20 to 25 minutes, or until golden brown.
- Make the icing: While the rolls cool slightly, beat the softened cream cheese and butter until smooth. Gradually beat in the powdered sugar and vanilla extract. Add milk one tablespoon at a time until you reach a smooth, spreadable consistency.
- Ice and serve: Spread the cream cheese icing generously over the warm rolls. Serve immediately for the best texture.
Notes
- For extra soft rolls, cover the pan with foil for the first 15 minutes of baking, then remove the foil to allow the tops to brown.
- If you want a richer dough, substitute whole milk for the liquid in the dough.
- You can make the dough ahead of time and let it rise slowly in the refrigerator overnight for easier morning preparation.
Nutrition
- Serving Size: 1 roll
- Calories: 450
- Sugar: 45
- Sodium: 250
- Fat: 25
- Saturated Fat: 15
- Unsaturated Fat: 10
- Trans Fat: 0
- Carbohydrates: 55
- Fiber: 2
- Protein: 6
- Cholesterol: 75