

The holiday season is wonderful, but goodness, does it get busy! Between parties, gifts, and juggling the oven for big dinners, sometimes you just need a dessert that brings maximum cheer with minimum fuss. That’s exactly why I love these incredibly easy, no-bake grinch oreo balls. They capture all the fun spirit of the season, look adorable on any platter, and they don’t require turning on the stove! Here at Misty Plate, we believe holiday magic should feel joyful, not stressful, and these chocolatey bites fit that philosophy perfectly.
- Why These Grinch Oreo Balls Are Your New Favorite Holiday Recipe
- Gathering Ingredients for Perfect Christmas Oreo Truffles
- Step-by-Step Guide to Making **Grinch Oreo Balls**
- Tips for Perfect **Grinch Oreo Balls** Every Time
- Storage and Making Ahead: Make Ahead Christmas Desserts
- Serving Suggestions for Your Festive Bites
- Frequently Asked Questions About **Grinch Oreo Balls**
- Nutritional Estimate for **Christmas Cookie Balls**
- Share Your Festive Creations
Why These Grinch Oreo Balls Are Your New Favorite Holiday Recipe
I promise you, once you make these, they move straight to the top of your annual holiday rotation. They are the perfect solution for when you need a show-stopping dessert without adding more chaos to your already packed schedule. They check every box for what a good holiday treat should be!
- They are fantastic for large crowds because they are completely adorable and perfectly portioned—true Bite Sized Christmas Sweets.
- They taste exactly like your favorite chocolate truffle but take way less effort than traditional cookies.
- They are undoubtedly some of the best Easy Holiday Desserts you can whip up in an afternoon.
Zero Oven Time: The Ultimate No Bake Oreo Balls
This is my favorite part when I’m already busy preparing a huge meal! Because these are No Bake Oreo Balls, you save precious oven space for that ham or roast. You mix, chill, and dip; that’s it! Clean up is virtually nonexistent, honest.
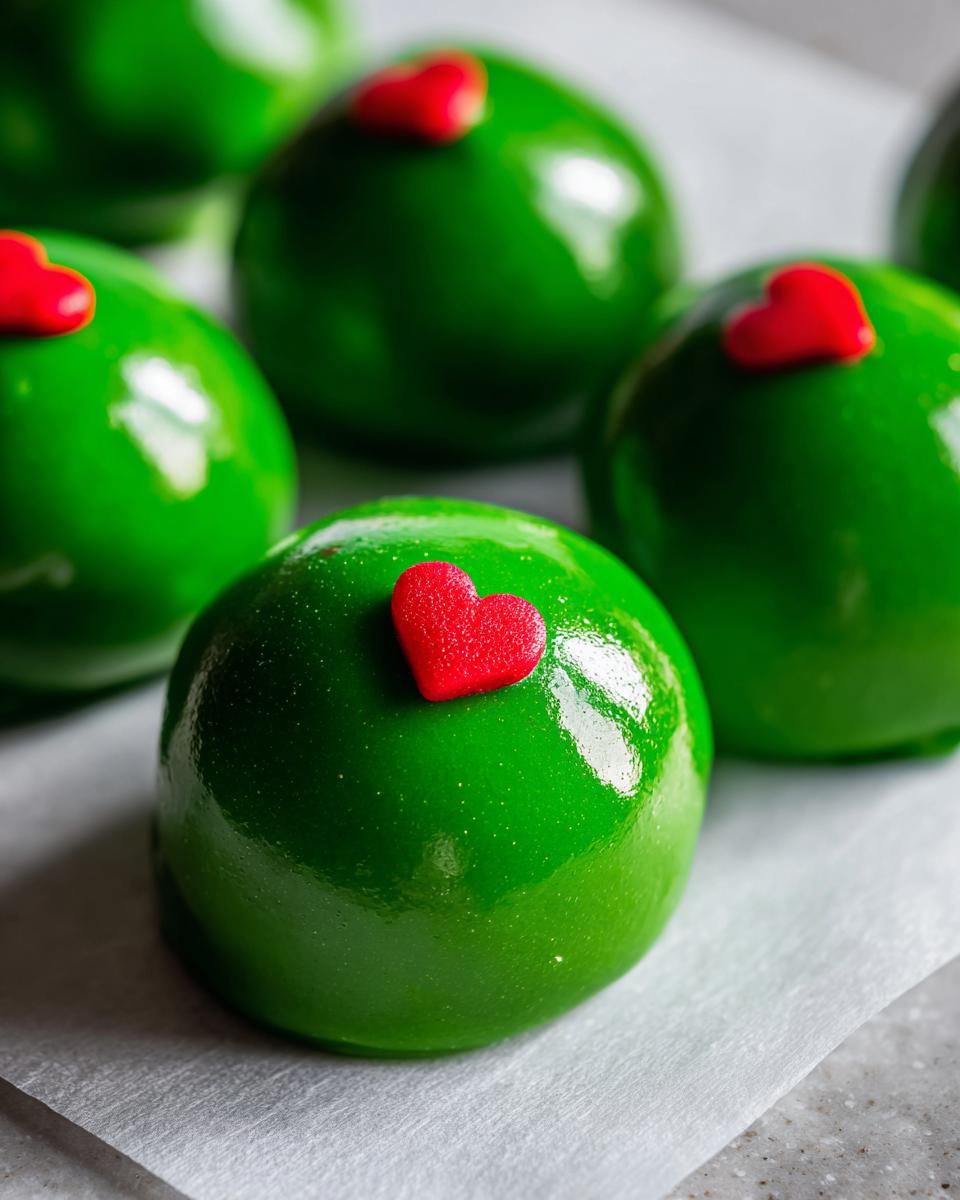
Visual Appeal: Perfect Grinch Themed Treats
Seriously, the little green color pops against all the red and white on your dessert table. They look way more complicated than they are! That one tiny red heart sprinkle we add at the end is just the perfect, playful detail that screams Christmas cheer.

Gathering Ingredients for Perfect Christmas Oreo Truffles
One thing I always aim for here at Misty Plate is making sure you don’t have to hunt down specialty store items just to make a dessert. That’s the beauty of these Christmas Oreo Truffles! You probably have the basic chocolate cookies on hand already. Everything else—the cream cheese, the candy melts—is super easy to grab during your regular grocery run. It’s all about keeping things simple and accessible, just like I learned back home. Before you dive in, take a look at what you’ll need for about two dozen of these adorable treats!
If you want to know more about my philosophy on keeping kitchens simple and joyful, you can always peek at my About Page!
Clarifying Ingredient Measurements for Your Grinch Oreo Balls
Don’t skim this part! The texture depends on getting the ratios right. You need a full package of Oreos—yes, the whole thing, crème filling and all! For the truffle base, make sure your cream cheese is actually softened; cold cream cheese just won’t mix right. And when you grab those green candy melts, make sure they’re the dipping kind, not just chips. As a little secret for a richer flavor, try swapping regular Oreos for the Red Velvet ones if you’re feeling festive—it gives the center a subtle red hue!
- 1 package (14.3 oz) Oreo cookies (or Red Velvet Oreos!)
- 8 oz cream cheese, softened
- 12 oz green candy melts
- 1 teaspoon coconut oil (optional, but trust me, it helps the melt flow!)
- Small red heart sprinkles (for the Grinch’s heart)
Step-by-Step Guide to Making **Grinch Oreo Balls**
Okay, deep breath! This is the fun part where simple ingredients turn into something truly festive. Even if the thought of dipping things in chocolate makes you nervous, trust me, these are totally manageable. We’re going to just follow the process laid out here, and you’ll have dozens of perfect little Grinch treats ready for your party table.
Preparing the Oreo Base for Your **Oreo Truffle Recipe**
First things first, we need smooth crumbs. You can absolutely use your food processor—that’s the fastest way to turn those cookies into fine dust. Just pulse them until they look like sand. But don’t stress if you don’t have one! I’ve done this the old-fashioned way dozens of times: shove those Oreos into a sturdy Ziploc bag, seal it up tight (leave a little air out first!), and just have at them with a rolling pin. Get them as fine as you can.
Now, pour those lovely crumbs into a bowl and add your softened cream cheese. This is important—if that cream cheese is cold, it won’t blend right, and you’ll end up with lumps. Use your hands for this part; spatulas just can’t cut it! Mix it, squish it, knead it until it’s totally uniform. It should look like dark, smooth cookie dough. If you forgot to soften the cream cheese, just microwave the block for about 10 seconds, but be careful not to melt it!
Chilling and Shaping the **Bite Sized Christmas Sweets**
Once everything is squished together, it’s time to roll! You want these to be small, uniform little guys, about one inch across, like a good marble. This usually gets me about 28 of these **Bite Sized Christmas Sweets**. Lay them out on a baking sheet lined with parchment paper.
Now, here’s a step you absolutely cannot skip if you want things to go smoothly later: Chill them! Pop that whole tray into the refrigerator for at least 30 minutes. Why? If they are soft when you try to dip them into the warm candy coating, they just turn into mushy green blobs. Chilling them solidifies that cream cheese center so they hold their shape perfectly while we dip.
Mastering the Green Coating for Your **Green Candy Melt Desserts**
While those balls are firming up, melt your green candy melts. Follow the package directions, but please, *please* stir them every 30 seconds in the microwave. Candy melts can go from perfect to scorched in two seconds flat! If your coating looks a little thick—which happens, especially if your kitchen is warm—stir in that optional teaspoon of coconut oil. It thins it out just enough so it flows beautifully over the dough.

Take the chilled balls out of the fridge. Grab a dipping fork or dipping tool—a standard dining fork works fine too. Just stick the fork into the ball, lower it all the way into the green coating, and gently lift it out. Tip the fork slightly and tap the handle right against the side of the bowl. Make sure that excess coating drips off before you place it back onto the parchment paper. That tapping step is the secret to avoiding those ugly chocolate feet at the bottom!
The Finishing Touch: Creating the Grinch Heart on Your **Grinch Themed Treats**
This is where the magic happens and they instantly become a recognized **Grinch Themed Treat**! Right after you set the wet, green truffle back down on the parchment paper, take one of those tiny red heart sprinkles and gently press it right on top, center mass. It needs to go on immediately while the candy melt is still liquid, or it just won’t stick.
You can let these set up on the counter if your house isn’t too warm, but if you’re eager, pop the whole sheet back into the fridge for about 10 minutes until the chocolate is totally firm. Then, they are ready to go!
Tips for Perfect **Grinch Oreo Balls** Every Time
Even with the easiest recipes, sometimes things go a little sideways, right? That’s totally normal, and it’s why I always want to give you a little cheat sheet for troubleshooting. We want these to be perfect, cheerful additions to your Simple Christmas Party Food layout, not last-minute stress triggers! Don’t worry if your initial batch isn’t magazine-perfect; we can fix almost anything.
Troubleshooting Common Issues with **No Bake Holiday Candy**
If your base mixture—the Oreo and cream cheese part—is too soft when you try to roll it, it usually means the cream cheese was a little too warm, or maybe you didn’t chill it long enough. If that happens, just pop the dough back in the fridge for another 15 minutes. If it’s stubbornly wet, grab a few extra crushed Oreos and work them in by hand until it feels firm enough to roll.
On the flip side, if you accidentally crush your Oreos *too* fine or use too much cream cheese, the mixture can get dry and crumbly when you try to roll it. Don’t panic! Just mix in a teaspoon of milk or even a tiny bit of melted butter until it holds together when squeezed. For the green coating, if it starts getting stiff while you’re working, microwave it for just 10-15 seconds and stir until it’s liquid again. For a super smooth dip, check out these great tips on candy melts over at Skilled Cooks!
If the coating cracks once it sets, it almost always means the truffle center was too cold, or you dipped it too fast. Make sure those centers are firm but not rock-hard frozen straight from the deep freeze!
Storage and Making Ahead: Make Ahead Christmas Desserts
The best part about these **Grinch Oreo Balls**? They are incredible **Make Ahead Christmas Desserts**! This is huge when the holidays roll around and you are trying to manage baking timelines. You can totally make these a few days ahead of time and actually relax a bit on Christmas Eve.
Once they are totally set and the green coating is firm, just pop them into an airtight container. I usually layer them gently with sheets of parchment paper in between so they don’t stick together when they sit. They stay perfectly wonderful in the refrigerator for up to two weeks. Yes, two weeks!
If you need to go even further ahead, they freeze like a dream too. Place them on a cookie sheet, flash freeze them until solid, then transfer them to a freezer bag. They are good in the freezer for about two months. Just let them thaw in the fridge for a few hours before serving them up. Easy peasy!
Serving Suggestions for Your Festive Bites
Now that you have these adorable little **Festive Bites** ready, presentation is key! Forget just piling them on a plate—let’s make them shine for your holiday party. These truffle size sweets look absolutely magical stacked up on a tiered serving stand. I love placing them right next to a big mug of hot chocolate because the kids go wild.

For something a little extra special, set them on top of mini cupcake liners inside your serving dish; it keeps the drips contained and adds a pop of color. They pair so well with anything that has a strong vanilla or mint flavor, making them a perfect addition to any festive spread!
Frequently Asked Questions About **Grinch Oreo Balls**
I always get a few questions when folks try these for the first time, especially around the coating part! Since these are meant to be straightforward—fitting right in with my goal of making Easy Holiday Desserts that don’t cause headaches—I wanted to make sure you feel confident tackling these.
Can I use different types of cookies instead of Oreos in this **Oreo Truffle Recipe**?
That’s a good question! Technically, yes, you can substitute. However, the classic Oreo Truffle Recipe relies on the crisp wafer combined with that specific cream filling to create the perfect dense binder when mixed with cream cheese. If you use something like vanilla wafers or graham crackers, the texture will be much drier and might crumble apart easily. Stick to the original Oreos—or try those Red Velvet ones I mentioned earlier—for the best result!
How far in advance can I make these **Easy Holiday Desserts**?
I love that these are freezer-friendly! You can definitely prepare these **Easy Holiday Desserts** well ahead of time. Once the green coating is completely set, store them in an airtight container in the refrigerator for up to two weeks. If you need more time than that, just pop them into a freezer bag. They will last beautifully for about two months in the deep freeze and thaw out perfectly after chilling in the fridge for a few hours.
What is the best way to get the green color for the **Grinch Themed Treats**?
For the most vibrant, true Grinch green, I highly recommend using good quality green candy melts. They are already colored, so you don’t have to mess with mixing gel coloring into melted white chocolate, which can sometimes cause the chocolate to seize up and become gloppy! If you *must* use white chocolate, use oil-based candy coloring, not regular food coloring, or you’ll run into trouble with a non-smooth coating for your **Grinch Themed Treats**.
If you have any more questions about substitutions or technique, feel free to check out my Privacy Policy for contact info!
Nutritional Estimate for **Christmas Cookie Balls**
I always get asked about the numbers, even though honestly, when I’m enjoying these festive treats, I’m not really counting! But for those keeping track, here is a general estimate for one of these delightful **Christmas Cookie Balls**. Remember, since these are homemade and the exact size of your balls and the brand of Oreos you use can differ slightly, these figures are just a good starting point. Don’t sweat the small stuff—these are meant to be enjoyed!
Here is the approximate breakdown per ball (based on a 28-serving yield):
- Calories: 150
- Total Fat: 9g
- Carbohydrates: 16g (with about 15g being sugar)
- Protein: 1g
It’s important to know that this is an estimate, as the specific brand of cookie and candy coating will certainly adjust those numbers!
Share Your Festive Creations
I truly hope these easy **grinch oreo balls** bring a smile to your face this holiday season! When you try this recipe, please come back and leave a rating right here on the site. It helps me know what you love! I’d also love to see your little green creations! Tag me on social media when you share them. Hearing from you guys is honestly the best part of running Misty Plate, so don’t be a stranger!
If you have questions or want to share feedback, you can always hop over to my Contact Page.
PrintEasy No-Bake Grinch Oreo Balls

Make these adorable, bite-sized Grinch Oreo Balls for a festive, no-bake holiday treat. They use simple ingredients and are perfect for Christmas parties or cookie exchanges.
- Prep Time: 25 min
- Cook Time: 5 min
- Total Time: 60 min
- Yield: 28 servings 1x
- Category: Dessert
- Method: No-Bake
- Cuisine: American
- Diet: Vegetarian
Ingredients
- 1 package (14.3 oz) Oreo cookies
- 8 oz cream cheese, softened
- 12 oz green candy melts
- 1 teaspoon coconut oil (optional, for thinning)
- Small red heart sprinkles (for the Grinch’s heart)
Instructions
- Place the Oreo cookies in a food processor and process until fine crumbs form. If you do not have a food processor, place them in a zip-top bag and crush them with a rolling pin.
- Transfer the cookie crumbs to a medium bowl. Add the softened cream cheese. Mix with a spatula or clean hands until the mixture is completely combined and uniform.
- Roll the mixture into small balls, about 1 inch in diameter. You should get approximately 24 to 30 balls. Place the balls on a baking sheet lined with parchment paper.
- Chill the Oreo balls in the refrigerator for at least 30 minutes. This step helps them firm up before dipping.
- Melt the green candy melts in a microwave-safe bowl according to package directions, stirring every 30 seconds. Stir in the coconut oil if you want a smoother consistency for dipping.
- Working with one ball at a time, use a fork or dipping tool to fully coat the chilled Oreo ball in the melted green candy. Tap the fork gently against the side of the bowl to remove excess coating.
- Place the coated ball back onto the parchment-lined baking sheet. Immediately press one small red heart sprinkle onto the top center of each ball to resemble the Grinch’s heart.
- Allow the candy coating to set completely at room temperature, or place the tray in the refrigerator for about 10 minutes to speed up the process.
- Serve these festive bites or store them in an airtight container in the refrigerator.
Notes
- For a different flavor, substitute regular Oreos with Red Velvet Oreos for a subtle red tint in the center.
- If the candy coating thickens while you work, microwave it in 15-second intervals until smooth again.
- These **No Bake Oreo Balls** keep well in the refrigerator for up to two weeks, making them excellent **Make Ahead Christmas Desserts**.
Nutrition
- Serving Size: 1 ball
- Calories: 150
- Sugar: 15
- Sodium: 85
- Fat: 9
- Saturated Fat: 5
- Unsaturated Fat: 4
- Trans Fat: 0
- Carbohydrates: 16
- Fiber: 0
- Protein: 1
- Cholesterol: 10