
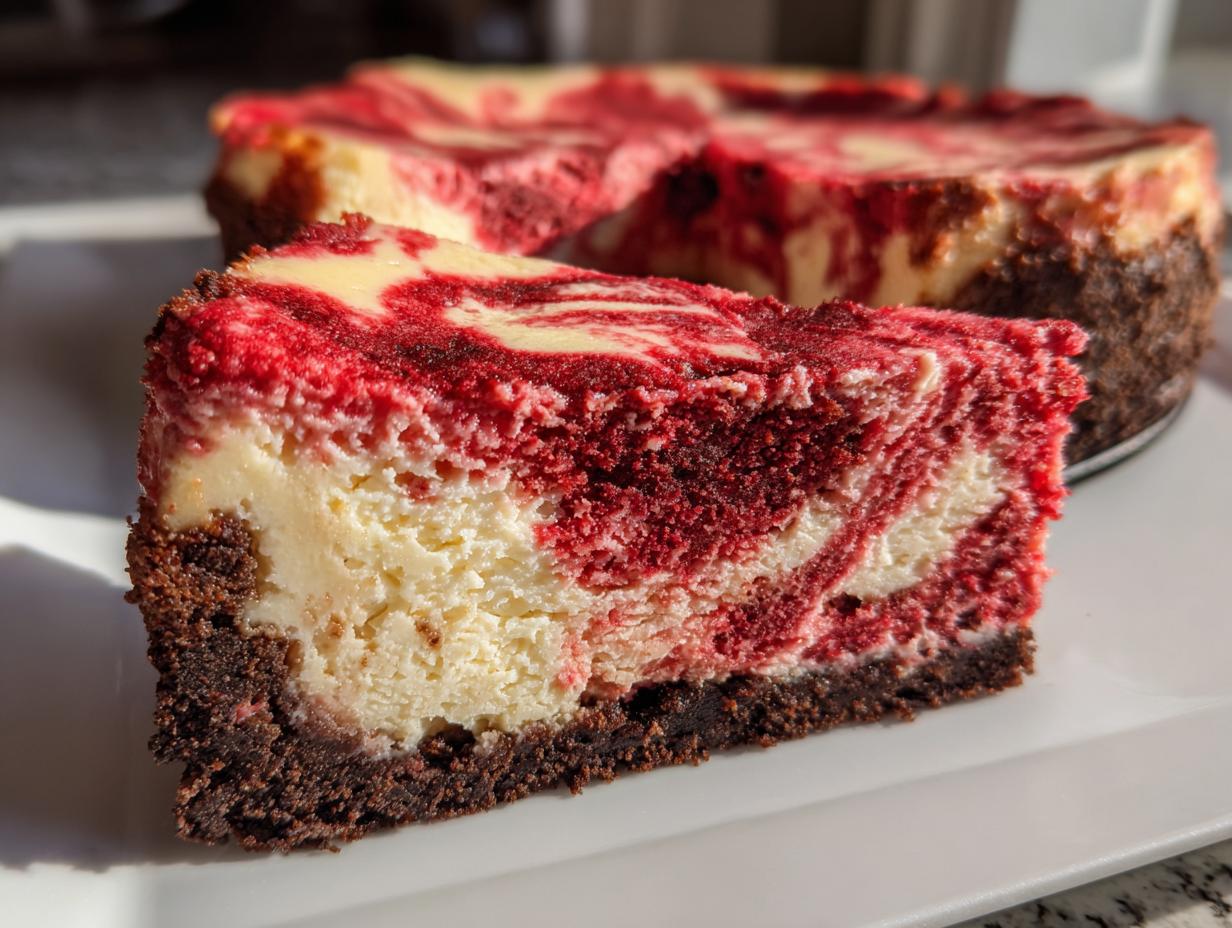
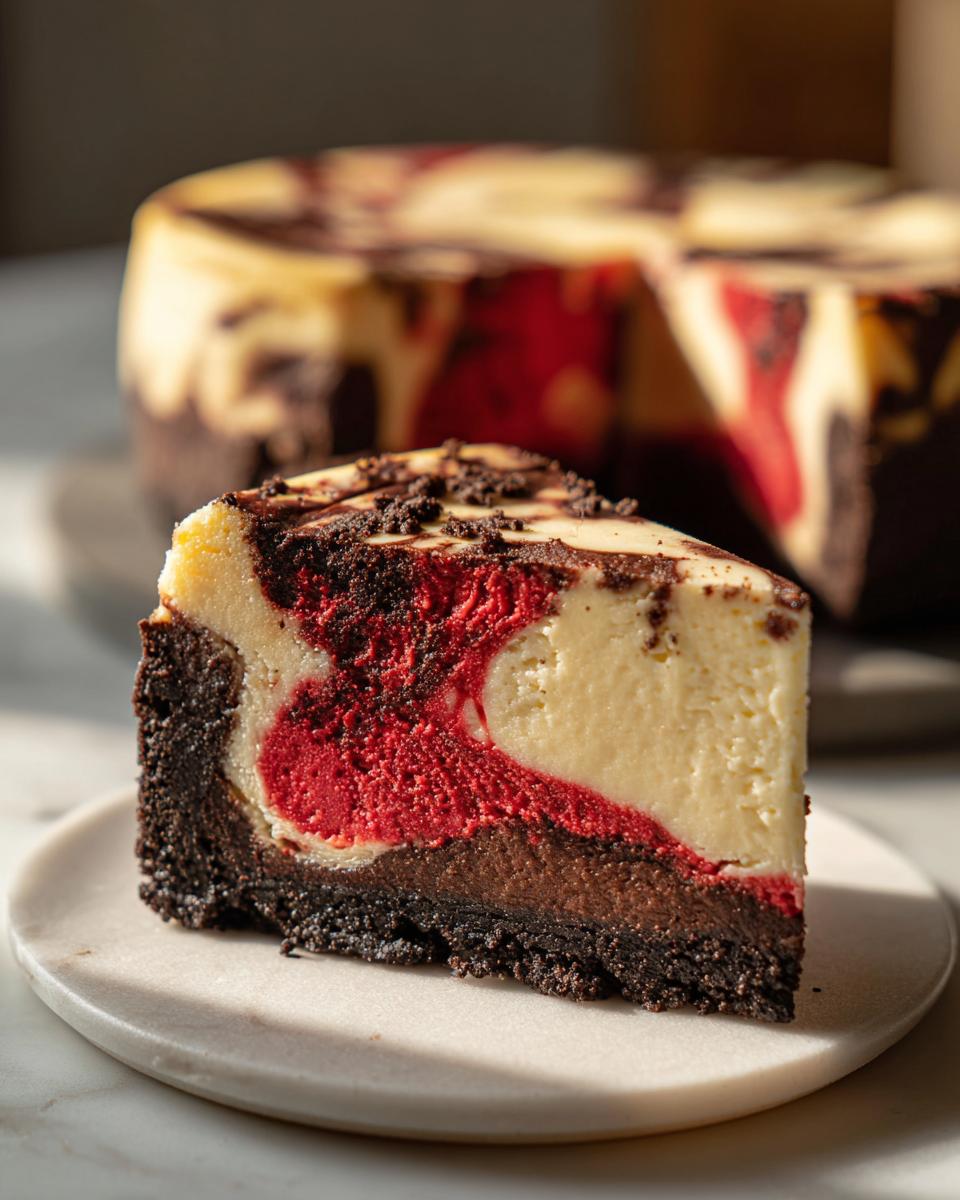
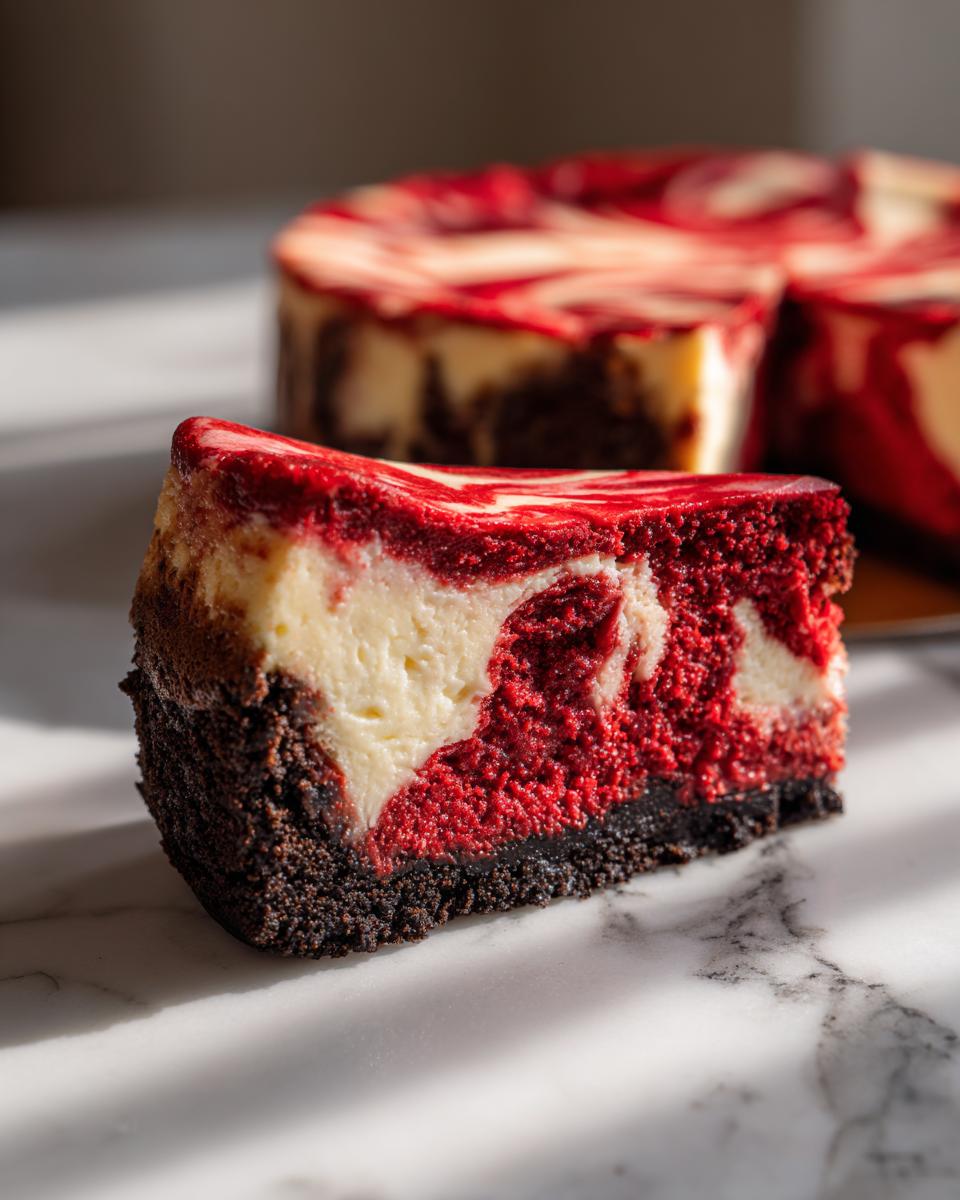
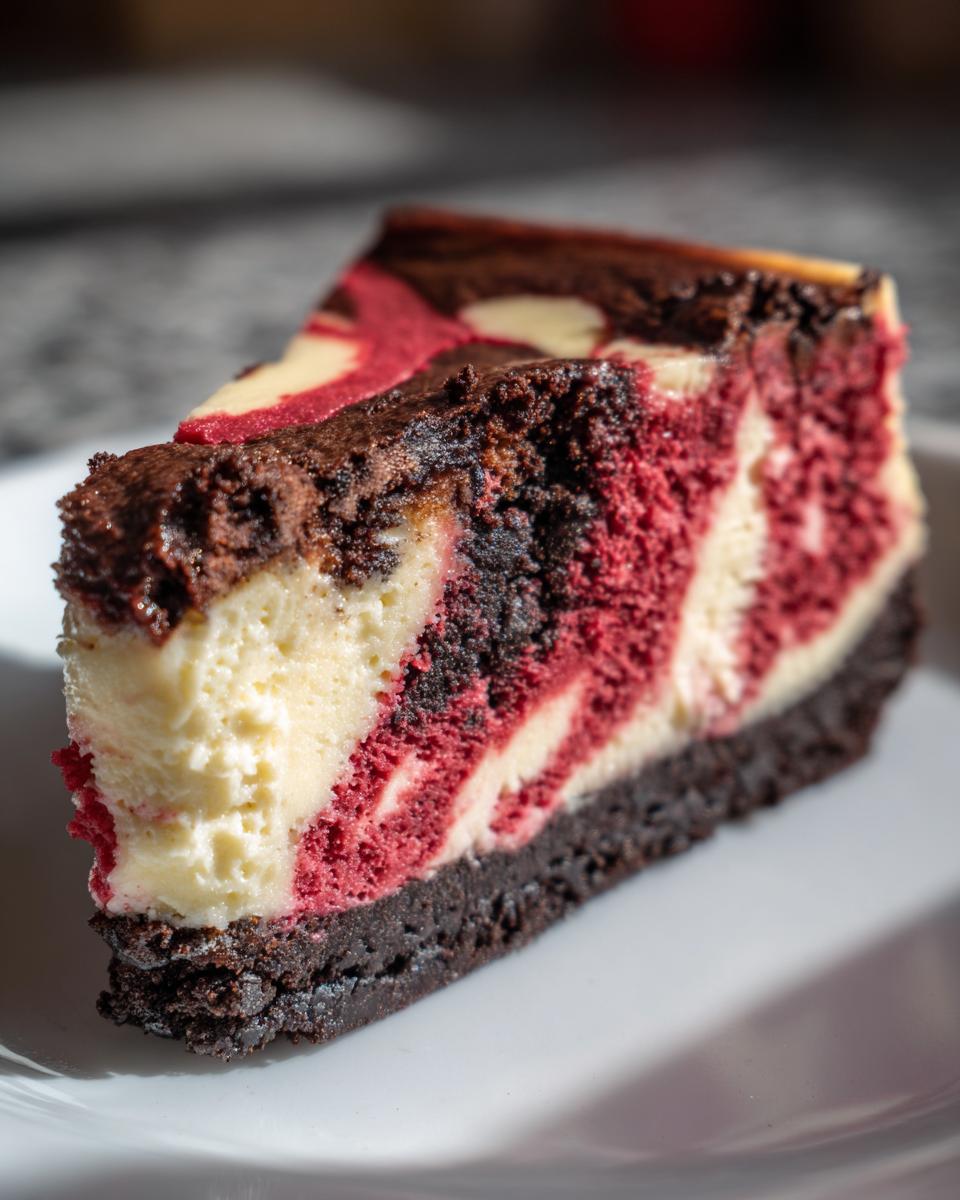
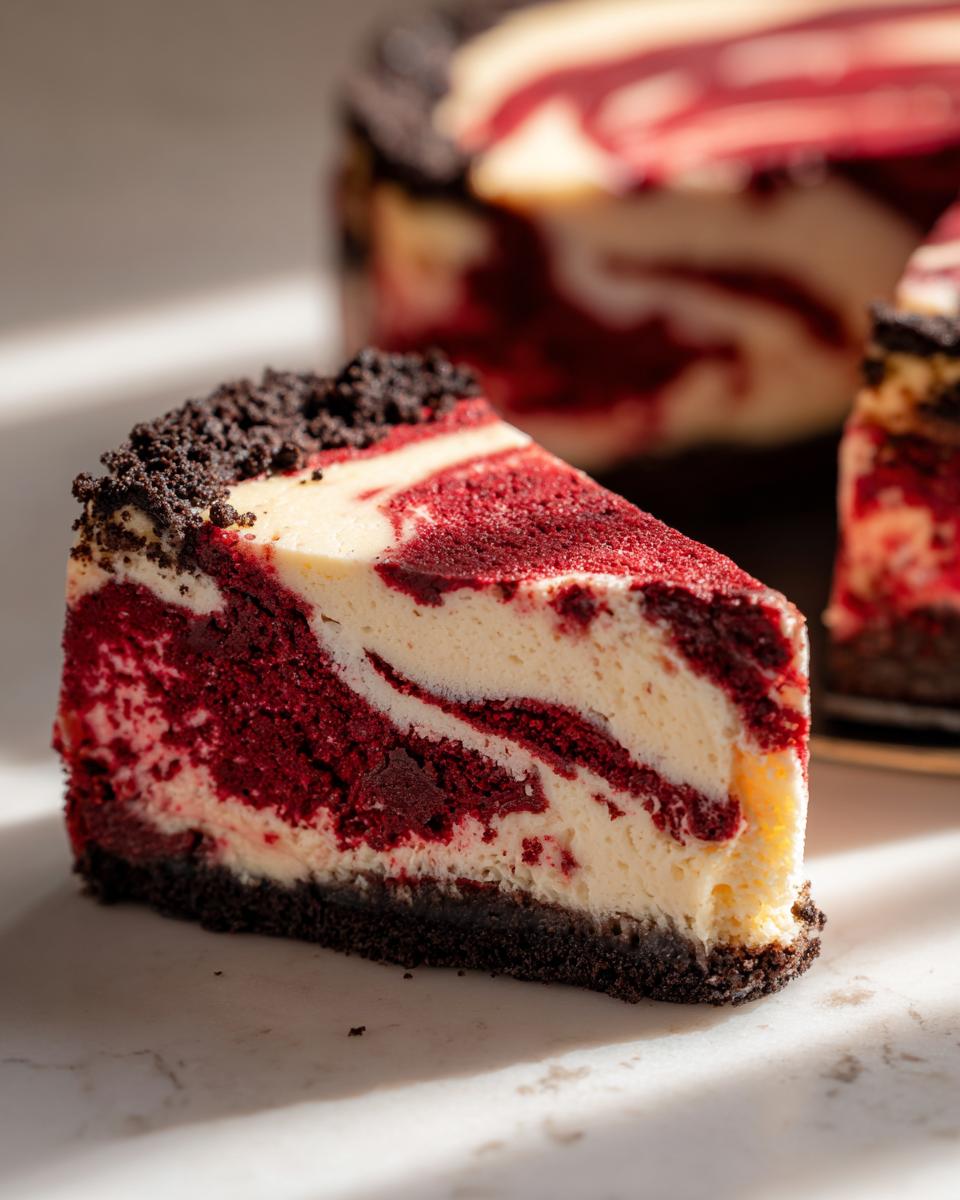
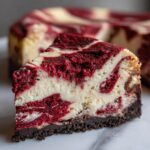
I’m going to be honest: there are desserts that taste good, and then there are desserts that stop conversation the second they hit the table. This Showstopper Creamy Red Velvet Cheesecake with Oreo Crust falls firmly into that second category. When you see that rich, deep red color contrasting against the dark, crunchy crust and the bright white swirls, you’ll understand why this became my go-to for family celebrations. It’s utterly decadent, but making it feels surprisingly grounding. For me, baking this spectacular red velvet cheesecake brings me right back to that feeling of creating something beautiful just because the people I love deserve it. Trust me, you’re going to feel like a baking hero when you serve this.
- Why This Is the Best Red Velvet Cheesecake Recipe You Will Make
- Gathering Ingredients for Your Red Velvet Cheesecake
- Step-by-Step Guide to Making a Showstopper Red Velvet Cheesecake
- Tips for the Ultimate Red Velvet Dessert Success
- Variations: Red Velvet Oreo Cheesecake Options
- Serving Suggestions for Your Christmas Dessert Centerpiece
- Storage and Reheating Instructions for Red Velvet Cheesecake
- Troubleshooting Common Red Velvet Cheesecake Issues
- Estimated Nutrition for This Decadent Red Velvet Bakes
- Share Your Showstopper Baking Showstopper Desserts Experience
Why This Is the Best Red Velvet Cheesecake Recipe You Will Make
I completely stand by calling this the Best Red Velvet Cheesecake Recipe. It hits all the right notes—it’s rich, it’s beautiful, and honestly, it’s easier than you might think to keep it perfect.
Here’s what sets this particular bake apart:
- The contrast between the crunchy Oreo crust and that smooth, velvety center is just divine.
- It’s a true showstopper—that marbled red and white look grabs everyone’s attention immediately.
Achieving Ultra Creamy Cheesecake Desserts
The secret to truly creamy cheesecake desserts lives in two places: making sure your cream cheese is soft like butter, and never skipping the water bath. The gentle, steamy environment protects the filling from the harsh direct heat, which is what keeps it silky and stops it from getting grainy or cracking on top.
The Showstopper Holiday Cheesecakes Presentation
If you need a dessert that screams, “I made an effort!” for Christmas or your next big party, this is it. The dark Oreo crust grounds the dramatic color of the red velvet, making the swirl look intentionally artistic. It turns your table into something truly special; it’s one of those showstopper holiday cheesecakes that people take pictures of before they dig in.
Gathering Ingredients for Your Red Velvet Cheesecake
Okay, putting together these ingredients is what makes this a truly decadent red velvet bake. You’re combining a few simple parts to get that stunning final effect. Remember, quality counts here, especially with the main dairy elements!
For the Rich Oreo Crust
- 1 1/2 cups crushed Oreo cookies
- 1/4 cup granulated sugar
- 6 tablespoons unsalted butter, melted
For the Creamy Cheesecake Filling
- 3 (8 ounce) packages cream cheese, softened
- 1 1/2 cups granulated sugar
- 1 teaspoon vanilla extract
- 1/4 cup all-purpose flour
- 1/4 cup sour cream
- 2 large eggs
- 1 teaspoon white vinegar
My biggest piece of advice for this part: your cream cheese absolutely has to be fully softened—I mean squishy soft—otherwise, you’ll end up with lumps, and we want this filling smooth as velvet!
For the Red Velvet Swirl Component
- 2 tablespoons unsweetened cocoa powder
- 2 tablespoons red food coloring
- 1/4 cup buttermilk
- 1 teaspoon baking soda
For the Cream Cheese Frosting Topping
You’ll need Cream Cheese Frosting ingredients (for topping). I usually just whip up my favorite batch while the cheesecake chills, or you can simply use a ready-made container if you’re pressed for time!
Step-by-Step Guide to Making a Showstopper Red Velvet Cheesecake
Alright, let’s get baking! This guide is going to make preparing this incredible red velvet cheesecake feel like a breeze. We’re going to take this step by step so you get that showstopper look without any last-minute panic. It really is an easy homemade cheesecake guide if you follow these crucial timing cues!
Preparing the Crust and Initial Bake
First thing: get your oven warmed up to 350°F (175°C). While it heats, wrap that 9-inch springform pan completely in heavy-duty foil—this is vital because that foil is what keeps the water out for our bath later! Mix those crushed Oreos, sugar, and melted butter until it looks like wet sand, press it down firmly, and pop it in for a short 10-minute bake. Then, turn the oven way down to 325°F (160°C) for the main event.
Mixing the Creamy Cheesecake Filling
Now for the good stuff. Beat your softened cream cheese with the main portion of sugar until it’s beautiful and streak-free. Then, whisk in the flour, followed by your sour cream. Once that’s combined, add the eggs and vinegar very slowly, mixing only on low speed. Please, whatever you do, don’t overmix once those eggs are in! We want air, yes, but too much makes it grainy.
Creating the Red Velvet Component and Swirling
In a separate bowl, whisk together the cocoa, red coloring, buttermilk, and baking soda until it’s smooth and vividly red. Now, pour about half of your plain batter right over that cooled Oreo crust. Gently dollop spoonfuls of the red velvet mixture over that plain layer. Top it all off with the rest of the plain batter. Take a knife or a skewer and gently drag it through the layers just a couple of times to get those beautiful, distinct ribbons—don’t stir it into mud!
Baking and Cooling the Red Velvet Cheesecake
This is where patience pays off for that creamy cheesecake filling. Place your foil-wrapped pan into a larger roasting pan and carefully pour hot water into the larger pan until it reaches halfway up the cheesecake pan’s side. Bake this setup for 60 to 75 minutes until the edges look set but the center still wobbles just a tiny bit. The absolute most important tip? Turn the oven OFF, crack the door open, and let it chill in there for a whole hour. This slow cooling process is the ultimate anti-cracking strategy!
Tips for the Ultimate Red Velvet Dessert Success
When you’re aiming for those truly rich velvety desserts, the small details make the entire difference between good and magnificent. We talked about the water bath, but there are a couple of other little secrets I follow every time to guarantee a perfect texture in this red velvet cheesecake.
Ingredient Temperature and Mixing Technique
I can’t stress this enough: room temperature is your best friend. If that cream cheese and sour cream are cold, your batter will be lumpy, period. You need everything soft so it emulsifies beautifully. Also, when you’re mixing the cream cheese batter, try to resist scraping down the sides of the bowl every thirty seconds. Every time you scrape, you knock the air out that we worked so hard to incorporate with the sugar!
Water Bath Mastery for Layered Cheesecake Recipes
When you’re getting ready for the water bath, don’t just use one sheet of foil—that always fails! Take two big sheets, lay them crisscrossed, and wrap them vertically around the outside of your springform pan. This double barrier is essential for keeping the water out while your layered cheesecake recipes bakes gently. Seepage is the enemy of creamy perfection!
Variations: Red Velvet Oreo Cheesecake Options
We already nailed that amazing Red Velvet Oreo Cheesecake with the crust, but sometimes I want to change things up a little! Not everyone wants the full baked experience, and that’s okay. If you’re looking for a quicker fix but still want that rich flavor, you could easily adapt the filling into something like my favorite no bake red velvet cheesecake alternative, just skip the baking steps entirely and let it firm up in the fridge!
Topping Ideas for Festive Cheesecake Ideas
The cream cheese frosting is classic, but for extra flair, especially when creating festive cheesecake ideas, try these toppings. A delicate showering of finely chopped white chocolate shavings looks so elegant draped over the top. Or, if you want a bit of tartness to cut through the richness, pile on fresh raspberries or strawberries. A quick drizzle of dark chocolate ganache is always a win, too!
Serving Suggestions for Your Christmas Dessert Centerpiece
When this stunning red velvet cheesecake comes out of the fridge, it’s already the star of the show! Because it’s so rich, you don’t need much to go with it. Think of it as the magnificent Christmas dessert centerpiece that stands proudly on its own.
For drinks, I love pairing it with something tart or bubbly to cut through the creamy sweetness. My favorite is keeping the theme festive with a spiced drink, perhaps a tart apple cider mule. A small side of tart raspberries or even a thin shard of dark chocolate is just enough garnish to make this already beautiful dessert look absolutely unbeatable.
Storage and Reheating Instructions for Red Velvet Cheesecake
This creamy masterpiece needs time to set, so patience is key after you finish baking. You absolutely must cover this red velvet cheesecake tightly with plastic wrap—make sure the wrap isn’t touching the frosting if you’ve already topped it! It needs that long chill time in the fridge, at least six hours, but honestly, overnight is always better for the ultimate texture.
Leftovers keep really well in the refrigerator for about four days. Don’t even think about trying to reheat cheesecake; it’s truly best served cold right from the fridge! Just let a slice sit out for about 15 minutes to take the hard chill off before slicing into that gorgeous second piece.
Troubleshooting Common Red Velvet Cheesecake Issues
Even with the most careful instructions, sometimes baking throws us a curveball, right? Don’t panic if your gorgeous creation doesn’t look exactly like the picture on the first try. Troubleshooting is just part of learning the rhythm of a new, intricate dessert like this one. We fix texture issues, not failures!
If you see any of these common bumps, here’s what usually happened:
- Why did my cheesecake crack on top? Nine times out of ten, this is due to temperature shock. It baked too fast, or it cooled too quickly once it was out of the oven. Remember my big tip: let it cool *slowly* inside the turned-off oven for an hour before letting it chill on the counter. That slow transition prevents the filling from shrinking too fast.
- My filling looks grainy, not smooth. This is almost always an ingredient temperature issue. If the cream cheese wasn’t completely, totally soft—like room temperature putty—it won’t blend properly. Cold cream cheese clumps up, and no amount of mixing will fix those little lumps once they’re baked in.
- The middle sank a ton! If the center sinks more than just a little bit (a little wiggle is good!), it probably means it wasn’t quite done baking. Even if the edges look sturdy, if the center is too wet, it collapses when it cools. Next time, give it 5 to 10 extra minutes in the water bath.
I promise, once you master the slow cooling technique, you’ll be making creamy cheesecake desserts like a pro. Keep practicing; baking is all about flow!
Estimated Nutrition for This Decadent Red Velvet Bakes
You know I always want you to enjoy every bite of this decadent red velvet bakes without guilt, but since this is a serious showstopper, we should probably look at the numbers! Here is the estimated breakdown for one slice of this amazing red velvet cheesecake.
- Serving Size: 1 slice
- Calories: 450
- Sugar: 35g
- Fat: 30g
Please remember, these are just close estimates based on standard measurements. Once you add extra toppings or use a different crust, those numbers shift around a bit! Enjoy this treat because you absolutely deserve something this spectacular.
Share Your Showstopper Baking Showstopper Desserts Experience
Now that you’ve gone through all the steps and created your very own, truly stunning red velvet cheesecake, I’m just dying to hear about it! Making a dessert this impressive—one of those big baking showstopper desserts—is such a rewarding feeling, and I want to celebrate with you.
Please, please, please leave a comment below and tell me how it turned out. Did the swirl look perfect? Did your family freak out when you brought it to the table? I love seeing what you all create in your own kitchens!
If you captured a photo of your masterpiece, feel free to tag me on social media, too. Seeing your enthusiasm and your beautiful bakes is honestly the whole reason I share these family favorites. Happy baking, friends!
PrintShowstopper Creamy Red Velvet Cheesecake with Oreo Crust
This recipe guides you through making an ultra creamy red velvet cheesecake resting on a rich Oreo crust. It is a decadent dessert perfect for holidays or special gatherings.
- Prep Time: 30 min
- Cook Time: 75 min
- Total Time: 120 min
- Yield: 12 servings 1x
- Category: Dessert
- Method: Baking
- Cuisine: American
- Diet: Vegetarian
Ingredients
- 1 1/2 cups crushed Oreo cookies
- 1/4 cup granulated sugar
- 6 tablespoons unsalted butter, melted
- 3 (8 ounce) packages cream cheese, softened
- 1 1/2 cups granulated sugar
- 1 teaspoon vanilla extract
- 1/4 cup all-purpose flour
- 1/4 cup sour cream
- 2 large eggs
- 1 teaspoon white vinegar
- 2 tablespoons unsweetened cocoa powder
- 2 tablespoons red food coloring
- 1/4 cup buttermilk
- 1 teaspoon baking soda
- Cream Cheese Frosting ingredients (for topping)
Instructions
- Preheat your oven to 350°F (175°C). Wrap the outside of a 9-inch springform pan tightly with heavy-duty aluminum foil.
- Prepare the crust: Mix the crushed Oreos, 1/4 cup sugar, and melted butter. Press the mixture firmly into the bottom of the prepared springform pan. Bake for 10 minutes. Set aside to cool slightly.
- Reduce the oven temperature to 325°F (160°C).
- Prepare the cheesecake batter: In a large bowl, beat the softened cream cheese and 1 1/2 cups sugar until smooth. Beat in the vanilla extract and flour. Mix in the sour cream until just combined.
- In a separate small bowl, whisk together the eggs and vinegar. Gradually add the egg mixture to the cream cheese mixture, mixing on low speed until just incorporated. Do not overmix.
- In another small bowl, whisk together the cocoa powder, red food coloring, buttermilk, and baking soda until smooth. This is your red velvet component.
- Pour half of the plain cheesecake batter over the cooled crust. Gently dollop spoonfuls of the red velvet mixture over the batter. Top with the remaining plain batter.
- Create the swirl: Use a knife or skewer to gently swirl the red velvet batter into the plain batter, creating a marbled effect. Do not over-swirl to maintain distinct layers.
- Bake the cheesecake in a water bath: Place the foil-wrapped springform pan into a larger roasting pan. Carefully pour hot water into the roasting pan until it reaches halfway up the sides of the springform pan.
- Bake for 60 to 75 minutes, or until the edges are set but the center still has a slight jiggle.
- Turn off the oven, crack the oven door open slightly, and let the cheesecake cool inside the oven for 1 hour. This prevents cracking.
- Remove the cheesecake from the water bath and foil. Cool completely on a wire rack. Once cool, cover and refrigerate for at least 6 hours, or preferably overnight.
- Before serving, top with your favorite cream cheese frosting. Release the springform sides carefully. Slice and serve your showstopper holiday dessert.
Notes
- For the creamiest texture, ensure your cream cheese is fully at room temperature before mixing.
- If you skip the water bath, you risk a drier texture and potential cracking.
- This cheesecake pairs well with a simple chocolate ganache drizzle for extra decadence.
Nutrition
- Serving Size: 1 slice
- Calories: 450
- Sugar: 35g
- Sodium: 320mg
- Fat: 30g
- Saturated Fat: 18g
- Unsaturated Fat: 12g
- Trans Fat: 0.5g
- Carbohydrates: 40g
- Fiber: 1g
- Protein: 7g
- Cholesterol: 110mg