
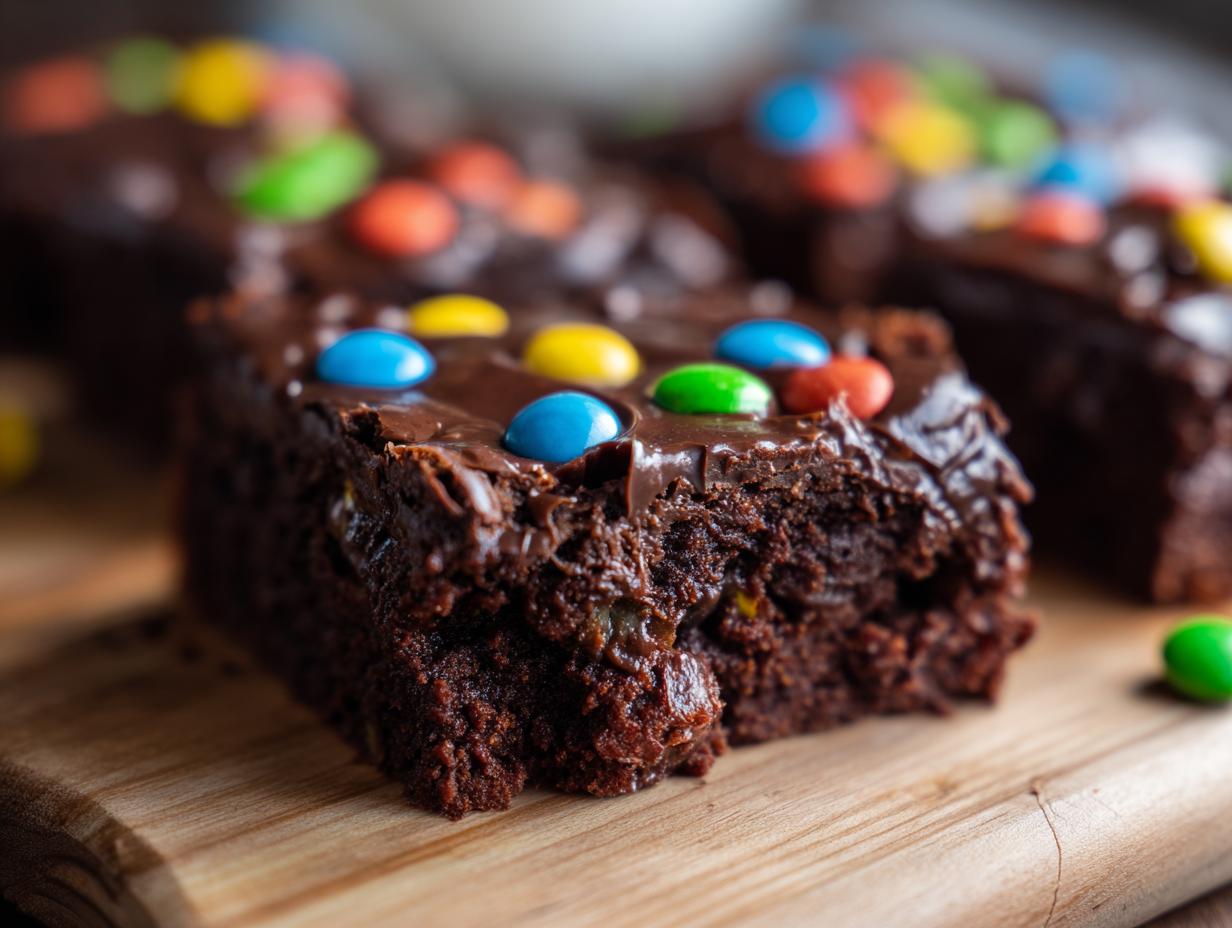
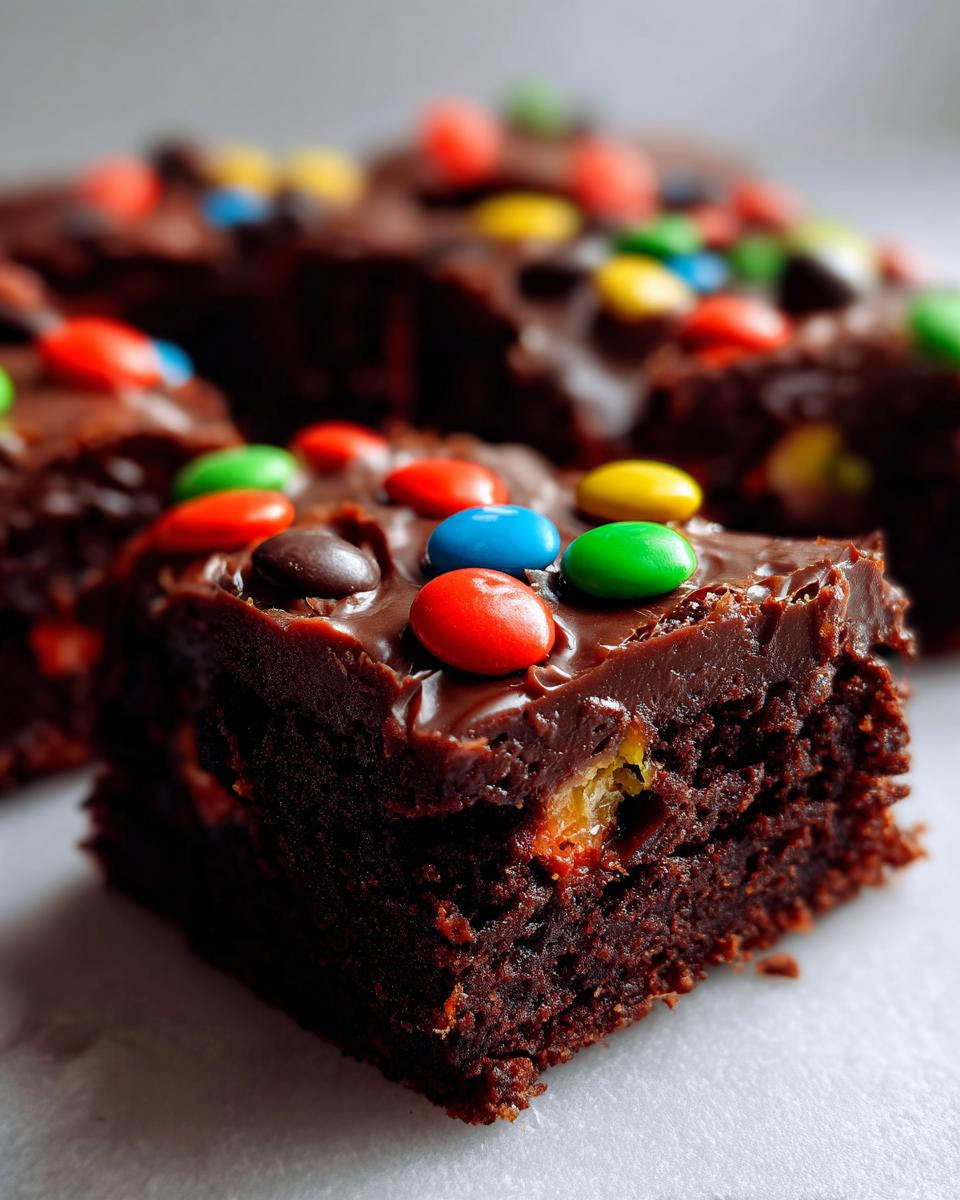
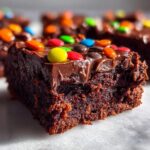
Do you ever get that intense craving for something you haven’t tasted since grade school? For me, it’s always those iconic, perfectly frosted squares of chocolate goodness. Forget the boxed versions packed with things I can’t pronounce; we’re making real, honest-to-goodness cosmic brownies today, and trust me, they are leagues better than the store-bought kind. At Misty Plate, my philosophy is centered on simple, tested home cooking, and this recipe proves you don’t need complexity to achieve ultra-fudgy, truly indulgent results. We are ditching the short cuts to bring that nostalgic magic right into your kitchen with ingredients you can actually find at your local market. If you want to know more about how we approach these classic recipes, check out our About Page. Let’s bake something special!
- Why You Will Love These Homemade Cosmic Brownies
- Ingredients for the Best Fudgy Cosmic Brownies
- How to Make Copycat Cosmic Brownies Step-by-Step
- Tips for Perfect Homemade Cosmic Brownies
- Ingredient Notes and Substitutions for Cosmic Brownies
- Storage and Reheating Instructions for Your Cosmic Brownies
- Serving Suggestions for These Decadent Chocolate Squares
- Frequently Asked Questions About Making Cosmic Brownies
- Nutritional Estimates for Homemade Cosmic Brownies
- Share Your Cosmic Brownie Creations
Why You Will Love These Homemade Cosmic Brownies
When I first started recreating these childhood favorites, I wanted to capture that specific fudgy density that the packaged ones are famous for, but without all the artificial stuff. These copycat cosmic brownies tick every single box. You’ll be so proud when you pull this tray out of the oven!
- They are unbelievably fudgy and dense. We skip the cakey texture entirely and go straight for chewy decadence in every single bite.
- This is a true from-scratch recipe, meaning no box mix needed! You’ll be amazed how easy it is to whip these up using basic pantry staples.
- They genuinely taste better than store bought brownies. The richness from the quality cocoa powder and real butter shines through.
- An instant wave of nostalgia! Seriously, seeing those colorful candy chips instantly transports you back to lunchbox days.
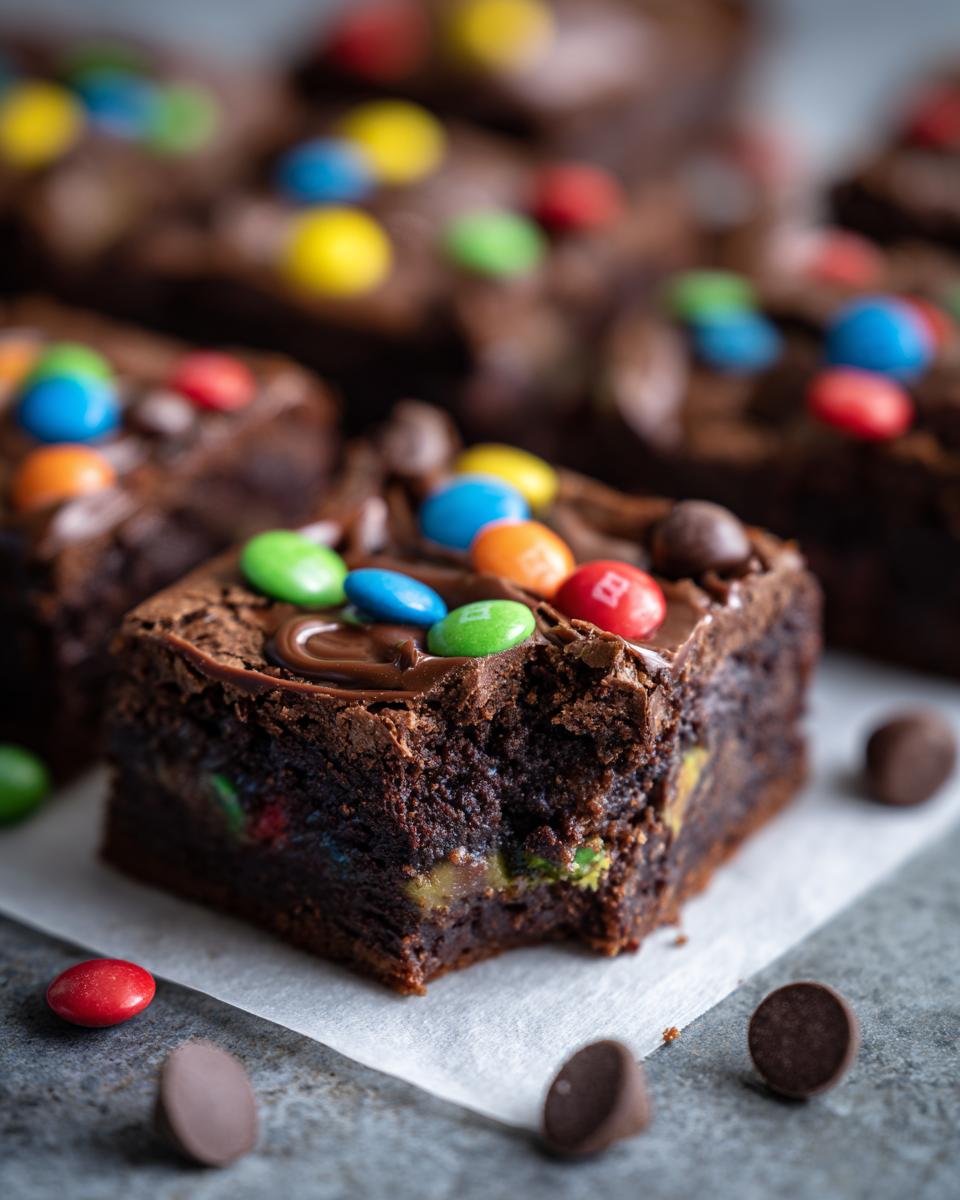
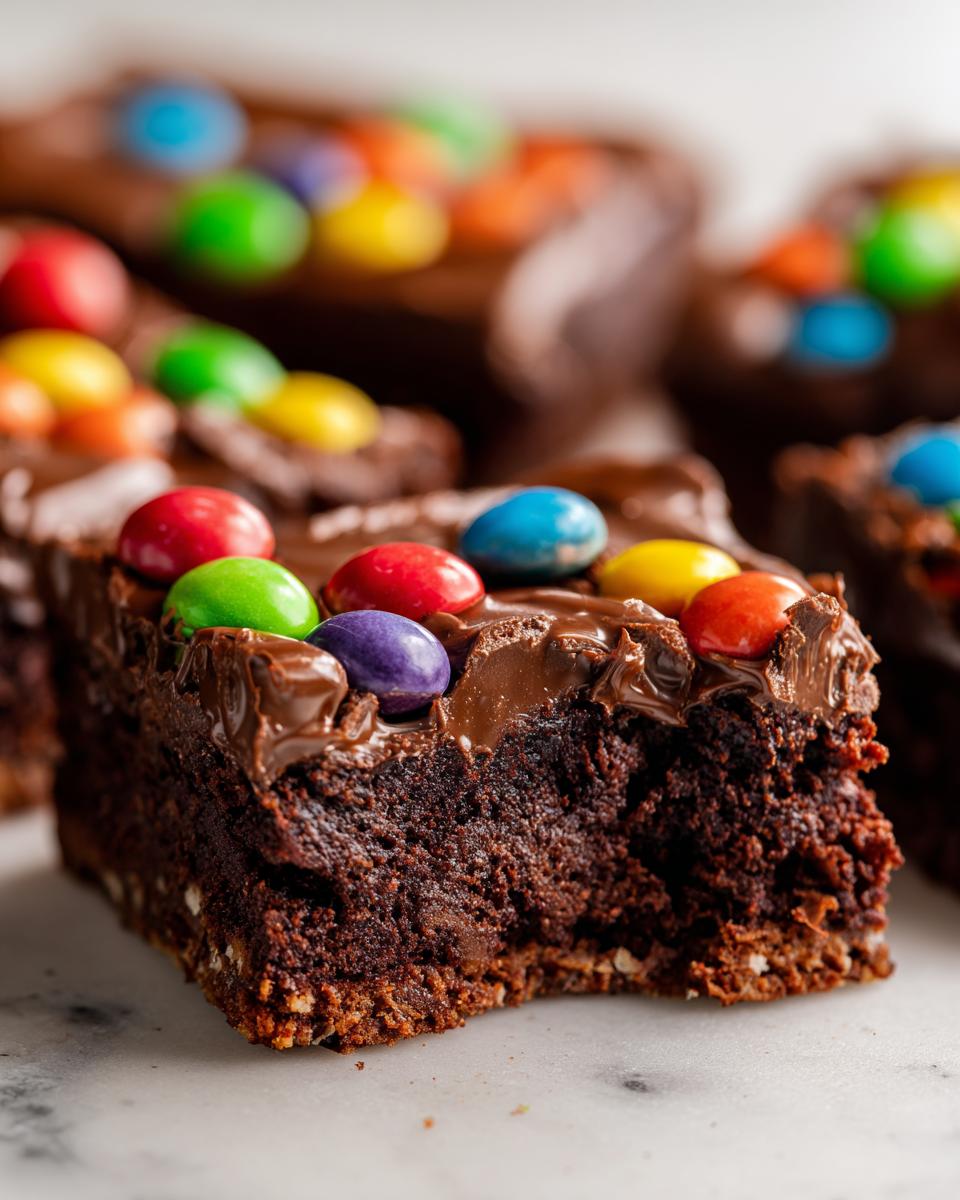
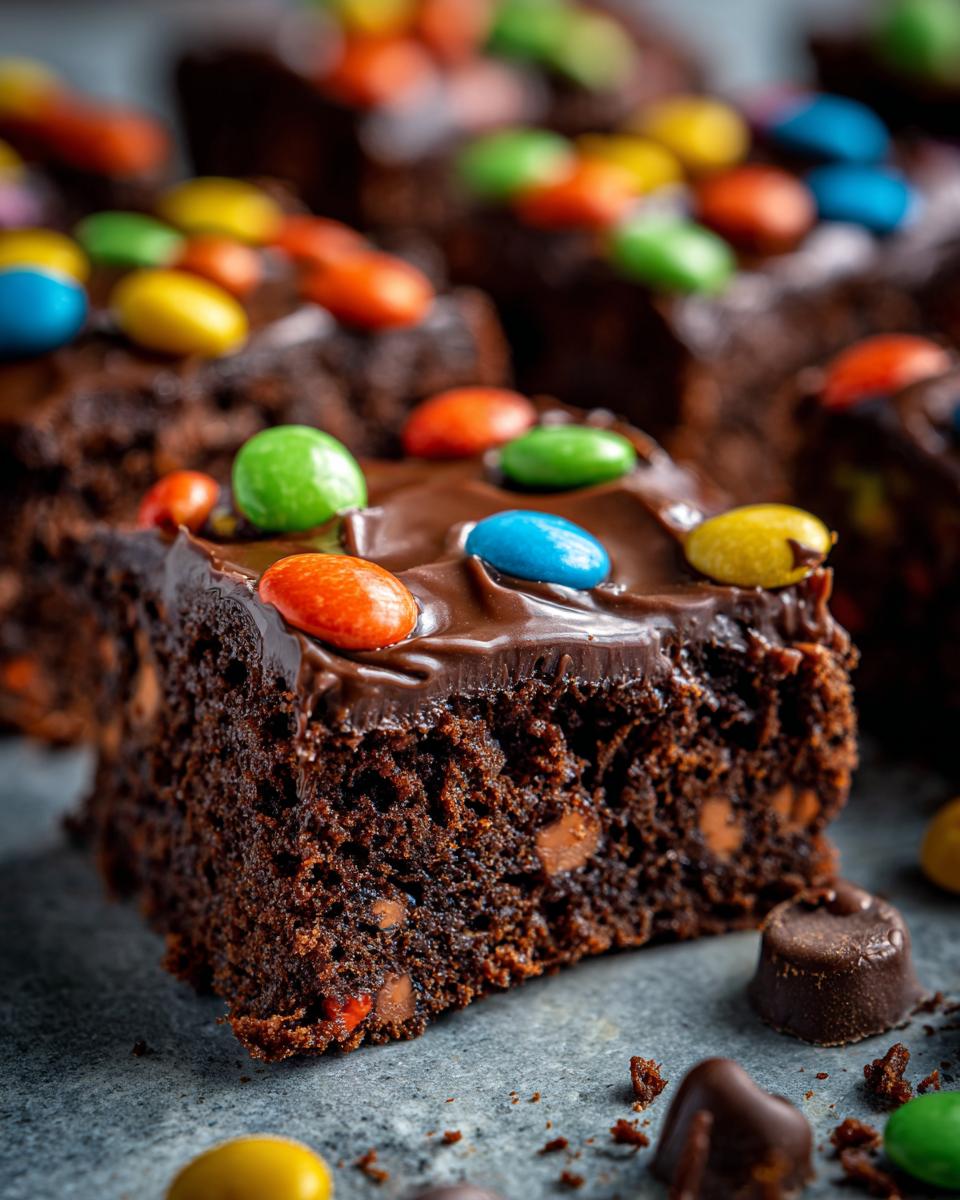
- The iconic topping is easy! That signature smooth chocolate ganache topping sets up beautifully and doesn’t crack when you slice them.
- They’re perfect for sharing. These ultra rich chocolate squares disappear fast at any gathering, making you the kitchen hero!
Ingredients for the Best Fudgy Cosmic Brownies
Getting these cosmic brownies right starts before you even preheat the oven—it starts with quality. I’ve listed everything you need right here. Remember, for the ultra rich brownies flavor we’re chasing, don’t skimp on that cocoa powder! We keep things organized so you don’t miss a thing when you are getting ready to bake.
For the Fudgy Brownie Base
- 1/2 cup unsalted butter
- 1 cup granulated sugar
- 1/2 cup packed brown sugar
- 2 large eggs
- 1 teaspoon vanilla extract
- 1/2 cup all-purpose flour
- 1/2 cup unsweetened cocoa powder (Use the best quality you can find!)
- 1/4 teaspoon salt
- 1/4 teaspoon baking powder
- 1/2 cup semi-sweet chocolate chips (These melt to add extra goo!)
For the Chocolate Ganache Topping and Sprinkles
This is the part that really screams “classic” when you see those bright colors on top! Make sure you have these ready to go.
- 1 cup powdered sugar
- 1/4 cup unsweetened cocoa powder
- 3 tablespoons milk or heavy cream (Start with 3 and add more slow if needed!)
- 1/2 teaspoon vanilla extract
- 1/2 cup colorful candy chips (Like the ones you grew up with!)
How to Make Copycat Cosmic Brownies Step-by-Step
This is where the magic happens! Making these cosmic brownies from scratch is surprisingly straightforward, and following these steps exactly ensures you get that addictive, fudgy texture every single time. Remember, the key to any great fudgy brownie recipe is patience, especially when it comes to cooling down. Don’t rush the process!
Preparing the Pan and Brownie Batter
First things first, let’s get ready! Make sure your oven is preheated to 350 degrees—that’s Step 1. While it heats up, grease and line an 8×8 inch pan with parchment paper, making sure you leave an overhang on the sides. That overhang is your handle later on, so don’t skip it! Next, we melt the butter, then whisk in both sugars off the heat. Whisk in the eggs one by one, followed by the vanilla. In a separate bowl, combine your dry ingredients—flour, cocoa, salt, and baking powder. Now, add the dry things to the wet things gradually. Promise me you’ll mix only until **Do not overmix**! Just until you see no white stripes of flour remain. Finally, fold in those chocolate chips and spread the batter evenly in your prepared pan.
Baking and Cooling for Ultra Rich Brownies
Bake this glorious batter for about 25 to 30 minutes. Here is my expert tip for truly ultra rich brownies: Pull them out when a toothpick comes out with moist crumbs attached, but definitely not wet batter. That residual heat is what keeps them irresistibly fudgy later on! As tempting as it is, you must let these cool completely in the pan on a wire rack. I know, it feels like forever, but if you try to ice warm brownies, you’ll just get chocolate soup everywhere.
Creating the Chocolate Ganache Topping
Once they are fully cooled (you can check out my advice on quick cooling methods or just go grab a cup of coffee—see these weeknight dinner ideas while you wait!), we make the topping. Whisk the powdered sugar and cocoa powder together first. Then, add the milk and vanilla. Whisk until it looks smooth, which should take just a moment. If your ganache is too thick to spread, add milk just one teaspoon at a time. If it looks too runny—which happens if your milk goes in too fast—just whisk in powdered sugar, one tablespoon at a time, until you get that perfect spreadable consistency. That’s how we build trust in the kitchen!
Finishing and Cutting Your Cosmic Brownies
When the ganache is spread smoothly over the cooled brownies, you have to move fast! Before the icing sets up, immediately sprinkle those vibrant colorful candy chips all over the top. You need them to stick right away! Let this set for about 30 minutes at room temperature—not too long, or the sprinkles won’t firmly adhere. Once the icing is slightly firm, use those parchment paper overhangs to lift the whole slab out, and then slice away into your perfect squares.
Tips for Perfect Homemade Cosmic Brownies
Making homemade cosmic brownies is super rewarding, but getting that ideal texture—chewy on the edges and pure fudge in the center—takes a couple of small tricks. My biggest learning curve, honestly, was the cooling time. I used to be so impatient, slicing into them while they were still warm, dreaming of those colorful chips sticking to the knife. What happened? The chocolate ganache melted everywhere, and the whole thing crumbled! Don’t make my mistake.
For the absolute best easy brownie recipe from scratch, always rely on high-quality cocoa powder; it makes a huge difference in depth of flavor. Also, trust the toothpick test, not the clock! If you see moist crumbs, pull them out. They will firm up as they cool down, setting you up for success later. If you need more simple baking inspiration, check out my tips for best homemade BBQ sauce recipe—sometimes even savory cooking teaches you things about ratios!
Ingredient Notes and Substitutions for Cosmic Brownies
One thing I learned when developing this recipe is that sometimes you just don’t have everything on hand, and that’s okay! We want these cosmic brownies to be accessible, but we also need to make sure we keep that signature texture. The goal here is achieving chewy cosmic brownies, and certain ingredients really help us lock that in.
If you find yourself scrambling, here are a few notes on substitutions. Trust me, a few small tweaks won’t ruin the whole batch, as long as you understand what that ingredient is supposed to be doing!
Substitutions for Sugar
I specifically ask for both granulated and packed brown sugar because the molasses in the brown sugar really deepens that dark chocolate flavor and adds a little chewiness. If you are completely out of brown sugar, you can use an extra half cup of granulated sugar instead. Just know that your brownies might come out slightly less moist, so you’ll want to make sure you don’t overbake them even a second past the moist crumb stage!
What to Use Instead of Specific Candy Chips
The colorful candy-coated chocolate chips are non-negotiable for the “cosmic” look, but maybe you only have a bag of M&Ms hiding in the pantry? Go for it! M&Ms work beautifully for the topping and behave exactly the same way. If you’re dealing with allergies or can’t find them, you can use rainbow nonpareils, although you’ll lose that delightful little crunch those candy chips give you. For the chips inside the batter, if you’re out of semi-sweet, use milk chocolate, but it will make things significantly sweeter overall.
Cocoa Powder Quality Matters
I am going to be honest here: the cocoa powder is the star of the show for the base and the frosting. If you can swing it, use a high-quality Dutch-processed cocoa powder. It gives you that deep, dark color and rich flavor that makes these indulgent chocolate snacks so satisfying. If you only have natural unsweetened cocoa, your brownies might rise just a little bit more than mine did, so keep an eye on that baking time!
Storage and Reheating Instructions for Your Cosmic Brownies
Once these beautiful, fudgy squares have set, the next big decision is, “How do I keep them tasting this good tomorrow?” Trust me, keeping these cosmic brownies at their peak fudgy texture is simple, provided you’re patient enough to let them cool fully before storing them!
The best environment for these treats is airtight. You want to keep all that wonderful moisture locked in. I usually use a large, hard-sided container layered with wax paper or parchment between the layers of brownies. This prevents the chocolate ganache topping from making a mess on the layer above it.
Room Temperature vs. Refrigeration
For the very best texture, I recommend keeping your brownies at room temperature for the first two or three days. Storing them in the fridge can sometimes harden the fudgy base a bit too much, making them almost too dense. If you baked these using the high-quality cocoa powder I suggested, they should stay perfectly fresh and moist at a cool counter temperature for up to four days.
If you know you won’t get to them within four days, or if your kitchen is uncomfortably warm, the refrigerator is fine. Just remember to let them sit out on the counter for about 20 to 30 minutes before you plan on eating them. That little bit of softening time makes all the difference in recapturing that just-made texture.
Reheating for Extra Gooeyness
Are you craving that just-baked, melty chocolate center? I do this all the time! Pop a single square into the microwave for just 10 to 15 seconds. Any longer and you risk melting that gorgeous ganache completely off the top. A quick zap warms the chocolate chips inside the base just enough so they turn glorious and gooey again. It’s the perfect way to enjoy an indulgent chocolate snack right when you need it most!
Serving Suggestions for These Decadent Chocolate Squares
Now that you’ve mastered these perfect cosmic brownies, the only thing left to do is decide how you’re going to enjoy them! These decadent chocolate squares stand up beautifully on their own, but I love pairing them with something contrasting—the richness of the chocolate just sings when matched with something creamy.
For a real treat, they are fantastic served slightly warmed with a big scoop of vanilla bean ice cream. The contrasting cold and warm temperatures are just divine! If you’re looking for a grown-up beverage pairing, try a tall glass of cold milk, or maybe even sip on that creamy classic homemade eggnog recipe we make during the holidays. Either way, don’t forget the sprinkles!
Frequently Asked Questions About Making Cosmic Brownies
I know you still might have a few little nudges and questions about getting these cosmic brownies absolutely perfect on your first try. That’s totally normal when you’re trying to nail a beloved classic! I’ve gathered the questions I get asked most often when people are trying this easy brownie recipe from scratch for the first time. Remember, baking is all about learning your oven, and these tips should help you feel extra confident. If you’re looking for more inspiration after mastering this, head over to my main dessert recipes page!
Can I make these cosmic brownies vegan or gluten-free?
That’s a great question, especially since so many of us are trying to navigate dietary needs. You absolutely can adapt this recipe! For vegan versions, the main swap is the butter—use a high-quality vegan butter stick instead. You’ll also need to replace the eggs with a vegan binder, like two tablespoons of applesauce or a flax egg for each egg called for in the recipe. Gluten-free is easier; just swap the all-purpose flour for a high-quality 1:1 gluten-free blend. Keep in mind that gluten-free flours can sometimes behave a bit differently, so watch your baking time closely, as you might need an extra minute or two!
What is the secret to the fudgy texture in these cosmic brownies?
This is the heart of the matter, isn’t it? We aren’t aiming for cakey here; we want that signature chew! The secret lies in two main things. First, the ratio of fat and sugar to flour has to be high. We use plenty of butter and sugar—that’s what keeps them dense and moist. Second, and this is crucial: do not overbake. Pull them just when you see those moist crumbs clinging to your toothpick. That slight under-baking allows the residual heat to finish the process without drying out the center. That’s the magic behind truly great fudgy chocolate treats.
How do I get the chocolate ganache topping perfectly smooth?
Ah, the glorious icing! Nobody wants lumpy chocolate topping on their beautiful homemade cosmic brownies. The key here is temperature control and incorporating the liquid slowly. Always whisk your dry ingredients—the powdered sugar and cocoa—together first in a small bowl. This prevents lumps before you even add moisture. When you introduce the milk or cream, only add a little bit at a time, whisking constantly and deliberately. If you dump all the liquid in at once, it seizes up, and you get clumps. If it still looks a little gritty, just keep whisking for a good minute or two; the friction actually helps smooth out those sugar granules. They should look glossy and pourable, not stiff!
Nutritional Estimates for Homemade Cosmic Brownies
Okay, so let’s talk numbers for a second. I always try to keep my baking balanced, but let’s be real—cosmic brownies aren’t exactly health food! They are a celebration, remember? I’ve run the numbers for a standard square based on the recipe above so you have a general idea of what you’re digging into. Remember, my philosophy here at Misty Plate is focusing on the joy of real, homemade food, but I still believe in transparency when it comes to ingredients.
This is just for a single serving (one square, yielding 16 total). If you cut yours into smaller pieces, the numbers will obviously drop!
- Serving Size: 1 square
- Calories: 280
- Fat: 14g
- Saturated Fat: 8g
- Carbohydrates: 37g
- Sugar: 35g (Yes, that’s high, but it’s delicious!)
- Protein: 3g
- Sodium: 110mg
Now, here’s the important part, and I say this often about all my dessert recipes: These estimates are based purely on the ingredients listed in the quantities provided. If you decide to use dark chocolate instead of semi-sweet, switch out butter for coconut oil, or use a different brand of cocoa powder, your actual nutritional content will shift! This is just a friendly guideline for enjoying these **better than store bought brownies** responsibly!
Share Your Cosmic Brownie Creations
It genuinely warms my heart seeing you all recreate these beloved treats! When you make something that brings a little bit of magic and nostalgia back into your week, I want to know all about it. That’s the whole point of Misty Plate—building this community of home cooks who find joy in simple, delicious food.
Have you tackled these cosmic brownies? Did you manage to get that perfect fudgy center? Please, please come back and leave a rating right here on the recipe page! Stars tell me exactly what you thought and help other bakers feel confident trying something new.
And if you snap a picture of those beautiful, colorful squares, tag me on social media! I absolutely love seeing your plating and how you serve these decadent chocolate squares. It makes my day to know that the simple recipes we develop here are making their way onto your tables. If you ever have a burning question or just want to share a success story, don’t hesitate to reach out via the Contact Page. Happy baking, friends!
PrintBest Homemade Fudgy Cosmic Brownies (Copycat Recipe)
Make ultra rich, fudgy cosmic brownies from scratch that taste better than the store-bought version. This recipe delivers dense, chewy squares topped with smooth chocolate ganache and colorful candy chips.
- Prep Time: 15 min
- Cook Time: 30 min
- Total Time: 45 min
- Yield: 16 servings 1x
- Category: Dessert
- Method: Baking
- Cuisine: American
- Diet: Vegetarian
Ingredients
- 1/2 cup unsalted butter
- 1 cup granulated sugar
- 1/2 cup packed brown sugar
- 2 large eggs
- 1 teaspoon vanilla extract
- 1/2 cup all-purpose flour
- 1/2 cup unsweetened cocoa powder
- 1/4 teaspoon salt
- 1/4 teaspoon baking powder
- 1/2 cup semi-sweet chocolate chips (for batter)
- 1 cup powdered sugar (for icing)
- 1/4 cup unsweetened cocoa powder (for icing)
- 3 tablespoons milk or heavy cream (for icing)
- 1/2 teaspoon vanilla extract (for icing)
- 1/2 cup colorful candy-coated chocolate chips (for topping)
Instructions
- Preheat your oven to 350 degrees Fahrenheit. Grease and line an 8×8 inch baking pan with parchment paper, leaving an overhang for easy removal.
- In a medium saucepan, melt the butter over low heat. Remove from heat and whisk in the granulated sugar and brown sugar until combined.
- Whisk in the eggs one at a time until fully incorporated. Stir in the vanilla extract.
- In a separate bowl, whisk together the flour, cocoa powder, salt, and baking powder.
- Gradually add the dry ingredients to the wet ingredients, mixing only until just combined. Do not overmix. Fold in the 1/2 cup of semi-sweet chocolate chips.
- Pour the batter into the prepared pan and spread evenly.
- Bake for 25 to 30 minutes. A toothpick inserted near the center should come out with moist crumbs attached, not wet batter, for a fudgy texture.
- Let the brownies cool completely in the pan on a wire rack.
- Prepare the chocolate ganache icing: In a small bowl, whisk together the powdered sugar and cocoa powder.
- Add the milk and vanilla extract. Whisk until the icing is smooth and thick. If it is too thick, add milk 1 teaspoon at a time. If too thin, add powdered sugar 1 tablespoon at a time.
- Spread the chocolate ganache evenly over the cooled brownies.
- Immediately sprinkle the colorful candy-coated chocolate chips over the wet icing.
- Allow the icing to set for about 30 minutes before lifting the brownies out using the parchment overhang and cutting them into squares.
Notes
- For the fudgiest texture, slightly underbake the brownies. The residual heat will finish cooking them as they cool.
- If you prefer a firmer ganache, chill the finished brownies for 15 minutes before slicing.
- Use high-quality cocoa powder to achieve a deep chocolate flavor in both the base and the icing.
Nutrition
- Serving Size: 1 square
- Calories: 280
- Sugar: 35
- Sodium: 110
- Fat: 14
- Saturated Fat: 8
- Unsaturated Fat: 6
- Trans Fat: 0.1
- Carbohydrates: 37
- Fiber: 2
- Protein: 3
- Cholesterol: 45