
Oh, trust me, there is nothing quite like that craving for something intensely tropical—that perfect bite where sweet, creamy, and chewy meet in sheer bliss. If you’ve been chasing that feeling, you’re in the right spot! I’ve spent ages perfecting this Authentic Thai Mango Sticky Rice recipe, known traditionally as Khao Niew Mamuang, so you can bring that little slice of sunshine right into your own kitchen. At Misty Plate, we believe the best meals are about connection, and recreating cherished memories through accessible food is what I live for. This method cuts through the confusion and gives you that incredible result without any fuss.
- Why This Authentic Mango Sticky Rice Recipe Works for You
- Ingredients for Classic Mango Sticky Rice
- How to Prepare Your Mango Sticky Rice (Khao Niew Mamuang)
- Assembling the Perfect Mango Sticky Rice
- Tips for Success with Your Thai Dessert Recipe
- Storage and Reheating Instructions for Leftover Mango Sticky Rice
- Serving Suggestions for This Sweet Asian Dessert
- Frequently Asked Questions About Mango Sticky Rice
- Share Your Mango Sticky Rice Creations
Why This Authentic Mango Sticky Rice Recipe Works for You
When I recreate dishes that feel this special, I need to know they’ll work when you make them. Trust me, I’ve made enough sticky rice batches that ended up too hard or too soupy! This version is different because we focus on a few foundational steps that guarantee success, even if you’ve never tackled an Asian dessert recipe before. This isn’t just about following steps; it’s about understanding why they matter.
Perfect Texture Every Time with Coconut Sticky Rice
The secret to that satisfying, slightly chewy texture that pulls apart perfectly lies in the soaking. We give that glutinous rice plenty of time—at least four hours—to plump up before it ever hits the heat. Also, skip the light stuff! We insist on full-fat coconut milk in the final sauce because that extra richness is exactly what prevents the rice from hardening up when it cools down.
Simple Steps for the Creamy Coconut Sauce
You won’t catch me messing with a complicated simmering sauce here. The best part of this recipe is how gentle we are with the coconut mixture. We just warm it gently until the sugar melts away. Seriously, do not let it boil! Keeping that sauce unboiled keeps the sauce light, pure, and ready to absorb beautifully into the hot rice without breaking that creamy texture.
Tips for Selecting the Ripe Mango Dessert Fruit
The mango has to be perfect; it’s the star, after all! If you can find them, go for Nam Dok Mai or Honey mangoes. They are perfectly sweet and have that buttery texture that just melts in your mouth alongside the rice. If those aren’t in your local market, look for mangoes that give just slightly when you press them gently—that tells you they’re ready to shine in your dessert.

Ingredients for Classic Mango Sticky Rice
Okay, let’s get down to business. Having the right cast of characters is half the battle won, right? I’ve listed exactly what you need below. When I first started trying to nail this mango sticky rice down, I tried using half amounts or substituting milk, and honestly? It just wasn’t worth the effort. Stick to the full-fat coconut milk—you deserve the creamy texture! Remember, the rice needs time to soak, so make sure you have this plan ready the day before you want to eat this amazing sweet Asian dessert.
For the Sweet Sticky Rice Base
This is the heart of the dish, and we only need one main player here, but the prep on it is crucial. Don’t try to rush the soaking, seriously! If you do, you’ll end up with rice that doesn’t absorb the sauce properly.
- 1 cup glutinous rice (You might see this labeled as sweet rice or sticky rice—it must be this kind!)
For the Rich Coconut Sauce
This sauce is what turns plain cooked rice into pure comfort. We want richness here, so grab that full-fat can!
- 1 cup full-fat coconut milk
- ¾ cup granulated sugar
- ¼ teaspoon salt (Don’t skip this! It really wakes up the coconut flavor.)
For Assembly and Garnish
Now for the sweet, bright partner to our creamy rice and, of course, the little extras that make it look restaurant-worthy. Remember what I said about the mangoes? Go for that honey or Nam Dok Mai—they are worth seeking out for this ripe mango dessert!
- 2 ripe mangoes (Nam Dok Mai or Honey variety is best)
- Sesame seeds or toasted mung beans for garnish (optional, but I love the crunch!)
How to Prepare Your Mango Sticky Rice (Khao Niew Mamuang)
Alright, this is where the magic actually starts happening, but remember what I said about patience being key? We start long before we turn on the stove! If you skip prep, you risk dry rice, and that’s just a tragedy when you’re trying to make this famous Thai dessert recipe.
Step 1: Preparing the Glutinous Rice
First things first: we need to wash that glutinous rice until I can barely see a hint of cloudiness in the water. It’s important to scrub those grains gently but thoroughly. Once it’s rinsed clear, you must soak it. I usually aim for overnight, but if you’re planning this on a whim, get it in water for at least four solid hours. That soaking time swells the grains up, making sure they cook evenly and stay nice and chewy later. Drain it really, really well after soaking—we want it damp, not swimming.
Step 2: Cooking the Glutinous Rice Dessert
Here’s where you get to choose your adventure! If you have a rice cooker, this is so simple. Put your drained rice in the pot and just add enough water to cover the rice by about half an inch—no more, no less. Use the standard white rice setting. If you are steaming the old-school way, pack the rice into a steamer basket lined with cheesecloth and steam ’til it’s tender, usually about 30 minutes. Either way, it needs to be piping hot when it comes out!
Step 3: Making the Sweetened Coconut Sticky Rice Sauce
While that rice is doing its thing, we make the liquid gold. Grab a small saucepan. Combine one cup of coconut milk, all of your sugar, and that pinch of salt. Put it on medium-low heat. Your only job here is to stir gently until all that sugar vanishes into the milk. I cannot stress this enough: DO NOT BOIL IT! Boiling this can change the texture and it might separate later. Just warm it until it’s totally smooth, then pull it right off the heat.
Step 4: Infusing the Rice
This infusion step is non-negotiable for that classic, moist flavor. Take your hot, freshly cooked rice and immediately move it to a mixing bowl. Now, grab about two-thirds of that creamy coconut sauce—save the rest for drizzling later! Pour it right over the hot rice and gently fold everything together. Don’t stir aggressively, or you’ll crush the grains. Cover that bowl tightly, and let the rice just sit there for 15 to 20 minutes. It sucks up all that sweet coconut goodness and becomes perfectly soft and delicious.
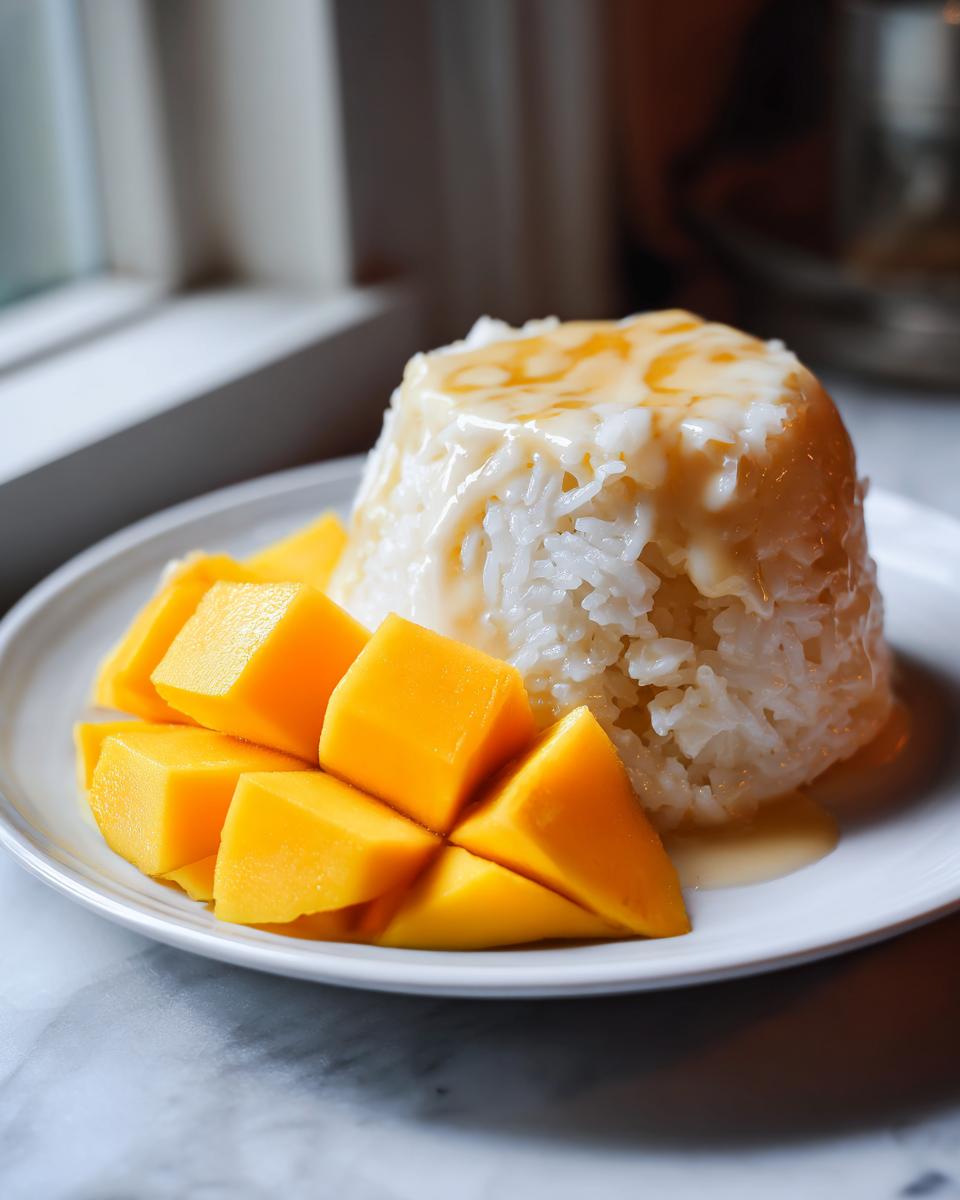
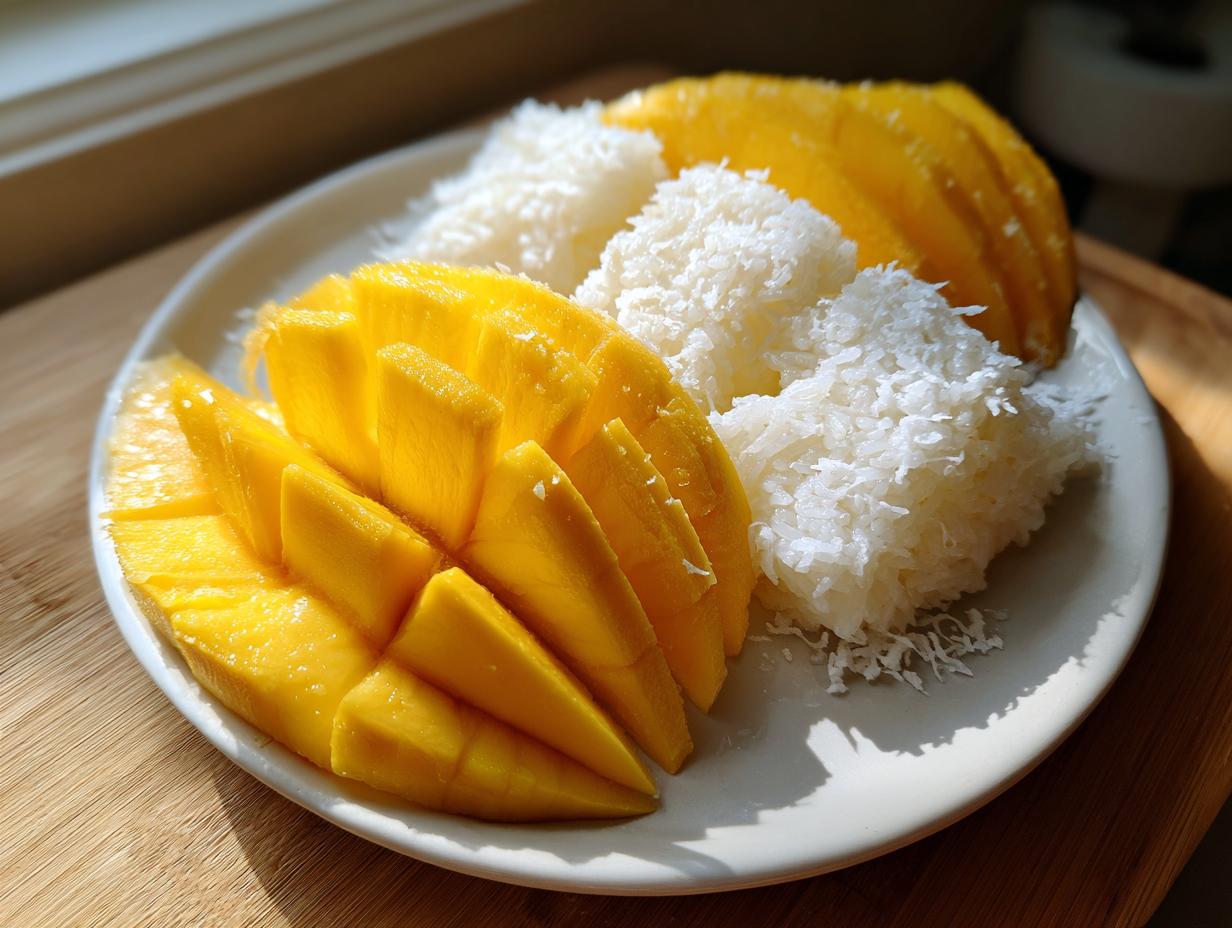
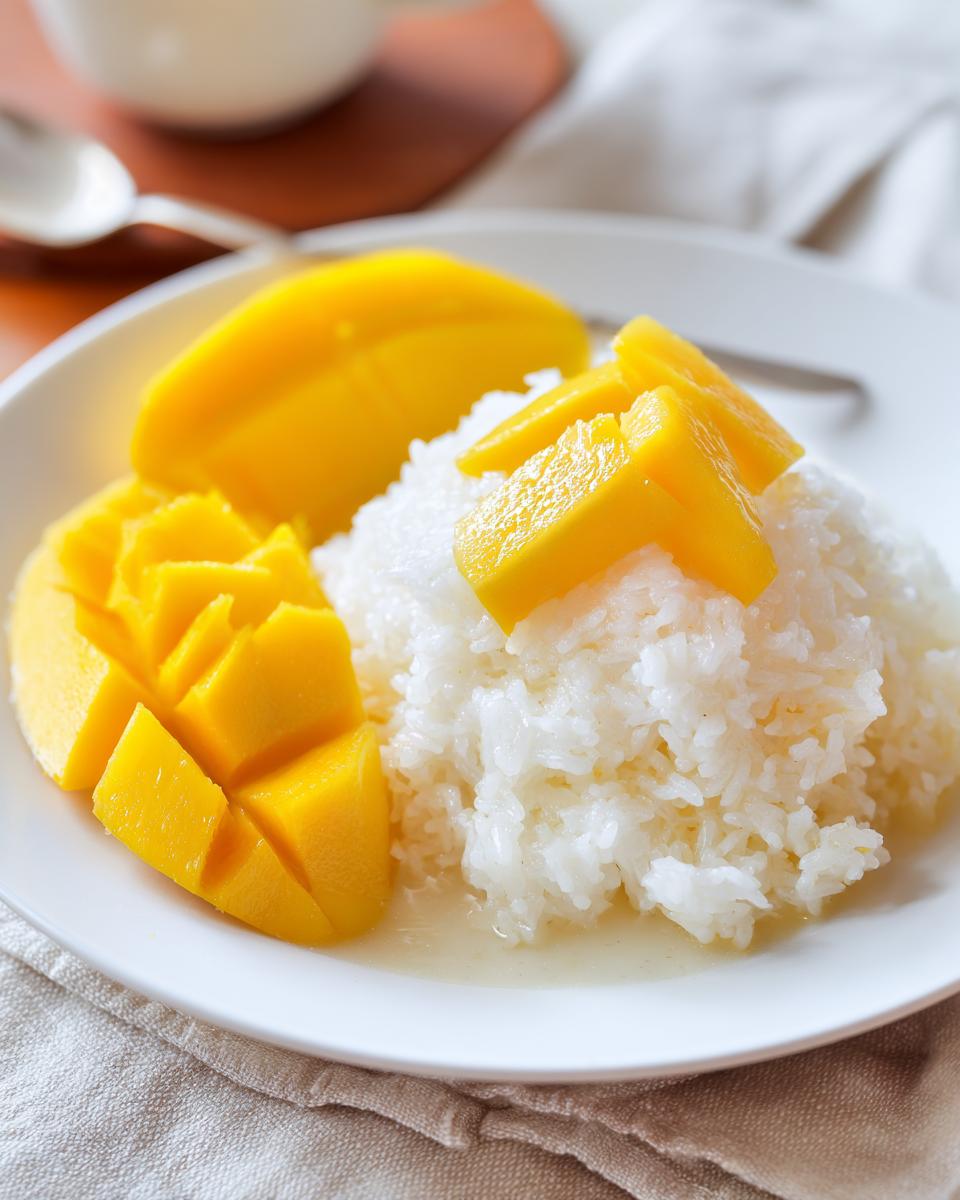
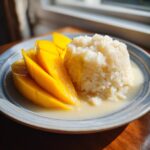
Assembling the Perfect Mango Sticky Rice
Okay, this is the fun part! After all that soaking and resting, it’s time to plate this beautiful sweet sticky rice dessert. Presentation really does matter when you’ve made something this good. You want to serve this right away while the rice is still warm and the mango is cool and fresh—that temperature contrast is just fantastic.
First, you need to prepare your mangoes. Peel them carefully—they should be soft, but firm enough to hold their shape when sliced. Slice them thinly. I always cut my slices neatly, almost fanning them out on the plate.
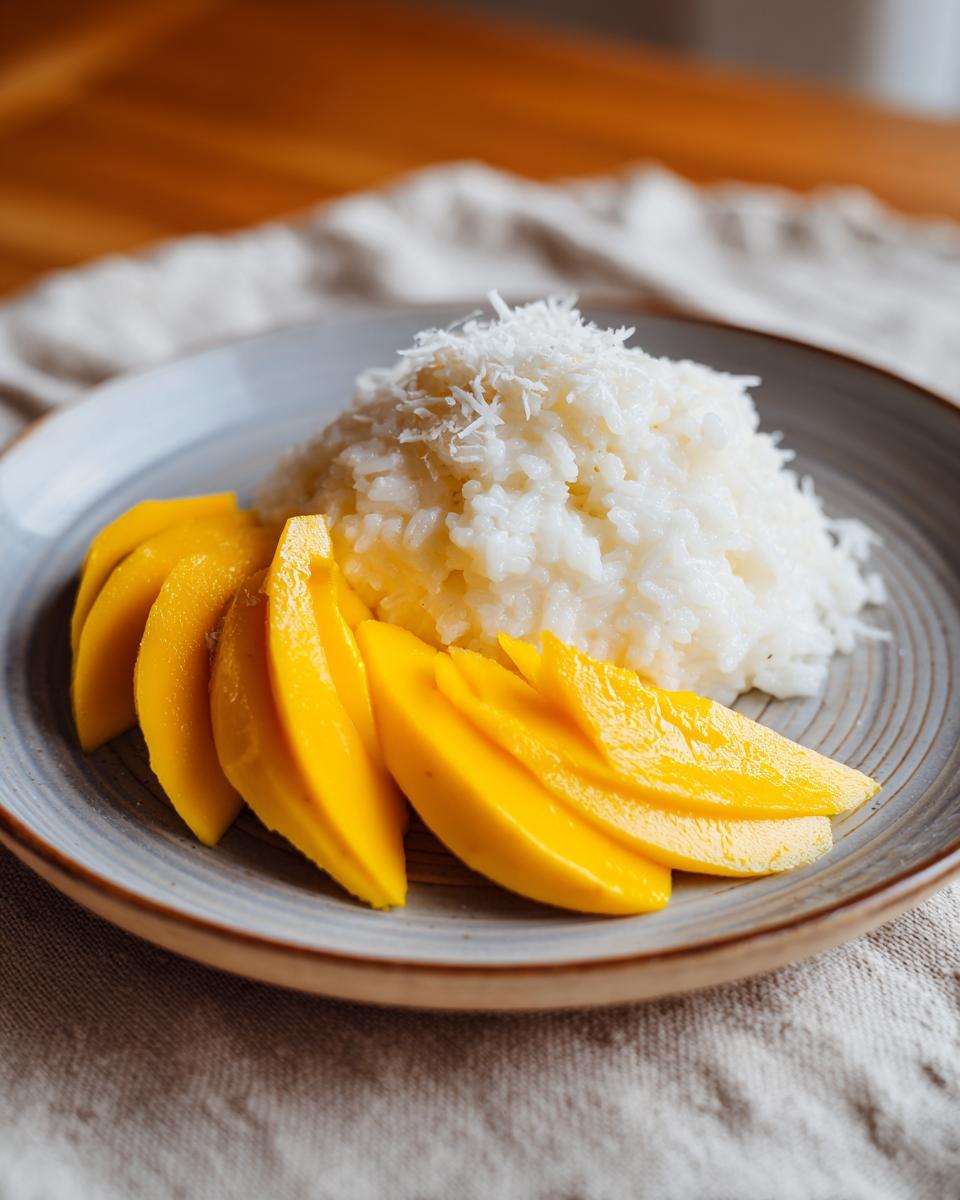
Next, take a nice scoop of that infused, sweet rice from your bowl. Don’t press it down too hard; you want it to look fluffy and tender. Arrange that scoop right next to your sliced mangoes. This is a great spot to see your work shine, just like those gorgeous tropical dessert ideas you see everywhere!
Finally, take the leftover coconut sauce we cleverly hid away earlier. Drizzle just a spoonful or two right over the top of the sweet sticky rice. If you want to be extra fancy, you can spoon a little bit onto the mangoes too. It’s ready to eat the moment the sauce hits the plate. Enjoy that first bite!
Tips for Success with Your Thai Dessert Recipe
You’ve done the soaking, the cooking, the drizzling—now let’s make sure everything stays perfect! When I adapted this classic Thai dessert recipe for Misty Plate, I focused on making it naturally friendly for lots of people. Don’t let dietary restrictions stop you from enjoying this beautiful treat; it was designed to be simple for everyone!
Ingredient Swaps for Vegan Mango Sticky Rice
Good news! If you’re making this with standard ingredients—glutinous rice, coconut milk, salt, and fruit—you’ve already got a fantastic vegan mango sticky rice ready to go! The only thing I watch out for if I’m serving a very strict vegan friend is the sugar. Sometimes, white sugar is processed using bone char, so if you want to be 100% certain, look for certified vegan sugar or just stick to that rich, dark brown sugar we mentioned earlier, which usually avoids that issue!
Making This a Gluten Free Dessert Option
When it comes to allergies and sensitivities, this recipe is such a gift. Glutinous rice, despite its confusing name, does not contain gluten! If you’re looking for a naturally gluten free dessert that still feels incredibly comforting and satisfying, this is it. Just make sure that any garnish you use, like toasted mung beans, isn’t cross-contaminated if that’s a serious concern!
Storage and Reheating Instructions for Leftover Mango Sticky Rice
Now, I’ll be honest with you: this mango sticky rice is absolutely at its peak texture when it’s made fresh. That creamy coconut sauce and the warm, tender rice are heavenly right then and there! But let’s face it, sometimes we make too much, or maybe you want that quick mango sticky rice for lunch the next day. When it comes out of the fridge, the rice *will* be noticeably firmer. That’s just the starches setting up, so don’t panic!
The key to keeping leftovers respectable is separating everything out before it goes into the fridge. If you store the rice drowned in sauce, it’ll get soggy and clumpy, and that’s just not the experience we want for our leftovers.
Here’s how I handle any batch that doesn’t get eaten immediately:
- Store the leftover coconut sticky rice in an airtight container on its own.
- Keep any remaining coconut drizzle in a separate, sealed jar. You might even add a tiny splash of fresh coconut milk to it before chilling; this helps keep it from hardening too much.
- Store the fresh mango slices separately. Honestly, mango doesn’t keep well once cut, so only slice what you plan to eat immediately, or plan on using slightly firmer mango the next day.
When it’s time to eat those delicious leftovers, you need to revive that rice gently. Don’t just blast it on high heat! Pop the rice into the microwave for short bursts—maybe 15 to 20 seconds at a time—and stir between each burst. You can even mix in a tiny spoonful of fresh coconut milk or water while reheating to help bring back that softness we worked so hard to achieve. Skip the oven or the stovetop unless you’re planning to steam it, which takes too long for a quick snack!
Serving Suggestions for This Sweet Asian Dessert
This mango sticky rice is so rich and satisfying, it truly feels like an event every time I pull it together. Because that coconut drizzle is so creamy and delicious, sometimes you want something to balance it out, right? It’s a vibrant, tropical dessert idea that sings, so we want accompaniments that either cool it down or offer a nice textural contrast.
When it comes to temperature, I’m firmly in the “serve it slightly warm” camp. The warmth of the rice combined with the coolness of the fresh mango is just heaven. But if it’s a scorching hot day, chilling the rice for about 30 minutes after assembling it makes it feel incredibly refreshing!
If you’re serving this after a big Thai meal, you might not want something else heavy. Here are a couple of simple things that pair beautifully with this sweet Asian dessert:
- Light, Iced Tea: Skip the creamy milk teas and serve a very lightly sweetened iced jasmine tea or even just sparkling water with a twist of lime. The brightness cuts straight through the richness of the coconut milk.
- A Nutty Crunch: If you chose not to use the toasted mung beans as garnish, serving a tiny side of perfectly toasted sesame seeds or crushed peanuts gives anyone eating a moment to decide if they want more crunch in their bite.
The goal is to let the mango and coconut be the stars. You don’t need much else! Just plate it beautifully, drizzle that last bit of sauce, and enjoy the simplest, most satisfying dessert you’ll ever make.
Frequently Asked Questions About Mango Sticky Rice
I know when you’re trying a new recipe, especially one as iconic as this mango sticky rice, your brain starts buzzing with little worries! Did I soak it long enough? Can I mess it up? Absolutely not! We’ve got this covered. I pulled together the most common questions I get sent about making this dessert at home so you can feel super confident when you pull out that plate. We’re talking about making this perfect, and if you’ve been checking out other mango sticky rice options out there, I promise this method is the most reliable for the home cook!
Can I use regular white rice instead of glutinous rice for mango sticky rice?
Oh, gosh, this is the big one, isn’t it? The short answer is: please don’t. You really have to use glutinous rice, which is also called sticky rice. Regular long-grain or even medium-grain white rice cooks up fluffy and separate—it’s great for savory stir-fries, but it won’t give you that classic, wonderfully thick, pliable texture we need for this Thai dessert recipe. Glutinous rice has a higher starch content, which is why it becomes that glorious, slightly gummy, cohesive layer that perfectly soaks up the coconut sauce. Trust me, regular rice just turns into soupy sweet rice pudding, and that’s a totally different thing!
What is the difference between steaming and using a rice cooker dessert recipe for the rice?
Honestly, for me, this comes down purely to convenience! Both methods can get you success, but they change the amount of hands-on time you need. Steaming is how it’s done traditionally, and sometimes I think it gives the rice a slightly drier, fluffier individual grain texture, which is lovely. But if you’re busy, using it as a rice cooker dessert recipe is a lifesaver. You just set it and walk away! The rice cooker method tends to keep the rice very moist because it steams in a contained environment, which works fantastic with the later soaking process.
How long does the homemade mango dessert last?
I always tell people that this homemade mango dessert is best eaten the day it’s made, ideally within a few hours of assembling it. That way, the rice is soft, the mango is perfectly fresh, and the sauce is glistening. But let’s be real, sometimes we have leftovers! If you do, you can store the components separately in airtight containers in the fridge for up to two days. Remember what I mentioned earlier? If you try to keep the mango attached, it gets watery fast. The rice will definitely firm up when chilled, so you’ll need to give it a gentle reheat (maybe with a tiny splash of coconut milk) before you serve it, just like we discussed in the storage tips!
Share Your Mango Sticky Rice Creations
Now that you’ve made this incredible, authentic mango sticky rice, I really want to hear from you! Honestly, seeing what you create in your own kitchens is the best part of running Misty Plate. Maybe you found the absolute *perfect* ripe mango, or perhaps you mastered the rice cooker method on your very first try—don’t be shy, share the details!
Please, take a moment to leave a rating below so other bakers know this recipe is worth their time. If you ran into a little challenge, tell me about it! I read every comment, and troubleshooting those little bumps is what helps us all become better home cooks together. Remember, it’s about the connection, not perfection!
And if you snapped a photo of your gorgeous plates, I’d be thrilled if you shared it! Tag us on social media—I love seeing that vibrant yellow mango next to that sweet, creamy rice. It makes my day knowing that this little piece of Thai joy is making its way onto your table. You can learn a little more about why we cherish these connected moments right here on our About Page. Happy cooking, everyone!
PrintAuthentic Thai Mango Sticky Rice (Khao Niew Mamuang)
Make this classic Thai dessert at home. You get sweet sticky rice infused with creamy coconut milk, served alongside slices of ripe mango. This recipe focuses on simple steps for a satisfying tropical dessert.
- Prep Time: 20 min
- Cook Time: 35 min
- Total Time: 55 min
- Yield: 4 servings 1x
- Category: Dessert
- Method: Stovetop/Rice Cooker
- Cuisine: Thai
- Diet: Vegetarian
Ingredients
- 1 cup glutinous rice (sticky rice)
- 1 cup full-fat coconut milk
- ¾ cup granulated sugar
- ¼ teaspoon salt
- 2 ripe mangoes (Nam Dok Mai or Honey variety recommended)
- Sesame seeds or toasted mung beans for garnish (optional)
Instructions
- Rinse the glutinous rice thoroughly under cold water until the water runs clear. Soak the rice in water for at least 4 hours, or preferably overnight. Drain the soaked rice completely.
- Cook the sticky rice. If using a rice cooker, place the drained rice in the cooker pot and add enough water to cover the rice by about half an inch. Cook using the standard white rice setting. If steaming, steam the rice until tender, about 25-30 minutes.
- While the rice cooks, prepare the coconut sauce. In a small saucepan, combine 1 cup of coconut milk, ¾ cup sugar, and ¼ teaspoon salt. Heat over medium-low heat, stirring until the sugar dissolves completely. Do not boil the mixture. Remove from heat.
- Once the rice is cooked, transfer the hot sticky rice to a bowl. Pour about two-thirds of the prepared coconut sauce over the hot rice. Stir gently to combine. Cover the bowl and let the rice absorb the liquid for 15 to 20 minutes.
- Prepare the mangoes by peeling and slicing them thinly.
- To serve, place a portion of the sweetened sticky rice on a plate. Arrange the fresh mango slices next to the rice. Drizzle the remaining coconut sauce over the rice and mango. Garnish with sesame seeds or toasted mung beans, if using. Serve immediately.
Notes
- For a richer flavor, you can use a mix of coconut cream and coconut milk for the sauce.
- If you do not have a rice cooker, you can steam the rice or cook it in a pot, ensuring the water ratio is correct for sticky rice.
- Nam Dok Mai or Honey mangoes offer the best sweetness and texture for this traditional Thai dessert.
Nutrition
- Serving Size: 1 serving
- Calories: 450
- Sugar: 35g
- Sodium: 150mg
- Fat: 18g
- Saturated Fat: 15g
- Unsaturated Fat: 3g
- Trans Fat: 0g
- Carbohydrates: 68g
- Fiber: 3g
- Protein: 5g
- Cholesterol: 0mg