

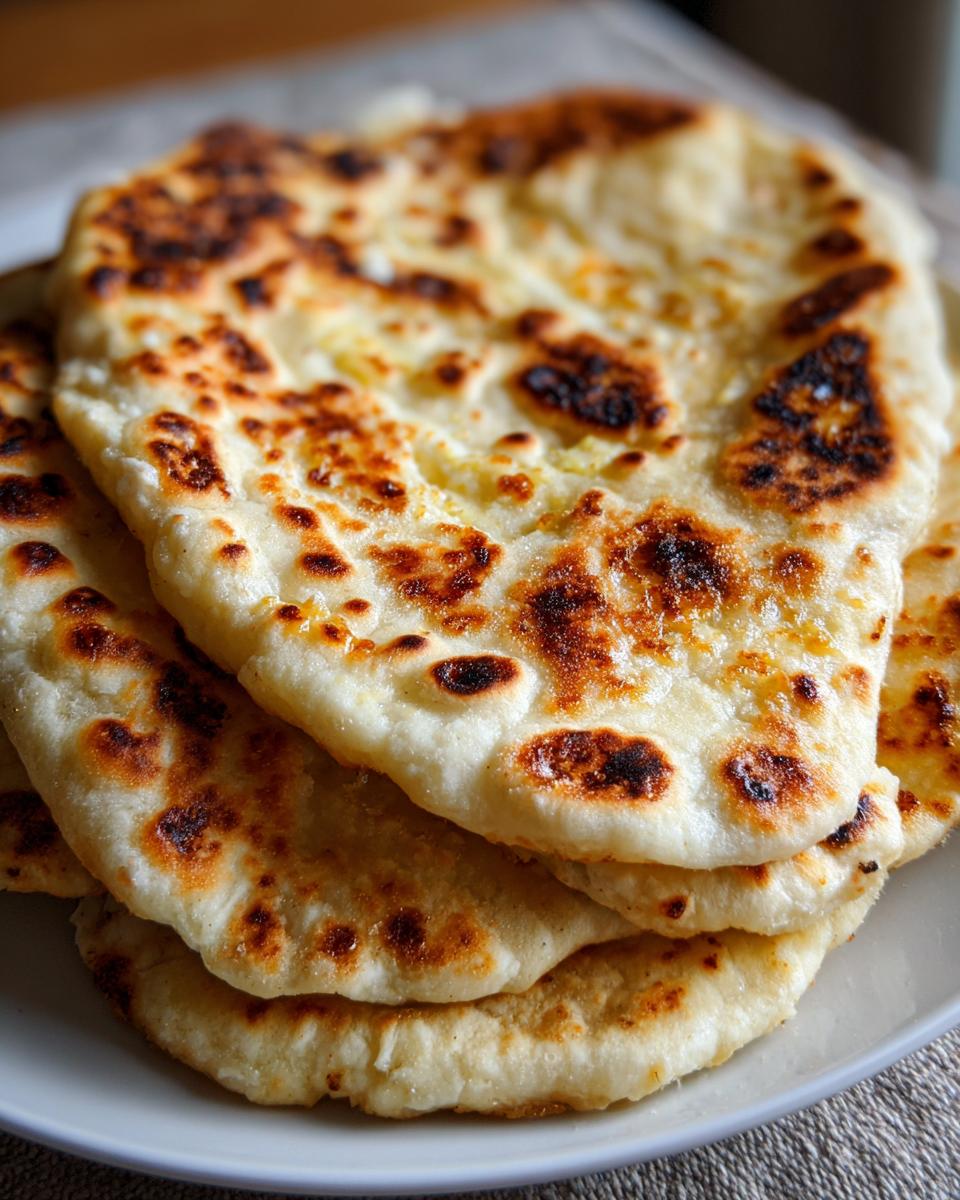
If you’ve ever sat down to a bowl of rich, fragrant curry and realized you’re out of that perfect, pillowy bread for dipping, you know the pain. That warm, slightly charred texture—it feels impossible to replicate at home, right? Wrong! I promise you that achieving beautiful, restaurant-style **naan bread** is surprisingly easy, and we don’t need any specialized equipment. Forget the tandoor; we’re leaning into the simple magic of a hot cast-iron skillet. This recipe is all about reclaiming that satisfying, home-cooked moment. It’s quick, it uses familiar ingredients, and it delivers that soft, fluffy result you crave for your weeknight dinners. Let’s get this simple bread making started!
- Why This Homemade Naan Recipe Delivers Restaurant Style Naan
- Gathering Ingredients for Your Simple Bread Making
- How to Prepare Your Skillet Naan Bread
- Finishing Touches for Buttery Naan
- Tips for Success with Your Homemade Naan Recipe
- Variations: Making Garlic Naan and Other Quick Naan Recipe Ideas
- Serving Suggestions for Naan Bread for Curry
- Storage and Reheating Instructions for Soft Fluffy Bread
- Frequently Asked Questions About Making Naan Bread
- Estimated Nutritional Data for This Naan Bread
- Share Your Homemade Naan Bread Experience
Why This Homemade Naan Recipe Delivers Restaurant Style Naan
I’ve tried so many flatbread recipes over the years, and what makes this one my absolute favorite for quick Indian bread is how it mimics that perfect tear in restaurant naan without the wait. We aren’t messing around with yeast here; that’s what makes it a quick naan recipe that actually tastes high quality. If you want that signature chew, you need these ingredients working together. You’ll find the trick to getting that amazing texture right in the dough itself. It’s why you’ll want to try this homemade naan bread recipe over any other.
Achieving Soft Fluffy Bread Texture Without a Tandoor
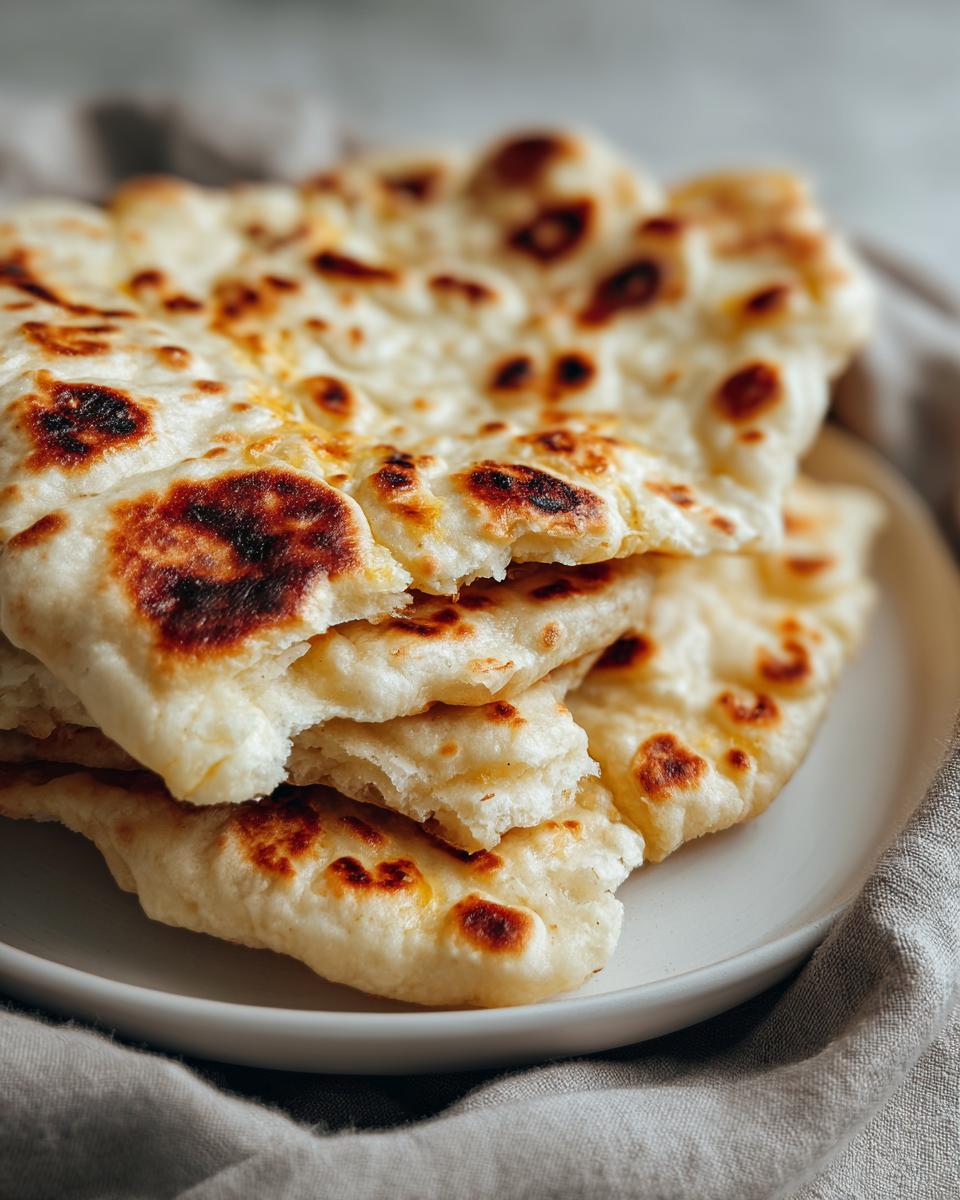
The secret weapon here is full-fat yogurt, trust me on this one! The tang and acidity in the yogurt react beautifully with the baking soda—no yeast required, making this truly a quick bread! That lift you get from that simple chemical reaction gives you that incredible rise when it hits the hot skillet. It’s what creates those big, beautiful air pockets, transforming a simple flour dough into incredibly soft fluffy bread that tears perfectly every single time. It’s pure stovetop magic!
Gathering Ingredients for Your Simple Bread Making
Before we even think about getting the skillet screaming hot, we need to gather our supplies. Making incredible naan bread doesn’t require a pantry full of specialty items! In fact, I use basic ingredients from my regular grocery run. Precision matters when you’re making dough, though. I always measure things out twice because for this simple bread making, those ratios are what give us that perfect soft, chewy final product.
Here is exactly what you need for 8 pieces of incredible naan:
- 1 cup plain yogurt (Full-fat is my non-negotiable choice!)
- 1 teaspoon sugar
- 1 teaspoon baking soda
- 2 1/2 cups all-purpose flour, plus more for dusting
- 1/2 teaspoon salt
- 1/4 cup warm water (We might not use all of it, so have it ready!)
- 2 tablespoons melted butter or ghee, for brushing
- For Garlic Naan: 2 cloves garlic, minced, mixed with 2 tablespoons melted butter
Ingredient Notes and Substitutions for Naan Bread
Okay, let’s slow down on a couple of these items because they really impact the outcome. For the yogurt, please use full-fat plain yogurt if you can get it. That fat content makes an enormous difference in keeping the final naan soft and pliable—it prevents that dry, cracking texture you sometimes see. If you skip the yogurt, you could try mixing whole milk with a splash of vinegar to mimic the acidity, but honestly, the texture won’t be quite the same.
Also, when we get to the end, that melted butter or ghee brushed on immediately is non-negotiable for keeping the flatbread from drying out as it cools. If you’re making Garlic Naan, mix up those garlic butter ingredients right now—minced garlic mixed into melted butter. Having that scented butter ready to go makes the finishing step lightning fast!
How to Prepare Your Skillet Naan Bread
Alright, time to get our hands messy! This is where the magic of homemade naan comes together, and I love that we only need a basic skillet for this whole process. If you want that authentic look and texture—the puffed-up bubbles and the slight charring—we need to pay attention to heat control. This isn’t like making pancakes; we want this skillet roaring hot for our Skillet Naan Bread. Just follow these steps, and you’ll be scooping up curry in no time!
Mixing the Dough and Resting for the Best Naan Bread
First up, wake up that yogurt! Mix your yogurt, sugar, and baking soda and let it sit for about five minutes until you see it start to get a little foamy. That’s the leavening action starting! Next, fold in your flour and salt. It’ll look shaggy at first, which is fine. If it seems too dry and won’t come together, add a tablespoon of that warm water until it’s manageable. Now, turn it onto your counter! Kneading is important here; you need to work that dough for a good 5 to 7 minutes until it stops sticking quite so much and feels smooth and elastic. This kneading develops the structure so you get that satisfying chewy flatbread quality later on.
Once you hit that smooth stage, pull the dough apart into 8 even pieces. Roll them into balls, cover them with a clean towel, and walk away for 15 minutes. Seriously, don’t skip the rest! If you try to roll them out now, the gluten will fight you, and you’ll end up with tough disks instead of soft naan.
Cooking the Naan Bread on the Stovetop Bread Method
While those little dough balls are resting, get your heavy skillet—cast iron is my MVP here—on the stovetop over medium-high heat. It needs to get screaming hot. We are cooking this completely dry, no oil! Once it’s hot, take one dough ball and roll it out thin, about 1/8 of an inch thick. Oval or teardrop shape looks the most authentic, but honestly, shape doesn’t matter when it tastes this good.
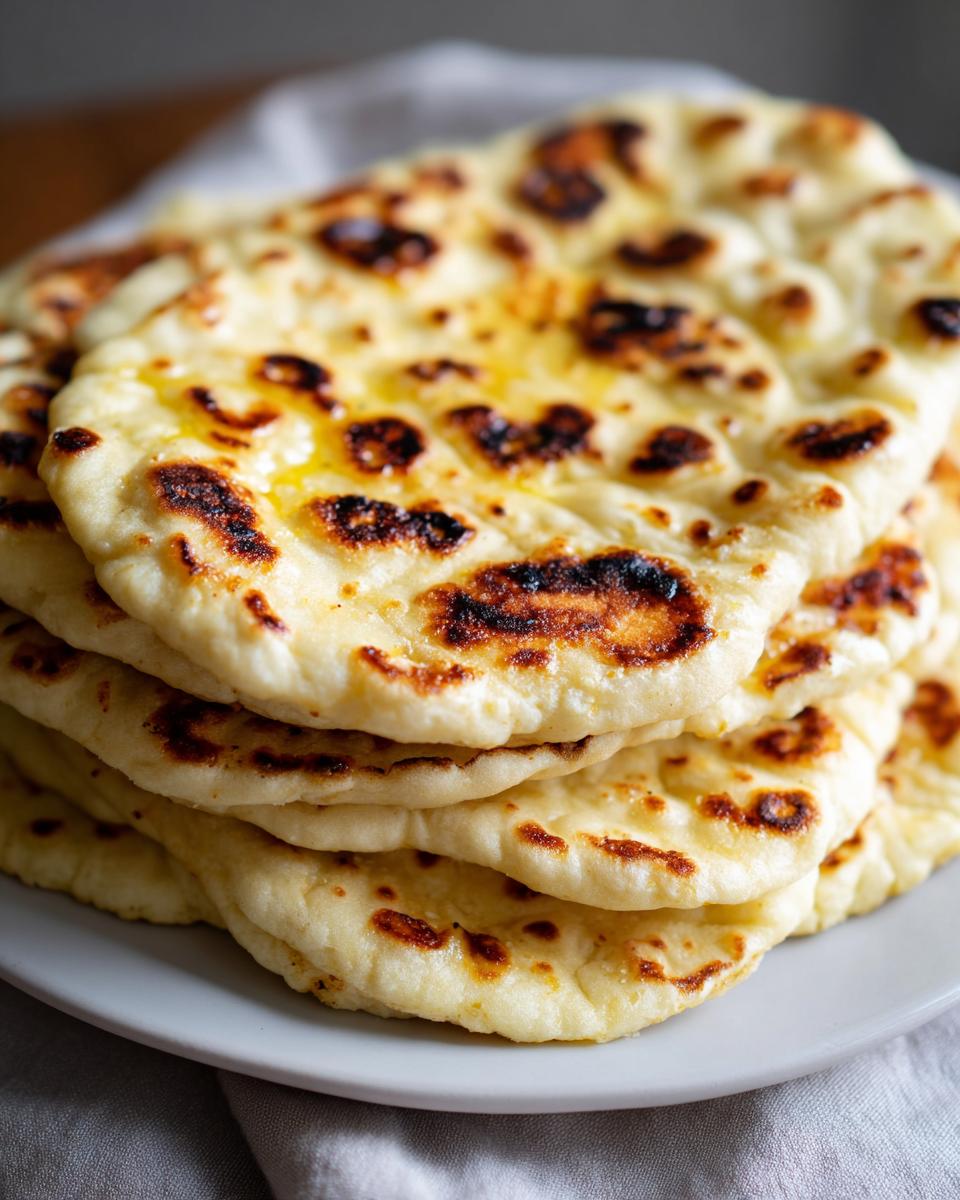
Lay the dough gently on the sizzling pan. You should hear it immediately! Cook it for just 30 to 60 seconds until it starts puffing up with bubbles. Flip it over, cook for another minute until you see those gorgeous little scorched spots forming. If you want that *real* restaurant look for your stovetop bread, carefully use tongs to hold the bubbled naan directly over a gas flame for just a few seconds—it’ll balloon up instantly! This entire cooking process is speedy, which is why this is such a great quick naan recipe.
Finishing Touches for Buttery Naan
Okay, your naan is cooked—it’s beautifully puffed up and golden spotted from that hot skillet. This next step is the absolute key to locking in moisture and getting that irresistible flavor profile. When you pull each piece off the heat, you need to brush it immediately with melted butter or ghee. Don’t wait! If you let it sit for even a minute, it can start to stiffen up, and we absolutely want soft, pliable naan for dipping.
This is what elevates it from just “flatbread” to truly Buttery Naan. If you made the garlic option, this is when you generously swipe that fragrant garlic butter all over the top. Oh my goodness, the smell alone makes this worth the five minutes of effort!
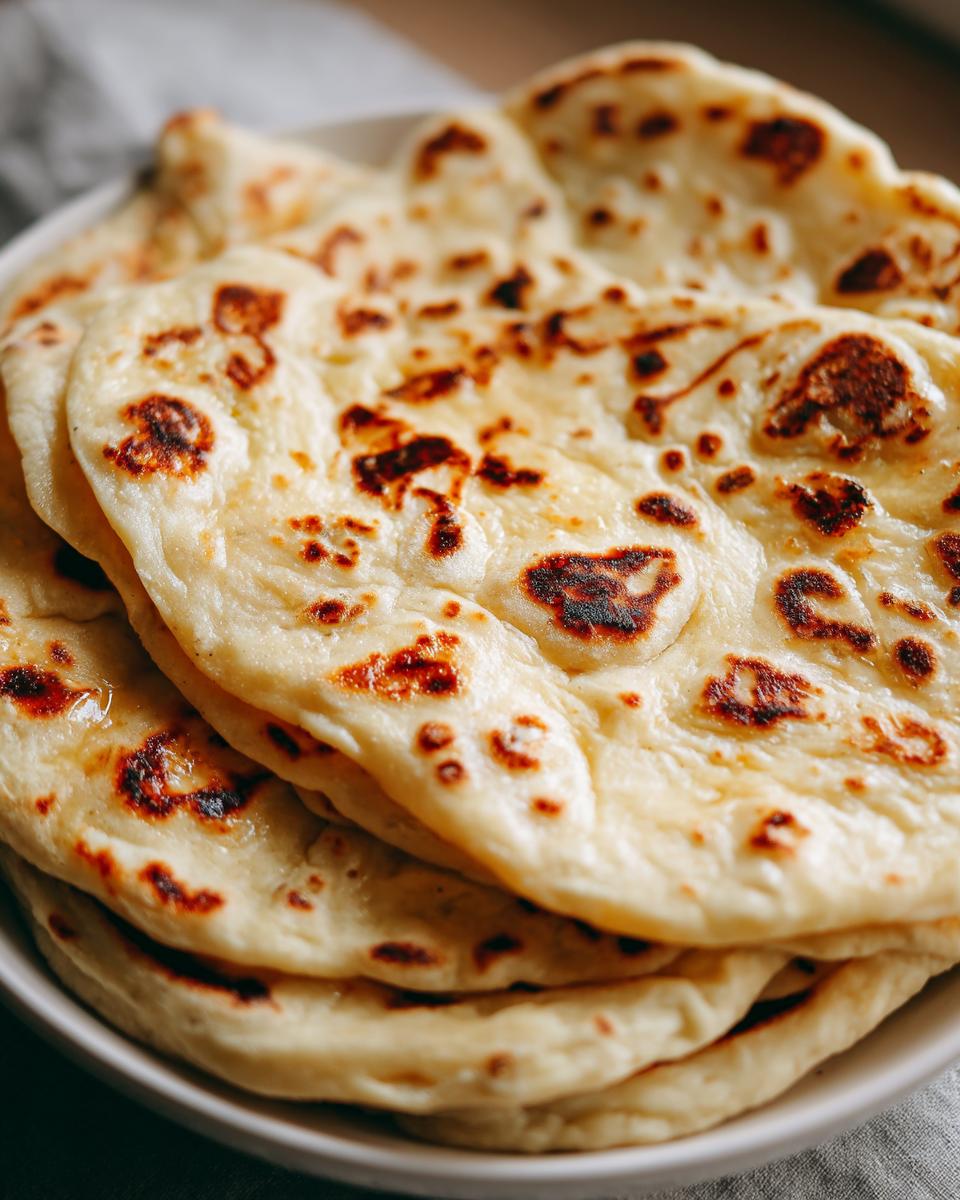
Once brushed, stack them up on a plate and cover them gently with a clean kitchen towel. This traps the steam created by the melted butter and keeps the whole stack wonderfully warm and tender while you finish the rest of the batch. Seriously, serving this right away while it’s still warm is the best way to enjoy your fresh **naan bread**.
Tips for Success with Your Homemade Naan Recipe
I want you to have the absolute best experience making this Homemade Naan Recipe. Cooking bread on the stovetop can sometimes lead to surprises, but trust me, these little bits of accumulated knowledge will keep you far away from anything tough or flat. Think of this as the cheat sheet I wish I had when I was first starting out and trading my takeout nights for real cooking!
Here are my top three essential tricks for making sure your naan turns out perfectly blistered and soft every single time:
- Don’t Crowd the Pan: Seriously, do not try to cook two naans at once, even if your skillet is huge. You need that blazing heat to hit the dough directly without interference. If you overload the pan, the temperature drops instantly, and you end up steaming your dough instead of searing it, which makes it rubbery. Cook one at a time, keep the others covered, and work quickly.
- The ‘Hotter Than You Think’ Test: When you think your skillet is hot enough for the stovetop bread method, make it hotter! If you drop a tiny speck of flour onto the dry pan and it sizzles and browns immediately, you’re ready. If it just sits there or smokes sluggishly, wait longer. That initial blast of heat causes the dough to puff up fast, which is crucial for softness. If you are looking for an even quicker version with zero yeast, check out this yeast-free bread alternative, though I still prefer this yogurt version!
- Keep Them Stacked and Covered: Once a naan is cooked and brushed with butter, place it on a plate and immediately cover the stack with a clean tea towel. This traps the steam that the butter releases, which is what keeps the bread pliable and stops it from firming up into a cracker while you finish the remaining dough balls. Warm, steamy layers equal perfect, soft naan bread!
Variations: Making Garlic Naan and Other Quick Naan Recipe Ideas
Now that you’ve mastered the base recipe for this incredible homemade naan, it’s time to play around a little bit! While the plain, buttery version is perfect for almost anything, I know so many of you are after that fragrant, savory takeaway taste, and luckily for us, that’s super easy to achieve right here at home. This is your ticket to making incredible Garlic Naan!
If you prepared the small bowl of garlic butter during the ingredient prep, you’re way ahead of the game. You simply use that mixture instead of plain melted butter when brushing the naan immediately after it comes off the hot skillet. It clings beautifully to the slightly blistered surface and infuses that wonderful sharp, savory flavor throughout the soft bread. Seriously, I use this version anytime we have soup or just want a snack!
But we don’t have to stop at garlic. Because this dough is so simple and doesn’t rely on a long yeast proofing time, you can fold in other additions during the last minute of kneading before you divide it up. This is great for adding a little fresh flavor to your Quick Naan Recipe.
Adding Herbs and Spices to the Dough
For a fresh twist that works wonderfully with richer curries, try incorporating about two tablespoons of finely chopped fresh cilantro or parsley right when the dough is becoming smooth. You have to work fast because you don’t want to over-knead once the herbs are in, but even a little bit adds a lovely pop of color and freshness. If you prefer something a bit earthier, try mixing in a teaspoon of nigella seeds (or Kalonji) into the dry flour before you mix the wet ingredients. These little seeds pop when they cook and give the dough a beautiful, authentic, rustic look.
It’s all about making this recipe your own, but my honest advice? Master the plain one first so you know exactly how tender your dough should feel. Then, definitely stock up on garlic because that’s the variation everyone asks me for again and again. For more ideas on perfecting that savory topping, you can check out some inspiration over at this garlic naan guide!
Serving Suggestions for Naan Bread for Curry
Now that you have this heavenly batch of soft, pillowy naan bread fresh off the skillet, the real fun begins: figuring out what to eat it with! This isn’t just a side dish; it’s the edible vehicle for all those rich, slow-simmered sauces you love. Honestly, the best use you can find for this perfect Indian Bread Recipe is undeniably scooping up every last bit of a fantastic curry. Don’t feel guilty leaving the spoon in the bowl—the naan is meant for that!
When I make a big pot of something flavorful, I always double the naan batch because everyone gravitates toward it. And because it’s so reliable and ready so fast, it’s the perfect accompaniment for a busy night when you want something deeply satisfying that doesn’t take hours.
Here are my absolute favorite ways to use this Naan for Curry:
- The Soak Mop: Classic Chickpea Curry (Chana Masala) or creamy Butter Chicken. The slightly chewy texture of the naan holds up beautifully to thicker sauces, while the plain variety lets the spices shine.
- The Wrap Base: Once cooled slightly, use a piece to wrap up leftovers like roasted vegetables or chicken tikka. It’s faster than making a sandwich, and you still get that soft, fluffy bread experience.
- The Dip Delivery System: If you’re having a snack spread, serve it alongside some homemade raita or even hummus. The buttery naan dipped into something cooling is just divine.
You absolutely have to try serving it alongside a vibrant stew. I made a batch last week to go with my Jamaican Curry Chicken, and the soft naan absorbed the bright, complex broth perfectly. It truly elevates any meal!
Storage and Reheating Instructions for Soft Fluffy Bread
Okay, I know you’re going to nail this recipe so thoroughly that you might actually have leftovers, which is a rare and wonderful thing! The absolute best way to enjoy naan bread is fresh off the skillet, but if you do have some leftover—maybe you made a double batch for a party—we need to protect that lovely, soft texture. Remember how we stacked them and covered them with a towel right after brushing them with butter? That’s the secret to keeping them pliable even when they cool down.
For storage, the enemy is air. Air dries out any bread, and we want to keep this Soft Fluffy Bread feeling tender for dipping later. Store leftover naan in an airtight container or a zip-top bag. I often wrap them tightly in plastic wrap first, and then pop them into a reusable bag, just to be absolutely sure they don’t dry out in the fridge. They’ll usually stay perfectly good for about three days this way.
Now, here’s the important part: reheating. If you reheat them the wrong way, you end up with stiff, chewy cardboard. We need gentle heat to bring back that initial puff and softness. Do NOT just microwave them plain—that never works out well for flatbread! My favorite way to revive them is treating them exactly like we cooked them the first time.
Reviving Your Naan Bread on the Stovetop
Grab that same cast-iron skillet you used for cooking and set it over medium heat. You want it warm, not scorching hot like before. Place the naan directly onto the dry pan for about 20 to 30 seconds per side. This gentle heating reactivates the moisture trapped inside from the butter brush, and you’ll see it puff up beautifully again. It takes almost no time at all!
If you are in a real rush and only have one piece that needs warming immediately, a short burst in the microwave—maybe 10 seconds—wrapped in a slightly damp paper towel can do the trick in a pinch. But I always recommend the skillet if you have 2 minutes, as it gives you that fresh-from-the-oven texture back, making it taste just like a fresh batch of homemade naan bread.
Frequently Asked Questions About Making Naan Bread
I know when you start bread making, especially when diving into something new like this amazing stovetop flatbread, questions pop up everywhere! It’s totally normal. We’ve covered the core recipe, but here are a few things I hear folks asking all the time about getting that perfect texture for their naan bread.
It’s all about making this recipe fit your real life. You might be wondering if you can swap ingredients or if it really is as fast as I claim. Let’s tackle those lingering doubts so you can feel confident hitting that skillet!
Can I make this naan bread recipe without yogurt?
That’s a super common question, especially if you find yourself out of yogurt when the craving strikes! You absolutely can make a version without yogurt, but you’re sacrificing a little bit of the signature richness and tang that makes this recipe my go-to. If you need an alternative, you can try mixing 1/2 cup of whole milk with 1/2 cup of water and adding a teaspoon of white vinegar or lemon juice and letting it sit for 5 minutes to curdle slightly. This replaces the liquid volume of the yogurt.
Just know this: the resulting dough will be slightly less rich, and the final chewy flatbread won’t have that subtle depth of flavor that full-fat yogurt brings. If you are really exploring minimalist baking and wondered about a true two-ingredient version, that usually relies on self-rising flour and sour cream, which is different chemistry entirely. For *this* recipe, the yogurt substitution works in a pinch, but it won’t be quite as perfect!
How long does this quick naan recipe actually take?
This is what I love most about this dough—it’s built for busy weeknights! If you follow the steps exactly, our total time is only about 35 minutes, which includes 20 minutes of prep and 15 minutes of cooking time. That includes the 15-minute rest period for the dough balls, which is non-negotiable for rolling, but doesn’t involve any long waiting.
If you’re thinking that feels too fast for bread, I get it! Most traditional recipes require at least an hour or two for yeast to proof. Because we use that yogurt and baking soda reaction, we skip all that rising time, keeping this a true quick naan recipe. If you want to see one of the fastest options out there—the true two ingredient naan variations—you can check that out, but I still stand by this one for better texture.
Can I skip the kneading step?
Oh, I wish you could, but no! Kneading develops the gluten, and gluten is what gives you that wonderful, stretchy, hold-onto-your-curry consistency. If you just mix it until it comes together and then immediately roll it out, you will end up with a very stiff, cracker-like bread that just snaps instead of tears. You need that 5 to 7 minutes of purposeful kneading to get that tender, perfect soft fluffy bread structure we are aiming for. It’s worth the few extra minutes, trust me!
Why did my naan bread come out flat instead of puffy?
This is almost always one of two things, and it usually happens during the cooking phase. First, your skillet wasn’t hot enough! If you put the dough on a lukewarm pan, it sits there and cooks slowly, letting all the steam leak out before it can puff up. You need medium-high heat and a pan that’s been heating up for at least 5 minutes until it’s smoking slightly. Second, if you rolled the dough too thin, there might not be enough structure left to trap the steam. Aim for about 1/8 inch thick—no thinner!
Is this recipe truly a No Yeast Bread?
Yes, absolutely! This is one of the biggest selling points for me when I need a delicious Indian bread recipe quickly. We rely entirely on the reaction between the baking soda (a base) and the lactic acid found in the yogurt (an acid) to create those carbon dioxide bubbles that puff up the dough. This way, we get a fantastic rise and soft texture without waiting for yeast to wake up, making this a perfect no yeast bread solution for any night of the week!
Estimated Nutritional Data for This Naan Bread
When we’re cooking meals from scratch, it’s always helpful to have a ballpark idea of what we’re eating when we reach for that second piece of delicious flatbread! Since we are working with simple, real ingredients like yogurt and flour for this naan bread, it’s surprisingly wholesome for a delicious treat.
The values below are estimated based on the full ingredients list provided in the recipe, assuming 8 equal servings. Remember, these are just guidelines—the exact numbers can vary based on the precise brands of yogurt or flour you use. Cooking at home gives you control over what goes in!
Here is the estimated nutritional breakdown per piece of plain, buttery naan:
- Serving Size: 1 piece
- Calories: 210
- Fat: 5 grams (with 3 grams being Saturated Fat)
- Carbohydrates: 37 grams
- Protein: 6 grams
- Sugar: 2 grams
- Sodium: 250 mg
- Fiber: 1 gram
- Cholesterol: 15 mg
As you can see, it’s a satisfying carbohydrate base for soaking up flavor, but it keeps the sugar quite low, especially compared to some highly processed commercial breads. It’s flexible, filling, and doesn’t weigh you down, which is why it pairs so perfectly with my favorite Indian bread recipes!
Share Your Homemade Naan Bread Experience
Well, we did it! We turned simple pantry staples into warm, glorious rounds of restaurant-style **naan bread** right on our own stovetops. Doesn’t that feel like a win? That aroma of butter and yeasty goodness filling your home is the ultimate reward for taking just a little bit of time to cook something truly satisfying.
I poured my heart into making this recipe straightforward because I believe that creating delicious food, even something as special as fluffy naan, should feel joyful, not stressful. Now that you’ve tried it, I truly want to hear all about it! Did you manage to get those beautiful char marks? Were you surprised at how quickly this quick dinner bread came together?
Please, don’t be shy! Scroll down and leave a rating below—let me know how many stars this homemade naan recipe gets in your rotation. If you had a moment to snap a picture of your warm, buttery stack ready for dipping, I would absolutely love to see it! You can tag me on social media or just send a note through my contact page. Hearing about your successes is genuinely my favorite part of building Misty Plate.
Knowing how this simple act of cooking brought a little warmth to your table is exactly why I share these recipes. Thank you for trusting me in your kitchen today. Go forth and tear that bread! Until the next simple adventure!
PrintSoft & Fluffy Homemade Skillet Naan Bread (No Tandoor Required)

Make restaurant-style naan bread at home using a simple skillet. This recipe delivers soft, chewy flatbread perfect for curry, without needing a tandoor or long rising times.
- Prep Time: 20 min
- Cook Time: 15 min
- Total Time: 35 min
- Yield: 8 servings 1x
- Category: Side Dish
- Method: Stovetop
- Cuisine: Indian
- Diet: Vegetarian
Ingredients
- 1 cup plain yogurt
- 1 teaspoon sugar
- 1 teaspoon baking soda
- 2 1/2 cups all-purpose flour, plus more for dusting
- 1/2 teaspoon salt
- 1/4 cup warm water (as needed)
- 2 tablespoons melted butter or ghee, for brushing
- For Garlic Naan: 2 cloves garlic, minced, mixed with 2 tablespoons melted butter
Instructions
- In a large bowl, mix the yogurt, sugar, and baking soda. Let this sit for 5 minutes until it becomes slightly foamy.
- Add the flour and salt to the yogurt mixture. Mix until a shaggy dough forms. If the dough is too dry, add warm water, one tablespoon at a time, until the dough comes together.
- Turn the dough out onto a lightly floured surface and knead for about 5 to 7 minutes until it is smooth and elastic.
- Divide the dough into 8 equal pieces. Roll each piece into a ball, cover them with a clean kitchen towel, and let them rest for 15 minutes.
- Heat a heavy-bottomed skillet or cast-iron pan over medium-high heat until it is very hot. Do not add oil to the pan.
- Working with one ball at a time, roll the dough into an oval or teardrop shape, about 1/8 inch thick.
- Place one piece of rolled dough onto the hot, dry skillet. Cook for about 30 to 60 seconds until bubbles start to form on the surface.
- Flip the naan and cook the second side for another 30 to 60 seconds until brown spots appear. If you want more charring, you can briefly place the cooked side directly over a gas flame using tongs for a few seconds, but this step is optional.
- Remove the cooked naan from the skillet and immediately brush the top generously with melted butter or ghee (or garlic butter, if making Garlic Naan).
- Repeat with the remaining dough pieces, stacking the finished naan and covering them lightly to keep them warm and soft.
Notes
- For the softest texture, use full-fat plain yogurt.
- If you skip the resting time, your naan may be tougher to roll out.
- Brush the naan with melted butter immediately after cooking to keep it pliable and prevent it from drying out.
Nutrition
- Serving Size: 1 piece
- Calories: 210
- Sugar: 2
- Sodium: 250
- Fat: 5
- Saturated Fat: 3
- Unsaturated Fat: 2
- Trans Fat: 0
- Carbohydrates: 37
- Fiber: 1
- Protein: 6
- Cholesterol: 15