
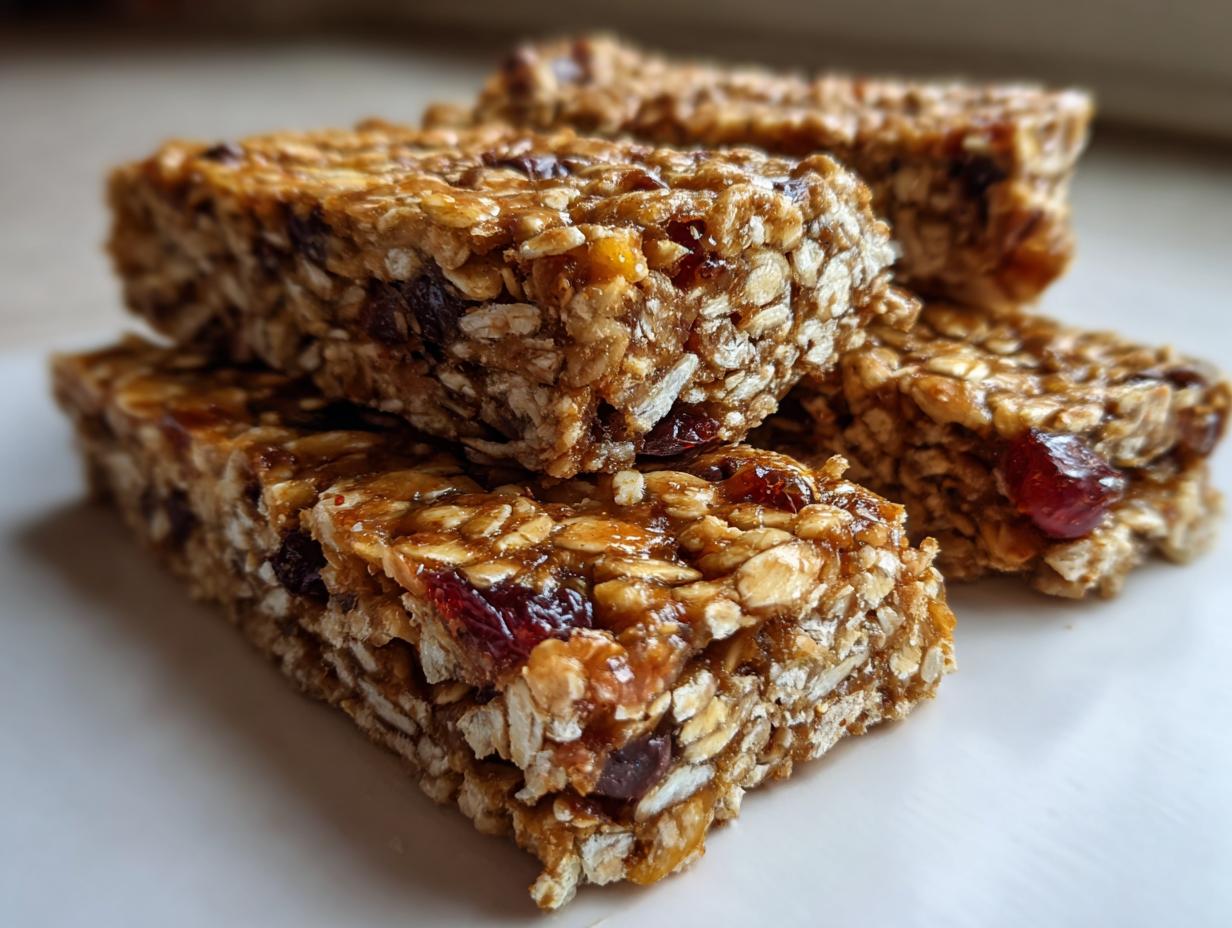
You know those days when the craving hits, but the thought of firing up the oven feels like too much work? I totally get it. Life in the city, even after I slowed down the pace, still means needing food that keeps up with me! That’s why I cherish this recipe for the ultimate easy no bake granola bars. Since coming back to simple, nourishing food, I’ve realized the best things—the things that truly fuel you—don’t need complexity or high heat. These bars are my answer for a quick, chewy, healthy grab and go snack that’s absolutely perfect for meal prep. We’re skipping the bake time completely, relying on the magic of peanut butter and honey to hold everything together until it sets in the fridge. If you’re looking for other fast no-bake options, check out my easy protein balls! Trust me, you won’t miss the oven one bit!
- Why You Will Love These No Bake Granola Bars
- Ingredients for Your Easy Granola Bars Recipe
- Essential Equipment for Perfect No Bake Granola Bars
- Step-by-Step Instructions for Making No Bake Granola Bars
- Tips for the Best Chewy No Bake Granola Bars
- Customizing Your No Bake Granola Bars
- Storing and Keeping Your No Bake Bars Fresh
- Frequently Asked Questions About No Bake Granola Bars
- Nutritional Estimates for These Simple Homemade Granola Bars
Why You Will Love These No Bake Granola Bars
Sometimes the simplest recipes are the ones we stick with, right? These fit that bill perfectly. I know you need snacks that are reliable, delicious, and don’t take up your entire afternoon. That’s why I’m obsessed with this method!
- Zero Oven Time, Maximum Flavor: Seriously, we aren’t turning on the stove or the oven. These are true refrigerator snack bars, meaning less heat in the kitchen, especially during the summer months.
- The Perfect Chew: We are aiming for that satisfyingly chewy granola bars texture, not something crunchy or crumbly. The balance of oats and binder is just right for that soft bite.
- Meal Prep Powerhouse: These are built for your weekly routine. Whip up a batch on Sunday, and you have healthy grab and go snacks ready for the entire week. They truly are amazing meal prep bars.
- Kid Friendly Snacks No Bake Approved: My niece insists these look and taste better than the boxed stuff. They are easy enough for older kids to help assemble, too!
- Customization is Key: You control what goes in them. Nuts, seeds, dried fruit—whatever you have on hand works beautifully, making them versatile energy bars without baking.
You can find plenty of other ideas for busy days by checking out my guide to quick, healthy lunch ideas, but these bars are always my first recommendation when time is scarce!
Ingredients for Your Easy Granola Bars Recipe
When you’re making something that doesn’t bake, the quality of your ingredients really shines through! Since there’s no heat to mask anything, we rely on good, wholesome stuff to give these easy granola bars recipe its flavor and structure. I listed everything out below. You’ll notice we keep the base very simple, which leaves tons of room for fun additions later.
Remember, the binder is the most important part here. If you use a natural peanut butter that is really oily or runny, you might need slightly less of the liquid sweetener, or it might need a tiny bit more chilling time. Always aim for creamy peanut butter if you can—it seems to bind better when melted. For alternative options, almond butter or even sunflower seed butter work beautifully! If you’re ever looking for great ways to use oats in other fast recipes, take a peek at my creamy banana oatmeal.
Here is exactly what you need for a perfect 8×8 inch batch:
- 3 cups rolled oats (Don’t use instant; they get too mushy!)
- 1 cup creamy peanut butter (or your favorite nut butter alternative)
- 2/3 cup honey or maple syrup (Use maple syrup for a vegan option!)
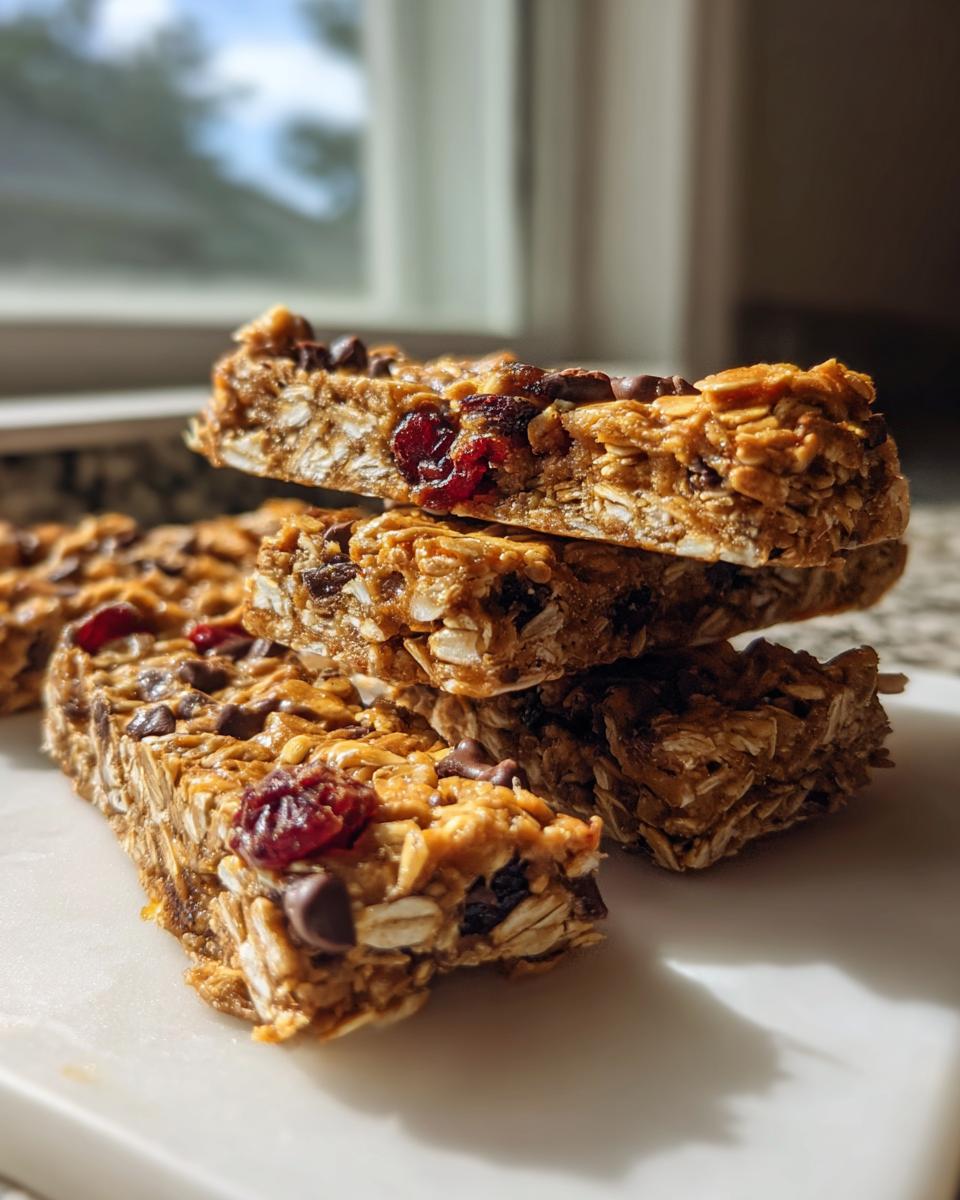
- 1/2 cup mix-ins – this is where you get creative! Think chopped nuts, dried fruit bits, or mini chocolate chips.
- 1 teaspoon vanilla extract
- 1/4 teaspoon salt (This really helps bring out the sweetness!)
This simple combination is the foundation for incredible homemade snack bars that you’ll be proud to share.
Essential Equipment for Perfect No Bake Granola Bars
Because we aren’t using the oven, we don’t need sheet pans or fancy mixing bowls, which I love! But having the right setup makes this go from a 15-minute job to a 10-minute job, and every minute counts, right?
For these easy oat bars no oven, you really just need a few staples. I’ve listed what you’ll need below. Don’t worry if you don’t have an 8×8 pan; a 9×9 works great too, it’ll just make your bars a little thinner!
- 8×8 Inch Pan: This is the gold standard size for the right thickness. Make sure it’s sturdy!
- Parchment Paper: This is non-negotiable! Seriously, save yourself the mess. You want enough overhang to use it like a sling to lift the whole block out later.
- Large Microwave-Safe Bowl: Our binding mixture (honey and peanut butter) gets warm and melty, so we need a bowl big enough to hold that liquid plus all 3 cups of oats without serious spillage. Careful when you take it out—it gets hot!
- Sturdy Spatula: You need something robust to mix those thick oats into the sticky binder. A silicone spatula is perfect for scraping down the sides of the bowl.
- Sharp Knife and Cutting Board: Once they’re chilled, you need a good, sharp knife to get those clean squares.
That’s it! Minimal cleanup and maximum snack payoff. Nothing complicated when we make these quick no bake treats.
Step-by-Step Instructions for Making No Bake Granola Bars
Okay, here is where the magic happens! Since we aren’t dealing with hot ovens, the process is more about mixing correctly and then chilling patiently. Follow these steps exactly—especially that pressing step—and you will have incredible no bake bars that don’t crumble under pressure. Once you finish assembling, you can start looking up simple appetizers and snacks for your next gathering!
Preparing the Pan and Binding Mixture
First things first: grab that 8×8 pan and line it with parchment paper. Make sure the paper hangs over the sides! That overhang is your handle later. Next, in your large microwave-safe bowl, mix the peanut butter and honey. Microwave this for about 30 to 45 seconds until it gets nice and runny. You want it smooth enough to stir easily. Finally, stir in your vanilla extract and salt until everything is happy and combined. That’s the glue for our easy granola bars recipe!
Mixing and Pressing the No Bake Bars
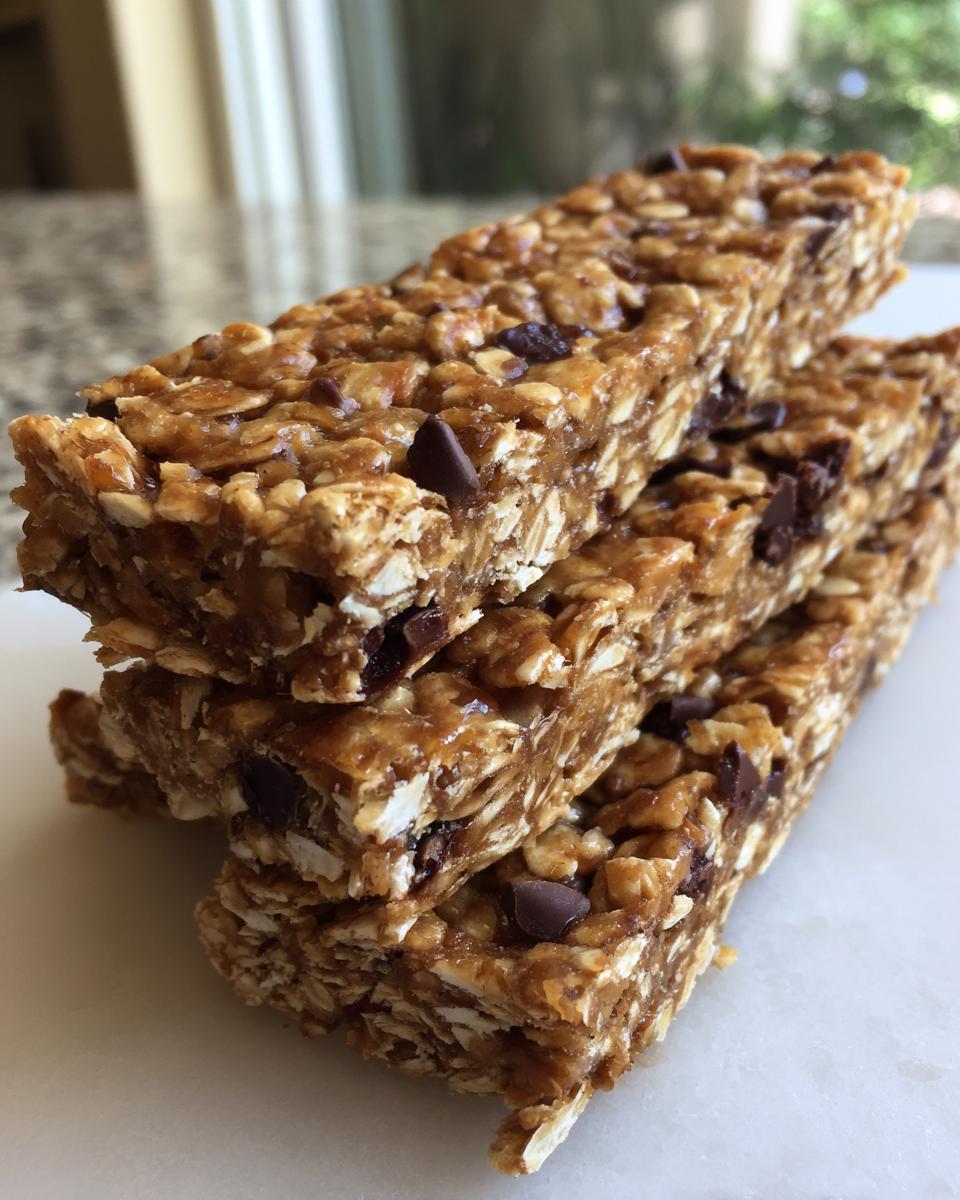
Now, dump in your 3 cups of rolled oats and all those wonderful mix-ins! Stir it really well. You have to work slightly fast here while the binder is warm, making sure every single oat flake gets coated by that sticky peanut butter mixture. This next part is where most people rush, but don’t! Dump the whole sticky mess into your prepared pan. Using a spatula or the bottom of a clean glass, press that mixture down as firmly as you physically can. I mean really press it! The tighter you pack them now, the more perfectly they hold together once set.
Chilling, Cutting, and Storing Your Homemade Snack Bars
Once you have a beautifully flat, dense surface, that pan needs to chill out. Put it in the refrigerator for a minimum of 2 hours. Honestly, if you can leave it for 3, do it—that extra time guarantees they won’t be messy. Once they are completely firm, use those parchment paper handles to lift the whole block out onto your cutting board. Slice into 12 or 16 pieces, depending on how big you like your refrigerator snack bars. Store them in an airtight container right in the fridge!
Tips for the Best Chewy No Bake Granola Bars
I’ve tried tweaking this recipe a million times, okay, maybe just a few dozen, but I always come back to the original base because it just works for that perfect chew! When you’re making no bake bars, the consistency is everything. If you want them reliably firm every single time, pay close attention to these little nuances. It’s the difference between a perfect snack bar and a sticky mess on your fingers!
For instance, the recipe calls for 2/3 cup of honey, but if you notice your peanut butter is super runny, try cutting that honey down just slightly—maybe to 1/2 cup plus two tablespoons. This slight reduction in liquid sweetener is one of the keys to preventing too much spreading and achieving that great firmness. If you adjust the sweetener, always test a tiny pinch of the mixture first to make sure it still tastes good!
I also want to mention the oats. While the recipe uses rolled oats, sometimes people ask if they can use quick oats. If you must use quick oats, be warned: they absorb liquid faster. If you swap them in, you need to mix them in much quicker and press them into the pan immediately because they’ll start to bind up on you right in the bowl. For the best texture, stick to the rolled oats!
When we talk about mix-ins, especially if you are preparing these as kid friendly snacks no bake treats, I always recommend chopping your dried fruit finely. Big chunks of dried apricot can sometimes prevent the bar from sticking together properly around them. Small pieces integrate better into that binding matrix.
And remember that hint about toasting the oats? It’s optional, but wow, does it add depth! If you do toast them to make even better simple homemade granola, you absolutely must let them cool down to room temperature before mixing them with the warm binder. If you add cold oats to warm honey, the honey thickens up too fast and you end up with clumps instead of an even coat. It pulls the whole structure apart!
These little tricks add up to fantastic healthy grab and go snacks that look professional. If you want more effortless morning recipes, you can always browse my collection of easy breakfast recipes!
Customizing Your No Bake Granola Bars
The beauty of this recipe for no bake granola bars is that once you nail that binder ratio—the honey and peanut butter—you can pretty much throw in anything that looks good! This is where we turn a great, simple snack into YOUR favorite snack. It’s so adaptable, making it easy to keep stocked with different flavors throughout the year. Plus, if you’re trying to use up bits and pieces from your pantry, this is the perfect spot to do it!
If you’re looking to switch up the texture, swapping out the mix-ins is the easiest way to get new flavor profiles. I’ve experimented quite a bit over the years, especially when trying to sneak in extra healthy bits for my family. If you’re looking for ways to use fruit in baked goods that are super simple, you might want to check out my moist banana zucchini bread!
Here are some of my favorite ways to change things up and create different kinds of energy bars without baking:
- Nut Swaps: If you’re avoiding peanuts or just bored with peanut butter, almond butter is a wonderful second choice. Cashew butter works too, though it tends to be a little softer, so you might need to chill those bars longer.
- Adding Seeds for Crunch: Toss in shelled sunflower seeds, pumpkin seeds (pepitas), or even hemp hearts for a nutritional boost and some nice texture contrast against the chewiness of the oats.
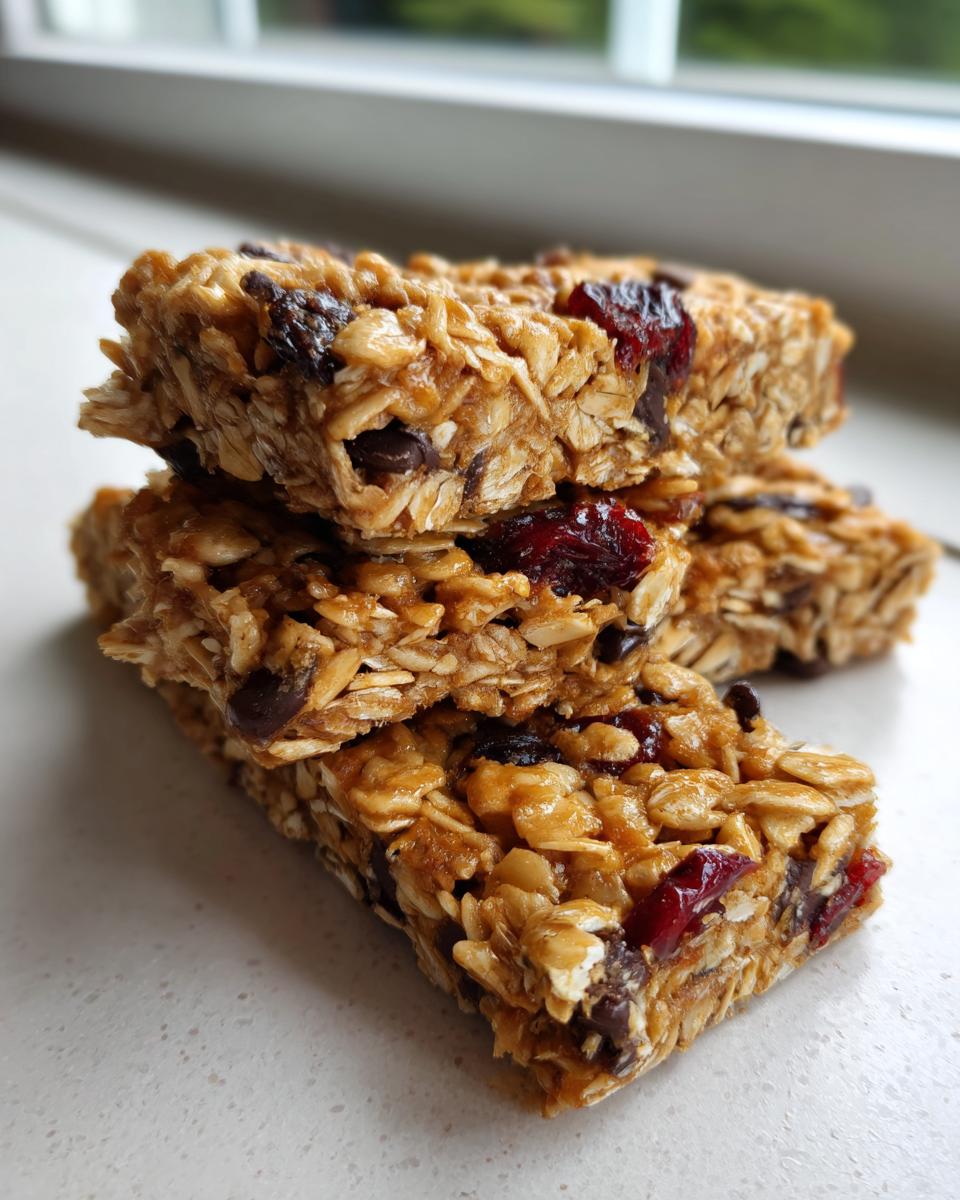
- Fruit Power: Go beyond raisins! Dried cherries, chopped apricots, or finely chopped dried mango offer a little zing that balances the sweetness of the honey. Make sure they are chopped small so they don’t interfere with the pressing stage.
- Chocolate Chip Variation: Sure, we listed mini chips, but if you go for dark chocolate chunks or white chocolate chips, the flavor changes dramatically! For a richer taste, try adding a sprinkle of unsweetened coconut flakes with the chocolate.
- Sweetener Experimentation: While honey and maple syrup are the go-to binders, sometimes I like using brown rice syrup if I want a slightly less sticky bar overall. Just remember that different syrups have different binding strengths, so you might need to adjust the liquid slightly to keep the mixture right.
Remember, these are designed to be easy! Don’t stress too much about perfect measurements when it comes to your custom add-ins—just aim for about 1/2 to 3/4 cup total of ‘stuff’ on top of your base oats so you don’t throw off the critical binding ingredients.
Storing and Keeping Your No Bake Bars Fresh
Since these are homemade snack bars and we aren’t using any stabilizing preservatives, storage is key to maintaining that perfect chewy texture! If you make a big batch for your weekly needs, you absolutely must treat them right so they last until Friday. These are best categorized as refrigerator snack bars because that cold temperature keeps the honey and peanut butter binder firm and prevents any sogginess.
When I make a double batch for a busy week of lunches, here is my exact routine:
- The Container Matters: You need an airtight container, for real. If you leave them in a loosely covered dish, the oats start to absorb fridge odors and the top gets a little dry. I usually use a glass container with a tight-fitting lid.
- Separation is Smart: If you’re stacking these, you have to separate the layers. Just cut squares of parchment paper or wax paper and place one sheet between each layer of bars. This keeps things tidy! If you skip this step, you’ll end up peeling two or three bars apart every time you want a snack.
- In Fridge, Up to One Week: I’ve tested this extensively! They stay perfectly fresh, moist, and firm for about 7 days when stored this way in the refrigerator. They get even firmer overnight, which I love, but they are still totally soft enough to bite into easily.

If, by some miracle, you manage to have any left over after a week, they freeze perfectly well too! Wrap them individually in plastic wrap and pop them into a freezer bag. They thaw on the counter in about an hour, tasting almost as good as fresh. It’s another reason why these are the best weeknight dinner ideas—you prep once, you eat all week!
Frequently Asked Questions About No Bake Granola Bars
When you’re making something that relies on gravity and chilling instead of heat, you always have a few questions pop up! I completely understand. We want these homemade snack bars to be perfect every time, whether they are going into a lunchbox or headed straight into my mouth during an afternoon slump. Here are the common sticking points I hear about most often!
What if my no bake bars won’t hold together?
Oh, I hate when that happens! Usually, this comes down to one of two things: either the binder ratio is off, or you didn’t press hard enough. If the mixture feels too crumbly when you mix it, you need a bit more sticky binder—add another tablespoon of honey or maple syrup and mix it in thoroughly. If the mixture feels too wet, you need more dry stuff, so add 1/4 cup more oats! The other huge factor is chilling time. You MUST chill them for at least 2 hours. Don’t rush this step; that time in the refrigerator sets the binding agents properly. For the firmest result, try the extra chilling time!
Can I make these peanut butter granola bars no bake without nuts?
Absolutely, yes! These are fantastic as-is, but if you have an allergy or just want to change things up, you can easily omit the chopped nuts entirely. If you do, I strongly recommend boosting the other textures so they don’t feel too uniform. Try increasing your dried fruit by 1/4 cup, or add in 1/4 cup of seeds like flax or chia. Since seeds are small, they integrate really well and still give you some great texture in these quick no bake treats.
Also, if you’re looking for other ways to skip the oven in your baking routine, don’t hesitate to reach out! You can always find my contact information right here.
Nutritional Estimates for These Simple Homemade Granola Bars
I always feel better when I know what’s truly going into my body, especially when I’m grabbing a bar on the way out the door. Knowing these no bake bars are packed with oats and real peanut butter gives me peace of mind. But let’s be clear: because we are talking about homemade food, these numbers are solid estimates based on the exact base recipe I use.
If you decide to go heavy on the dark chocolate chips or load up on a ton of dried cranberries, those numbers—especially the sugar and fat content—are going to shift! The best part about making your own is tweaking the good stuff. If you are comparing these to other recipes, you can see these are wonderfully balanced! If you want a recipe that really boosts the protein, pop over and see my no bake protein balls post.
For the base recipe (12 bars, using standard peanut butter and just oats/honey/salt as the mix-ins), here are the general figures per bar:
- Serving Size: 1 bar
- Calories: 220
- Fat: 11g (Only 2g is Saturated Fat, the rest is good unsaturated fat!)
- Carbohydrates: 28g
- Fiber: 3g
- Protein: 7g
- Sugar: 10g
- Cholesterol: 0mg
- Sodium: 85mg
See? Not bad at all for a satisfying, energy-boosting snack that required zero oven time. That’s winning in my book!
PrintUltimate Easy No Bake Granola Bars: Chewy, Healthy & Ready in Minutes
Make these chewy, homemade granola bars without turning on your oven. This easy no bake granola bars recipe uses simple pantry staples for a healthy grab and go snack perfect for meal prep.
- Prep Time: 15 min
- Cook Time: 0 min
- Total Time: 2 hr 15 min
- Yield: 12 servings 1x
- Category: Snack
- Method: No Bake/Chilling
- Cuisine: American
- Diet: Vegetarian
Ingredients
- 3 cups rolled oats
- 1 cup creamy peanut butter (or other nut butter)
- 2/3 cup honey or maple syrup
- 1/2 cup mix-ins (e.g., chopped nuts, dried fruit, mini chocolate chips)
- 1 teaspoon vanilla extract
- 1/4 teaspoon salt
Instructions
- Line an 8×8 inch baking pan with parchment paper, leaving an overhang on the sides for easy removal.
- In a large microwave-safe bowl, combine the peanut butter and honey. Microwave for 30 to 45 seconds until the mixture is smooth and easily stirrable.
- Stir the vanilla extract and salt into the warm peanut butter mixture until fully combined.
- Add the rolled oats and your chosen mix-ins to the bowl. Stir well until all the dry ingredients are evenly coated with the binding mixture.
- Transfer the mixture to the prepared pan. Press the mixture down firmly and evenly into the pan using the back of a spatula or another piece of parchment paper. Pressing firmly helps the bars hold together.
- Place the pan in the refrigerator and chill for at least 2 hours, or until completely set.
- Use the parchment paper overhang to lift the block of granola out of the pan. Cut into 12 to 16 bars.
- Store the no bake bars in an airtight container in the refrigerator for up to one week.
Notes
- For a firmer bar, slightly increase the amount of nut butter or reduce the liquid sweetener by one tablespoon.
- You can substitute peanut butter with almond butter or sunflower seed butter for variety.
- For a richer flavor, lightly toast the rolled oats in a dry skillet before mixing, but allow them to cool completely first.
- These are excellent for kid friendly snacks; use mini chocolate chips for the best texture.
Nutrition
- Serving Size: 1 bar
- Calories: 220
- Sugar: 10g
- Sodium: 85mg
- Fat: 11g
- Saturated Fat: 2g
- Unsaturated Fat: 9g
- Trans Fat: 0g
- Carbohydrates: 28g
- Fiber: 3g
- Protein: 7g
- Cholesterol: 0mg