
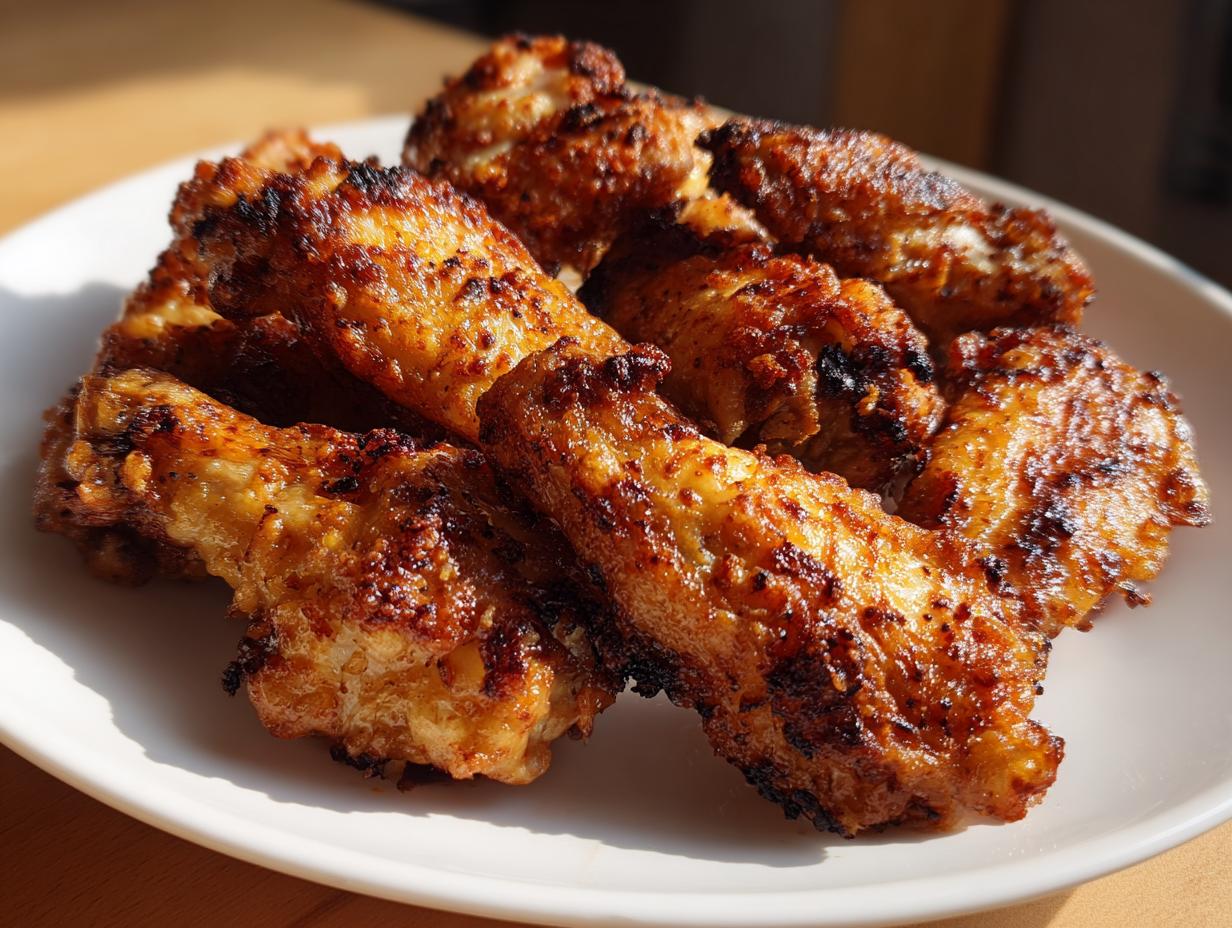
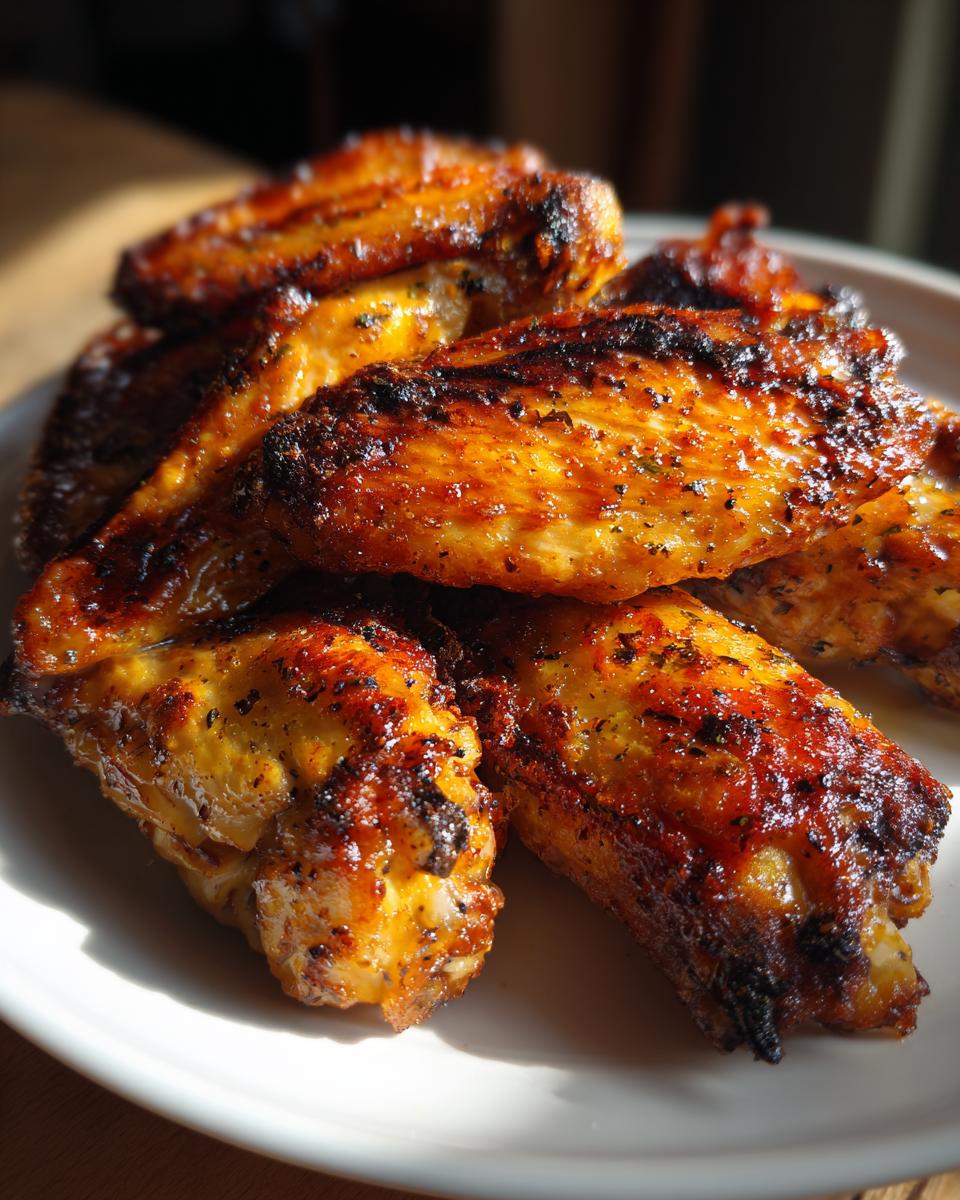
I swear, I spent years chasing that perfect, shatteringly crisp exterior on a chicken wing without having to deal with a giant vat of spitting hot oil. It felt impossible! When I first started cooking again, moving away from takeout and back to real food like my grandmother taught me, I needed reliable results from the oven. That’s why I treasure this simple methodology. Forget everything you think you know about soggy oven wings; this easy baked chicken wing recipe uses one tiny, common ingredient—baking powder—to guarantee you get that juicy meat wrapped in golden, crackling skin. Trust me, this technique is the key to making fantastic party food chicken week after week. If you need simple, crowd-pleasing ideas for busy nights, this formula is always a winner on my weeknight dinner ideas list!
- Why This Baked Chicken Wing Recipe Delivers The Ultimate Crunch (No Fry Wings)
- Gathering Ingredients for Your Perfect Chicken Wing
- Step-by-Step Instructions for Crispy Baked Chicken Wings Recipe
- Flavoring Your Baked Chicken Wings: Dry Rubs and Wing Sauces
- Tips for Success with Your Chicken Wing Batch
- Serving Suggestions for Game Day Chicken Wings
- Storage and Reheating Instructions for Leftover Chicken Wing
- Frequently Asked Questions About Crispy Baked Chicken Wings
- Nutritional Estimates for This Chicken Wing Recipe
Why This Baked Chicken Wing Recipe Delivers The Ultimate Crunch (No Fry Wings)
I know, I know, you’ve tried baking wings before and ended up with something sad and rubbery. I was there too, until I truly understood the science behind the crunch! This method transforms your oven into a powerhouse for creating oven fried chicken wings. The star player here is the baking powder; it’s not for leavening at all in this use. It actually raises the pH level of the chicken skin.
What does that mean for you? It means the baking powder helps break down proteins and speeds up the browning process, essentially drying out that skin super fast. That’s how we achieve that golden, crackling shell you normally need a deep fryer for. It makes this the best baked wing recipe around for texture fanatics. If you’re looking for amazing no fry wings that still pop, you absolutely need to try this trick. You can see the full science behind getting those perfect crispy baked chicken wings recipe details right here.
The Secret to Juicy Chicken Wings: Preparation is Key
Listen closely: if you skip this one step, the baking powder won’t work its magic properly. You must, and I mean *must*, pat your chicken pieces completely dry. Use a big stack of paper towels and press firmly until the skin feels almost tight and dry to the touch. Moisture is the enemy of crispiness! If there’s any residual water clinging to the skin, it will just steam in the oven, and we definitely aren’t making pot roast here; we want crunch!
Gathering Ingredients for Your Perfect Chicken Wing
Okay, now that we know the secret is in the powder, let’s talk about what goes into the bowl. For this recipe, simplicity is truly the heart of flavor, especially if you plan on tossing them in sauce later. You’ll need about two pounds of your favorite cut—I always grab a mix of flats and drumettes because everyone has a preference!
The main event, besides the wings themselves, is the baking powder. I stress this a lot because it matters: try to find aluminum-free baking powder if you can. It makes a subtle difference in the final taste, though any standard baking powder will still give you that great crunch. You only need about one tablespoon.
For seasoning, we keep it basic so the skin flavor pops. Think one teaspoon of kosher salt, half a teaspoon of black pepper, and then half a teaspoon of garlic powder. If you like a little heat right on the skin before you sauce them, toss in a quarter teaspoon of cayenne pepper, but that part is totally optional, you know I love to load up on heat!
Step-by-Step Instructions for Crispy Baked Chicken Wings Recipe
Alright, let’s get these beautiful wings into the oven! Remember, the goal here is mimicking that crispy texture without the grease, so oven setup is essential for this baked chicken wings recipe. First things first, get your oven blasting hot—preheat it to a roaring 425°F (220°C). Then, take your largest rimmed baking sheet and line it completely with foil; this saves you scrubbing later, trust me.
Next, you need that glorious wire rack. Setting that rack right on top of the foil-lined sheet is crucial because it lets the hot air circulate underneath the chicken wing. We are fighting steam at every turn! Once everything is set up, combine your baking powder, salt, pepper, garlic powder, and optional cayenne in a bowl. Toss those dried wings in there until every piece looks lightly dusted—not clumped, just coated!
If you need an easy bread or side dish companion while these cook, I have a fantastic skillet naan bread recipe that bakes up fast. We’ll get to sauces in a minute, but for now, we bake!
Coating and Arranging the Chicken Wing for Maximum Airflow
This is where people usually mess up their easy chicken wing appetizer! You have to arrange those coated wings on your rack in a perfect single layer. Seriously, space them out. If any wing is touching another wing, they will start steaming each other instead of getting dry and crispy in the oven’s heat. Give them room to breathe! They need that space so the dry heat can hit every single surface evenly.
The Two-Stage Baking Process for Ultra Crispy Chicken Wing
We bake them smart, not just long. Pop that pan in the oven and let them go for exactly 25 minutes. That first blaze of heat really starts drying out the skin. Then, pull the pan out carefully. You need to flip every single chicken wing over so the bottoms get just as golden as the tops. Back they go for another 20 to 25 minutes!
Flavoring Your Baked Chicken Wings: Dry Rubs and Wing Sauces
Now for the best part—making these crispy treats taste like whatever you are craving! The great thing about this base technique for your chicken wing is that the skin is already super crisp, so it holds up perfectly whether you go dry or wet. If you want amazing texture, use one of my favorite wing dry rub recipes and toss them immediately after they come out of that hot oven. Think bright Lemon Pepper Wings Recipe or a smoky dry blend!
If you are making something saucy, like a classic BBQ or one of my Honey Garlic Wings, wait just five minutes after pulling them out. This tiny break lets the skin cool just enough so it doesn’t go instantly soft when it hits the glaze. You want the surface to set up a little before you coat it. For ultimate flavor development that rivals the best wings you’ve ever had, check out these tips from a fellow baker here.
Tips for Sticky Glazed Wings
When you’re making those gorgeous sticky glazed wings, the thickness of your sauce matters a ton. If your sauce—whether it’s BBQ or something spicy—is running thin, pop it into a small saucepan on the stove for just a couple of minutes. Bring it to a quick simmer to reduce it slightly. Thicker sauce clings better and won’t soak into the crisp skin as fast, meaning those glorious juicy chicken wings stay crunchy longer for your guests!
Tips for Success with Your Chicken Wing Batch
When I first started perfecting this method, I dealt with plenty of unevenly cooked or slightly soggy results, so don’t worry if your first batch isn’t restaurant-perfect. The best chicken wing technique boils down to heat management. Always use that wire rack; seriously, do not try to skip it, because the bottom of the chicken wing will steam right against the metal pan otherwise.
Also, remember that time estimate is based on having a somewhat crowded rack, but never overlapping. If you are cooking for a huge crowd and have to do two batches, make sure the second batch goes into a fully preheated 425°F oven. Putting them into a cooling oven guarantees less crispness. If you ever need a quick fix alongside these wings, my ideas for quick healthy lunch ideas are perfect for filling out the rest of your meal!
Serving Suggestions for Game Day Chicken Wings
When the big game is on, or you suddenly realize you have company coming over, these crispy wings are the ultimate crowd-pleaser. Since they bake up so beautifully, they’re fantastic for making ahead of time. We aren’t just serving finger food here; we are setting the scene for a great gathering!
For a real touchdown spread, you need dips! Ranch dressing and blue cheese dressing are non-negotiable staples for any serious wing night. I like to put out both in separate little bowls so everyone can choose their favorite. If you need some other easy, no-fuss snacks to round out the spread while the wings finish baking, check out my list of simple appetizers and snacks.
To balance out the richness of the wings, you need something cool and crunchy on the side. Forget complicated sides; sliced celery and carrot sticks are perfect for scooping up extra dressing. They offer a great snap that contrasts nicely with that hot, crispy skin. It keeps the focus right where it should be—on the incredibly satisfying appetizer!
Storage and Reheating Instructions for Leftover Chicken Wing
I know it’s wishful thinking, but sometimes, miraculously, there are actual leftovers after a party. Don’t let those glorious, crispy beauties go to waste! Storing your leftover chicken wing correctly is just as important as baking them right in the first place. If you’ve sauced them already, make sure they are in an airtight container before they hit the fridge. They should keep nicely for three to four days, though honestly, the crisp will soften over time.
Now, here’s the crucial part: the reheating process. Please, for the love of all things crispy, do not put saucy wings in the microwave! You’ll end up with sad, soggy disappointment, and that defeats the whole purpose of using baking powder. The microwave melts the crisp right out of existence.
The best way to bring your chicken wing back to life is using that same trusty oven. Preheat it to about 375°F (190°C). Place any remaining wings on a clean wire rack set over a baking sheet. We need that air circulation again! Pop them in for about 8 to 10 minutes—just long enough to reheat the meat and absolutely crisp up that skin again. If you used a dry rub and they aren’t sauced, they might only need 5 or 6 minutes!
Frequently Asked Questions About Crispy Baked Chicken Wings
I always get so many questions when people try this recipe for the first time because the results are honestly shocking—especially compared to past failures! I’ve gathered the most common things folks ask me about reaching that perfect texture and when to add flavor boosts. Let’s clear up any confusion so your next batch of crispy chicken wings turns out flawlessly!
Can I use this technique for Honey Garlic Wings?
Absolutely, yes! That’s one of the wonderful things about this baking powder base: it sets up that perfect crisp crust that can stand up to almost any sauce—including sweet ones like Honey Garlic Wings. The key, and I can’t stress this enough, is timing. You must finish the baking process first. The wings need to be fully cooked and crispy before they ever kiss the sauce. Toss them immediately after they come out of the oven, or better yet, let them rest for just five minutes so the skin firms up a bit before coating them. This ensures you get that sticky, flavorful coating without losing all your hard-earned crunch.
Is this considered a Healthy Chicken Wings recipe?
I wouldn’t call it “diet food,” but compared to traditional frying, it’s definitely leaning towards the healthier side! Because we eliminate that huge amount of absorbed oil from deep-frying, you slash the fat content considerably. If you’re watching your intake, this is a fantastic way to enjoy your favorite appetizer. These are truly excellent no fry wings. We skip the grease but keep nearly all the satisfaction and flavor that you get from a good wing dry rub recipes application.
What if I don’t have a wire rack for my chicken wing?
Oh, I hear you! Not everyone has every gadget, and I certainly didn’t when I first started recreating these recipes years ago. If you skipped buying that crucial rack, don’t panic! The goal is to keep the bottom of the skin from sitting in its own rendered fat and moisture. You can achieve a decent approximation by doing this: use a heavy-duty metal baking pan—the same one you lined with foil—and instead of a rack, just use two sturdy metal cooling racks placed perpendicular to each other across the pan. The goal is just to elevate the wing off the direct metal surface so air can hit the bottom. If you don’t have two racks, use an inverted muffin tin placed on its side toward the end of the bake to prop up the wings slightly.
If you’re looking for simple ways to round out your meal preparation in general, sometimes I use these techniques to plan ahead for super easy easy breakfast recipes later in the week!
Nutritional Estimates for This Chicken Wing Recipe
Now, I just want to take a moment to show you what goes into these perfect wings from a numbers perspective. Remember, these estimates are calculated based on the ingredients listed in the main recipe, right before you toss them in any heavy BBQ sauce or dip them in ranch. If you add a thick layer of sweet glaze, those sugar counts are definitely going to jump up!
These figures reflect the wing itself, seasoned with the dry rub, serving four people total. I always remind folks that the beauty of cooking at home is that you are in complete control of what goes on your plate. If you need more inspiration for healthy eating throughout your week, you can always check out some of my easy breakfast recipes for balance!
Here is a general breakdown for what we estimate in about four wings:
- Serving Size: 4 wings
- Calories: 280
- Fat: 18g (with 5g Saturated Fat)
- Cholesterol: 95mg
- Carbohydrates: 1g
- Protein: 27g
- Sodium: 350mg
These are pretty straightforward numbers because we aren’t using heavy batters or frying oil! Just remember, this is an estimate, and the actual numbers will shift depending on the size of your cuts and the sauces you choose to finish them with. Enjoy them responsibly!
PrintUltra Crispy Baked Chicken Wings: The No-Fry Secret
Make shatteringly crispy baked chicken wings in your oven that rival fried versions. This easy recipe uses a simple technique to keep the meat juicy while achieving perfect, crackling skin every time. It is ideal for game day, parties, or a quick weeknight appetizer.
- Prep Time: 10 min
- Cook Time: 45 min
- Total Time: 55 min
- Yield: 4 servings 1x
- Category: Appetizer
- Method: Baking
- Cuisine: American
- Diet: Low Fat
Ingredients
- 2 lbs chicken wings (flats and drumettes separated)
- 1 tablespoon baking powder (aluminum-free preferred)
- 1 teaspoon kosher salt
- 1/2 teaspoon black pepper
- 1/2 teaspoon garlic powder
- 1/4 teaspoon cayenne pepper (optional)
Instructions
- Preheat your oven to 425°F (220°C). Line a large, rimmed baking sheet with aluminum foil for easy cleanup. Place a wire cooling rack on top of the prepared baking sheet.
- Pat the chicken wings completely dry using paper towels. This step is crucial for crispiness.
- In a medium bowl, combine the baking powder, kosher salt, black pepper, garlic powder, and cayenne pepper.
- Add the dried chicken wings to the bowl. Toss thoroughly until every piece is lightly and evenly coated with the baking powder mixture.
- Arrange the coated wings in a single layer on the wire rack, ensuring there is space between each wing for air circulation. Do not overcrowd the pan.
- Bake for 25 minutes.
- Flip each wing over. Return the pan to the oven and bake for another 20 to 25 minutes, or until the skin is golden brown and very crisp.
- Remove from the oven. You can serve the wings plain with a dry rub, or toss them immediately in your favorite wing sauce for sticky glazed wings.
Notes
- For extra flavor, toss the wings in a dry rub mixture immediately after baking, before adding any sauce.
- If you prefer a saucy finish, wait 5 minutes after removing the wings from the oven before tossing them in your chosen sauce. This helps the skin stay crisp longer.
- If you plan to make Honey Garlic Wings or Lemon Pepper Wings, prepare the sauce or seasoning blend separately and toss the wings after the final baking step.
Nutrition
- Serving Size: 4 wings
- Calories: 280
- Sugar: 0.5
- Sodium: 350
- Fat: 18
- Saturated Fat: 5
- Unsaturated Fat: 13
- Trans Fat: 0
- Carbohydrates: 1
- Fiber: 0
- Protein: 27
- Cholesterol: 95