
There is nothing, absolutely nothing, that screams comfort food louder than a big, steaming bowl of soup cradled inside a warm loaf of bread. Seriously, that perfect pairing turns an ordinary meal into an event! When I was working those long, crazy hours in the city, my kitchen felt like a distant memory, but coming back to that simple, grounding act of baking? That’s when I found my sanctuary again. Forget settling for flimsy store-bought containers; today, we are conquering the ultimate challenge: making truly bakery-style, soft bread bowls from scratch. I promise you, these edible soup bowls are strong enough to hold your thickest chili, and they pair perfectly with a restorative Italian comfort soup.
- Why This Is the Best Recipe for Homemade Bread Bowls
- Ingredients Needed for Soft Bread Bowls From Scratch
- How to Make Bread Bowls: Step-by-Step Baking Instructions
- Tips for Success When Baking Bread Bowls
- Serving Suggestions for Your Homemade Bread Bowls
- Storage and Reheating Instructions for Bread Bowls
- Variations: Beyond the Classic Yeast Bread Bowls
- Frequently Asked Questions About Making Bread Bowls
- Nutritional Estimate for Your Bread Bowls
- Share Your Success with These Bread Bowls
Why This Is the Best Recipe for Homemade Bread Bowls
I know you’ve seen those recipes that call for ten rises or three different types of flour, but we’re not doing that here. This recipe is built for real life. You need the results of a professional bakery without having to learn complex artisan techniques.
- You get the perfect balance: a wonderfully soft bread bowls from scratch interior that tears apart easily.
- The crust sets up firm and golden—no soggy bottoms when you pour in your creamy cream of chicken soup.
- These taste infinitely better than anything you buy pre-made. These are truly bakery style bread bowls, made by you!
Ingredients Needed for Soft Bread Bowls From Scratch
The beauty of these soft bread bowls from scratch is that they rely on pantry staples. You probably have everything you need right now! But precision matters here, especially with the water temperature, so grab a kitchen thermometer if you can. Trust me, happy yeast means happy bread!
For four perfect loaves, here is what you’ll need to gather:
- 1 packet (which equals about 2 1/4 teaspoons) active dry yeast. Make sure it’s fresh!
- 1 teaspoon granulated sugar. This is just for the yeast party, don’t skip it.
- 1 cup warm water—and this is important—it needs to be right between 105°F to 115°F. Too cold, and the yeast sleeps; too hot, and it dies.
- 3 cups all-purpose flour, plus any extra you need for dusting the counter later.
- 1 1/2 teaspoons salt. Get this measured out ahead of time.
- 2 tablespoons unsalted butter, melted. Make sure it’s just melted, not hot!
- 1 egg white, beaten with 1 teaspoon water. We use this as our egg wash for that gorgeous golden crust.
How to Make Bread Bowls: Step-by-Step Baking Instructions
Alright, let’s get baking! Learning how to make bread bowls successfully is all about patience during the rising stages. You’re going to follow the instructions exactly as they are written, giving the yeast the time it needs to work its magic. Don’t rush this part, and you’ll be rewarded with the softest dough you’ve ever worked with. If you prefer a quick bread recipe, check out my sourdough discard rolls while you wait for this batch to rest!
Activating Yeast and Mixing the Dough for Your Bread Bowls
Step one is where we wake up the yeast. In a small bowl, mix that warm water (remember, 105°F to 115°F!) with the sugar and yeast. Go make a cup of coffee while you wait five to ten minutes until it gets nice and foamy. That foam tells you the yeast is alive and ready! Then, whisk your flour and salt together in a big bowl, make a nice little well in the middle, and pour in the bubbly yeast mixture and that lovely melted butter. Stir it all together until you just have what’s called a shaggy dough. It won’t look smooth yet, and that’s totally normal for these bread bowls.
Kneading and the First Rise for Perfect Bread Bowls
Now we build structure! Turn that shaggy mess out onto a lightly floured surface. You need to knead this dough firmly for about six to eight minutes. You’re looking for elastic perfection—it should feel smooth under your hands when you’re done. Pop that smooth dough into a lightly oiled bowl, turn it over so it gets coated, and cover it up tight. Find a fairly warm spot in your kitchen and just let it sit there for an hour to an hour and a half. It needs to double in size completely. This step is critical for achieving those soft bread bowls we are aiming for!
Shaping and Baking Your Sturdy Soup Bowls Bread
Once it’s doubled, give the dough a gentle punch down—it’s actually really satisfying! Divide the dough into four equal pieces. Roll each piece into a taut, smooth ball. Remember, we want a nice, tight skin on the outside to make sturdy soup bowls bread! Place them on a parchment-lined baking sheet, cover them loosely, and let them rest for just 30 minutes for their second rise. While they rest, get that oven humming at 375°F (190°C). Brush every dome with your egg white wash—that’s what gives you that professional-looking golden color. Bake them for 20 to 25 minutes. They’re done when they look deeply browned and sound hollow when you tap the bottom. You can find inspiration for fillings here: a great bread bowl tutorial.
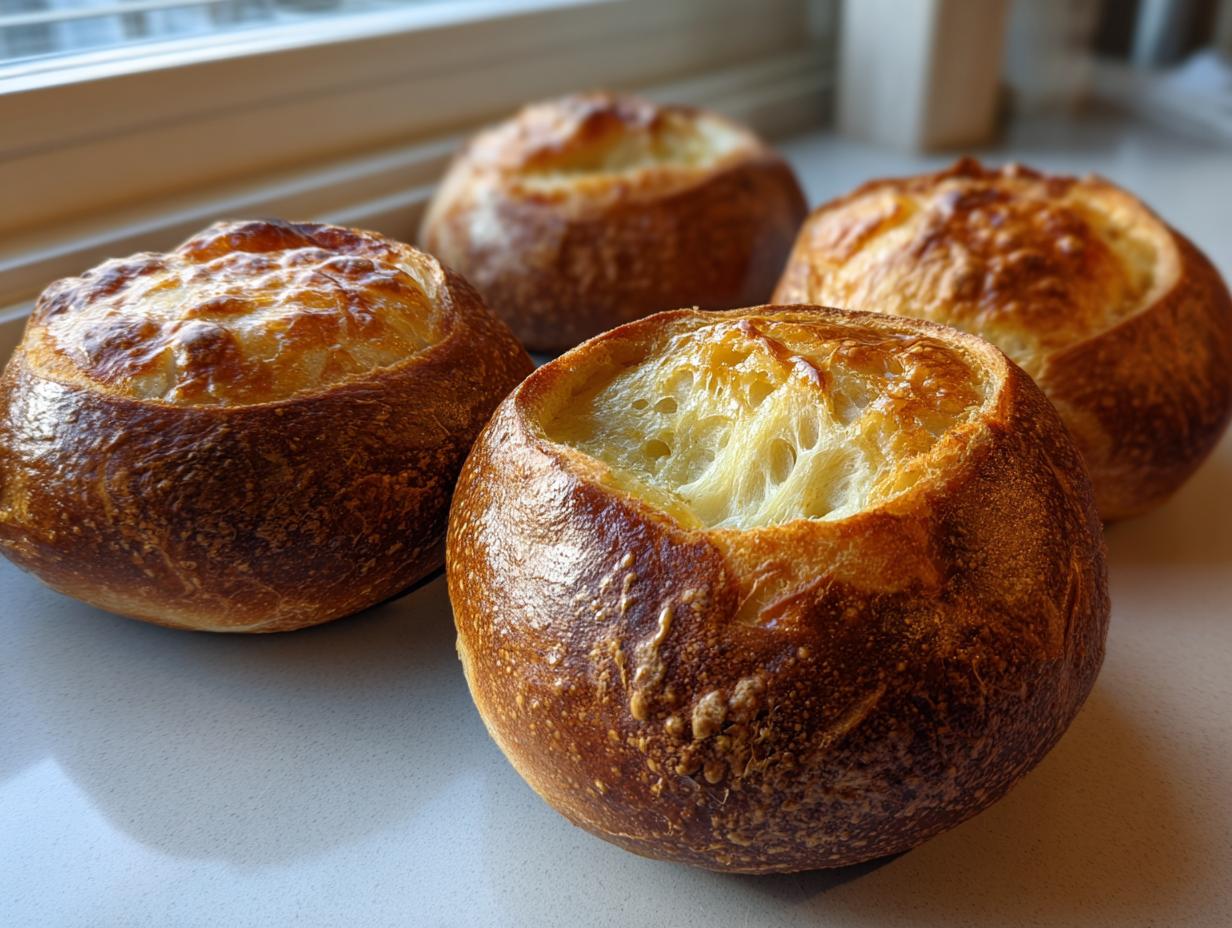
Hollowing Out the Edible Soup Bowls
This is where tons of people mess up, so listen closely! You have to let these bread bowls cool down completely, usually on a wire rack. If you try to cut them warm, the insides will get gummy and stick to the crust. Once they’re totally cool, take a serrated knife and carefully cut a circle right in the top of the loaf, leaving about a full inch border all the way around. Gently scoop out the soft interior bread—save every crumb! You want to leave a thick, sturdy wall so your soup doesn’t start weeping through the bottom. These hollowed-out shells are your perfect edible soup bowls.
Tips for Success When Baking Bread Bowls
Look, making great bread can feel intimidating, but that’s why I’m here to share the little tricks I learned over trial and error. For anyone trying this easy bread bowl recipe for the first time, these little adjustments make all the difference between a good loaf and a show-stopping dinner centerpiece.
My biggest tip for truly restaurant-quality bowls, the kind that hold a massive ladle of stew without collapsing? You need to dry them out just a tiny bit after hollowing. Grab those cooled, hollowed-out shells and pop them back into the 375°F oven—without the tops on—for an extra five minutes. This toasts the inside just enough to seal up any weak spots, making them super resilient. While these are baking, you can whip up some delicious garlic parmesan breadsticks using the bread you scooped out!
And please, please, please do not throw away that soft bread center! That’s a huge part of the budget-friendly, no-waste cooking philosophy I learned from my grandmother. Save that soft bread. It’s perfect for dunking the minute you serve your soup, or you can dry it out completely, cube it, and bake it low and slow for the best homemade croutons ever. Or, if you want another quick win, use those cubes to make a fantastic stuffing;
Don’t be tempted to over-proof during that second 30-minute rest. If they get too puffy, they might spread out too much in the oven, and you’ll end up with flatter loaves that make wider, less sturdy bowls. Just a gentle puff is what we’re aiming for before that final golden bake!
Serving Suggestions for Your Homemade Bread Bowls
So, you’ve achieved perfection! You have these beautiful, warm, sturdy bread bowls sitting on the cooling rack. Now comes the fun part: deciding what glorious, creamy substance will fill them! This is where homemade bread bowls truly shine compared to anything you can buy. They are built to handle heavy hitters.
The goal here is to use fillings that are thick and comforting, because that thick crust we worked so hard for deserves a hearty partner. Don’t skimp on the deliciousness inside your edible containers!
Creamy Soups and Stews That Demand a Bread Bowl
For the absolute classic restaurant experience—you know the one I mean—you have to go thick. A runny chicken noodle soup will just soak through too quickly, but something rich and cheesy? That’s heaven.
I cannot stress enough how much you need to pair these with a really decadent, thick recipe. Think about ladling a big scoop of our Loaded Baked Potato Soup right into the center. The creamy potatoes and sharp cheddar melt perfectly into the soft inside of the bread, and you can tear off chunks of the crust to eat alongside it. Also, my absolute favorite for a chilly evening is a fantastic, beefy slow cooker chili. The spices and the hearty texture just stand up so well to the chewy bread wall.
The Best Dips to Serve in Edible Soup Bowls
Sometimes you don’t want a whole meal in a bowl; sometimes you just want the best appetizer ever. That’s when you turn to hot dips! If you’re having friends over, I always bake the hollowed-out bread bowl for an extra five minutes just to dry the inside a bit more before I fill it. This keeps it extra resistant to grease.
A bubbling hot spinach artichoke dip or a three-cheese queso works wonderfully. You just spoon the dip right into the center, and the crisp, toasted bread on the inside edges soaks up all that glorious goodness. You can even use those bread tops you sliced off as the initial dippers before you break into the shell itself! If you want an incredible cheese experience, check out this great recipe for garlic bread bowls; it’s amazing.
Storage and Reheating Instructions for Bread Bowls
Making these meant I often ended up with more than we could eat in one sitting. Since these are yeast bread bowls, we need to handle storage carefully to keep that beautiful texture we worked so hard for! If you’ve baked the loaves but haven’t hollowed them out yet, you’re in really great shape. Those whole loaves are resilient little guys! You can wrap them up tightly in plastic wrap—make sure it’s airtight—and store them at room temperature for up to two whole days. They stay surprisingly fresh this way, ready for your next soup night.
Now, dealing with leftovers after they’ve held soup or chili is a different story entirely. Once the bread has absorbed liquid, it gets a little soggy once it cools. If you plan on salvaging any remaining bread once you’ve scooped out your meal, you have to dry it out immediately. Scrape out any gooey bits of soup clinging to the inside wall.
To revive the bread, whether it’s the leftover crust or the bread pieces you hollowed out, you have two options. The best way for the crust is to slice the loaf into thick wedges, brush them lightly with oil or butter, and toast them in a 350°F oven until they firm up again. This turns them into fantastic crunchy dippers for your next batch of dips, which really solidifies their role as usable recipe for edible containers!
If you end up with fully saturated, mushy bread after eating, honestly, toss it. It’s served its noble purpose holding up that heavy stew! The scooped bread that you saved before filling the bowls? That keeps well in an airtight bag on the counter for a day or two, ready to be turned into croutons or used as dippers right away.
Variations: Beyond the Classic Yeast Bread Bowls
Now that you’ve mastered the basic soft yeast dough—and I call this our blueprint recipe for all things comforting—I want to talk about switching things up! Just because this recipe works beautifully doesn’t mean we can’t experiment a little bit for our next big comfort food night. We’ve made the classic, sturdy base, which is fantastic for chili, but there are a couple of popular ways people transform these **bread bowls** for fun weekends or game days.
If you’re feeling ambitious and looking for that salty, chewy texture, you absolutely have to try making pretzel bread bowls recipe. The only real change you make to this dough is adding a step before baking: you dip each shaped loaf briefly into a simmering solution of water mixed with baking soda. Be careful, that solution is hot! That quick boil is what gives pretzels their signature color and tang. Because of that dip, they usually need just slightly less time in the oven compared to our standard bread bowls, so keep an eye on them.
Then there are the sourdough fans among us! While you can certainly use a sourdough starter instead of commercial yeast, know that it will totally change the rising time. You won’t be able to whip up sourdough **bread bowls** in two hours flat; you’ll need patience for a slow fermentation. If I’m using my discard, I usually tend to pivot toward an easier sourdough discard recipe, but if you want that tangy artisan bread bowl, just substitute the yeast/water/sugar for your active sourdough starter and let the dough rise slowly on the counter or in the fridge overnight. The resulting bowls have a lovely, complex flavor that’s amazing with French onion soup!
No matter which way you lean, the core principle remains the same: keep the dough tight when you shape it, and make sure you let it fully cool before you cut into it. That structural integrity is the secret sauce for any kind of edible container!
Frequently Asked Questions About Making Bread Bowls
It is totally normal to have a few questions when you tackle bread for the first time, especially when you need them to hold liquid! Don’t worry, we’ve all been there. Getting that perfect texture for your dinner recipes bread bowls is all about mastering a couple of key moments in the process. Here are the three biggest things people ask me about when they are trying this easy bread bowl recipe.
Can I make these bread bowls ahead of time?
Yes, you absolutely can, and I highly recommend it if you’re planning a big meal! If you bake the loaves completely but leave them whole (you haven’t cut the tops off or scooped them out yet), they store beautifully. Wrap those cooled loaves up super tightly in plastic wrap—I usually double-bag them—and leave them right on your counter at room temperature. They stay wonderfully fresh for up to two full days. That means you can bake them the day before your party, which frees up your oven time!
How do I ensure my bread bowls are sturdy enough for chili?
This is the make-or-break question! To get truly sturdy soup bowls bread that won’t leak chili or thick stew, you have to commit to that extra step I mentioned in the tips section. First, let the loaves cool completely before you even think about slicing the tops off. Second, after you’ve hollowed them out, brush the inside walls lightly with butter or oil, and pop them back into the oven for five more minutes at 375°F. This creates a slightly drier, sealed surface that locks out moisture. If you follow that, your bread bowls will hold up like champions!
What if my dough doesn’t rise properly for my bread bowls?
If your dough looks flat after the first rise, it almost always comes down to the yeast temperature or the age of your yeast. Remember how I stressed that 105°F to 115°F range for the water? If that water was too hot—say, straight from the tap after sitting on the stove—it killed your yeast before it could wake up. If it was too cold, it just took forever. If you’ve confirmed the water was warm enough and it’s still not bubbling up after 15 minutes, the yeast might be old and dead. Don’t panic! Just grab a fresh packet and start that step over with properly tempered water. The rest of the ingredients are fine, but you need that activated yeast to get the airy interior in these loaves.
Nutritional Estimate for Your Bread Bowls
I always like to give a little peek into what we’re putting into our bodies, even when it comes to comfort food baking! Remember, these estimates are based on the exact measurements in this recipe, assuming you get four perfect servings out of the recipe. If you eat two bowls and save one for dipping later, well, those numbers change!
This information is just to give you a general idea, not professional dietary advice, of course. Everything here tastes amazing, but in moderation!
Here is a rough breakdown per serving (one bread bowl):
- Serving Size: 1 bread bowl
- Calories: 350
- Sugar: 3 grams
- Sodium: 350 mg
- Fat: 5 grams
- Saturated Fat: 2 grams
- Unsaturated Fat: 3 grams
- Trans Fat: 0 grams (Hooray for real butter!)
- Carbohydrates: 68 grams
- Fiber: 3 grams
- Protein: 11 grams
- Cholesterol: 0 mg
Even though these are rich, hearty loaves made with delicious butter, they still manage to pack in 11 grams of protein. That’s the magic of a wholesome yeast bread! It might not be a low-carb dream, but it’s perfect when paired with a loaded potato soup or a hearty chili. Enjoy every bite!
Share Your Success with These Bread Bowls
Honestly, standing in your kitchen and smelling the final product is great, but seeing your beautiful creations out in the world? That’s the best reward for me! Baking is such a personal joy, and I truly love hearing how these recipes anchor your own meals and memories.
Once you’ve pulled your golden loaves out of the oven and figured out the perfect soup or dip to fill them with, I would absolutely love to hear about it. Did you manage to keep the walls perfectly sturdy? Did you make a classic chili, or did you go wild with a cheesy dip? Don’t keep all that comfort tucked away!
Please leave a rating right here on the recipe card. Five stars if these felt like the best homemade bread bowls you’ve ever tackled! Knowing what works for you helps me refine and improve things for everyone else in our Misty Plate family.
And if you snap a picture—because these loaves are gorgeous before they even get filled—tag me on Instagram or send it over through the contact page. Seeing that crusty top loaded up with creamy filling is the kind of thing that makes my day, every single time. Happy dipping, friends!
PrintUltimate Homemade Soft Bread Bowls: The Perfect Recipe for Soups and Dips

Learn how to make bakery-style, soft bread bowls from scratch. This recipe provides clear steps to create sturdy, edible soup bowls perfect for holding your favorite chili, stew, or creamy dip.
- Prep Time: 20 min
- Cook Time: 25 min
- Total Time: 2 hours 15 min
- Yield: 4 servings 1x
- Category: Baking
- Method: Baking
- Cuisine: American
- Diet: Vegetarian
Ingredients
- 1 packet (2 1/4 teaspoons) active dry yeast
- 1 teaspoon granulated sugar
- 1 cup warm water (105°F to 115°F)
- 3 cups all-purpose flour, plus more for dusting
- 1 1/2 teaspoons salt
- 2 tablespoons unsalted butter, melted
- 1 egg white, beaten with 1 teaspoon water (for egg wash)
Instructions
- Activate the yeast: In a small bowl, combine the warm water, sugar, and yeast. Let stand for 5 to 10 minutes until foamy.
- Mix dry ingredients: In a large bowl, whisk together the flour and salt. Create a well in the center.
- Combine wet and dry: Pour the yeast mixture and melted butter into the well. Mix with a wooden spoon until a shaggy dough forms.
- Knead the dough: Turn the dough out onto a lightly floured surface. Knead for 6 to 8 minutes until the dough is smooth and elastic.
- First rise: Place the dough in a lightly oiled bowl, turning to coat. Cover the bowl with plastic wrap or a clean towel. Let it rise in a warm place for 1 to 1 1/2 hours, or until doubled in size.
- Shape the bowls: Gently punch down the risen dough. Divide it into 4 equal pieces. Shape each piece into a tight, round ball. Place the balls on a baking sheet lined with parchment paper, leaving space between them.
- Second rise: Cover the dough balls loosely and let them rest for 30 minutes.
- Preheat oven: Preheat your oven to 375°F (190°C).
- Apply egg wash: Brush the tops of the dough balls evenly with the egg white wash. This helps achieve a golden crust.
- Bake: Bake for 20 to 25 minutes, or until the bread bowls are deep golden brown and sound hollow when tapped on the bottom.
- Cool: Transfer the bread bowls to a wire rack to cool completely before hollowing them out.
- Hollow the bowls: Once cool, use a serrated knife to carefully cut a circle in the top of each loaf, leaving about a 1-inch border. Gently scoop out the soft interior bread, leaving a sturdy wall for your filling. Save the scooped bread for dipping.
Notes
- For sturdier edible soup bowls, bake the hollowed-out shells for an additional 5 minutes after removing the tops to dry out the interior slightly.
- If you are making these ahead of time, wrap cooled, uncut loaves tightly in plastic wrap and store them at room temperature for up to 2 days.
- The scooped-out bread makes excellent dippers for your soup or cheese dip.
Nutrition
- Serving Size: 1 bread bowl
- Calories: 350
- Sugar: 3
- Sodium: 350
- Fat: 5
- Saturated Fat: 2
- Unsaturated Fat: 3
- Trans Fat: 0
- Carbohydrates: 68
- Fiber: 3
- Protein: 11
- Cholesterol: 0