
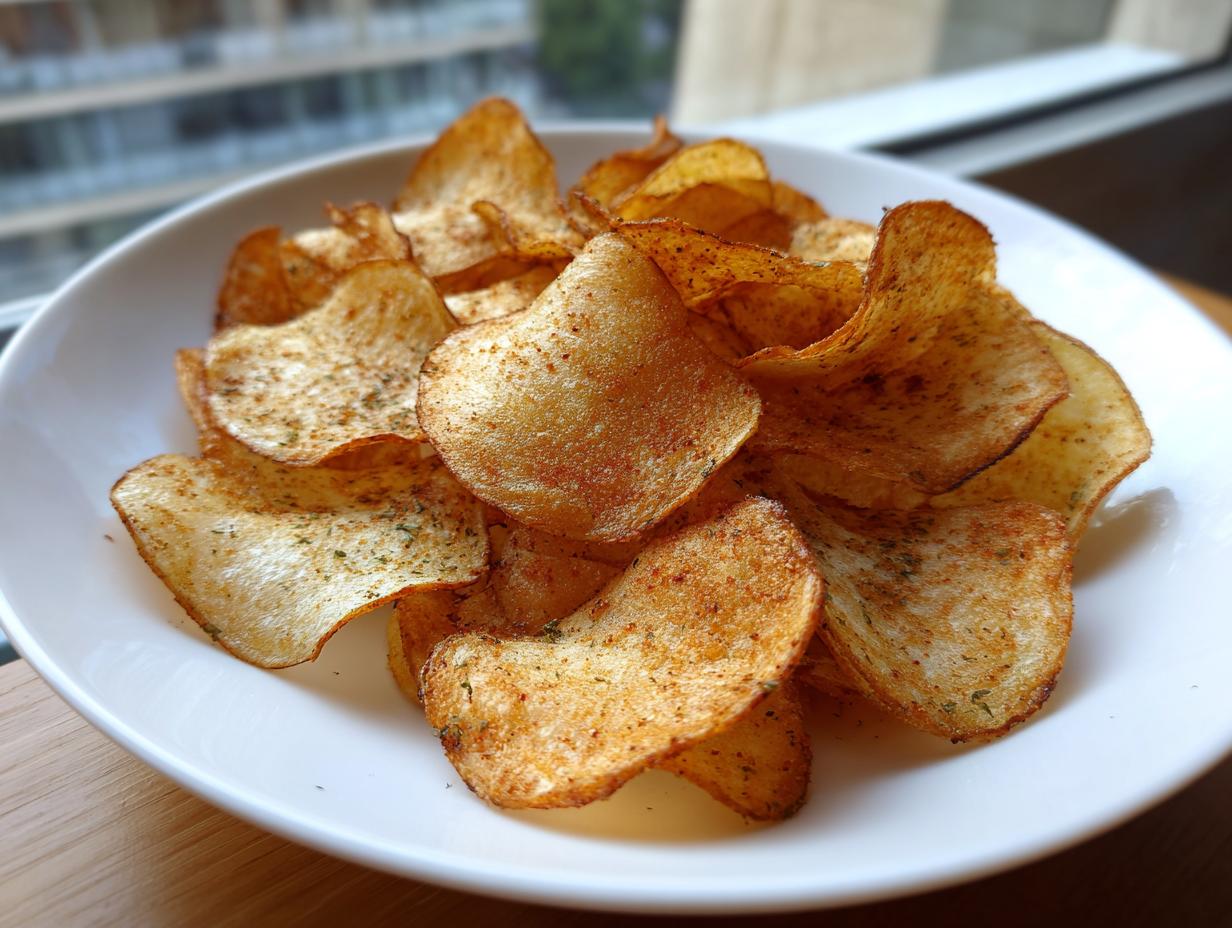
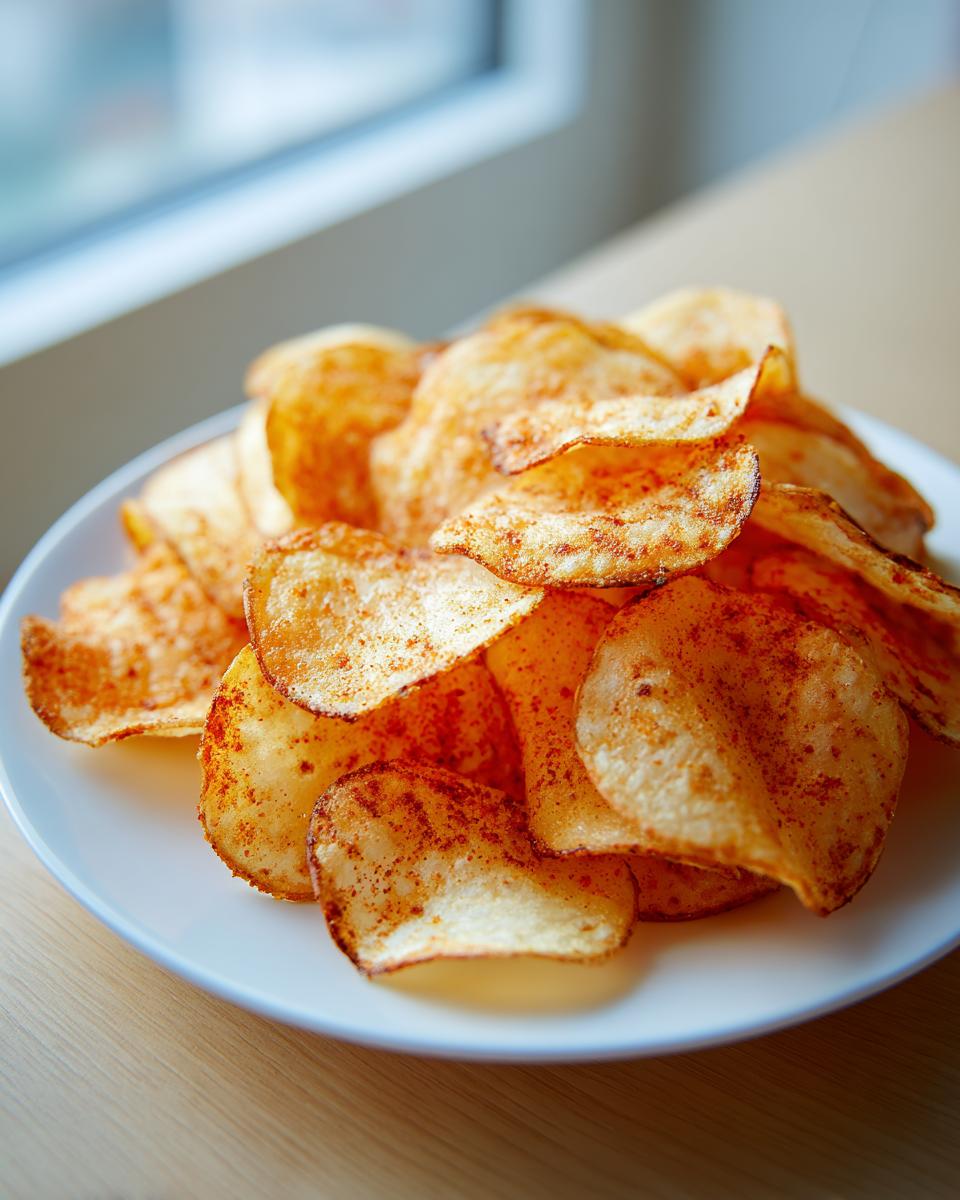
Oh, that sound! You know the one I mean—that perfect, sharp snap that only the crunchiest snack can deliver. I’ve spent years trying to replicate that magic outside of a factory, and I finally cracked the code for truly satisfying, homemade potato chips. Forget those stale bags hidden in the pantry; we’re making golden, shatteringly crisp slices right here in your own kitchen. This is about bringing simple joy back to snacking, whether you’re leaning toward the oven or firing up the air fryer. It’s food made with care, designed for real life.
- Why This Is the Best Potato Chips Recipe You Will Make
- Ingredients for Ultimate Crispy Homemade Potato Chips
- Step-by-Step Instructions for Perfect Potato Chips
- Tips for Success with Homemade Potato Chips
- Creative Potato Chip Seasoning Ideas
- Storage and Reheating Instructions for Your Potato Chips
- Serving Suggestions for These Easy Homemade Snacks
- Frequently Asked Questions About Crispy Potato Chips Recipe
- Share Your Homemade Potato Chips Creations
Why This Is the Best Potato Chips Recipe You Will Make
Honestly, I haven’t touched a bag of store-bought chips since I perfected this technique. They just can’t compete with the flavor and that perfect texture you get when you make them yourself. We’re cutting out mysterious oils and preservatives entirely, focusing on making truly guilt free chips that satisfy the deepest craving for a satisfying crunch recipes.
Here’s why this recipe beats the bagged stuff every single time:
- You control the salt and seasoning 100%.
- The slice thickness is perfectly uniform (especially if you use a mandoline!).
- You get that unbeatable freshness that simply fades on store shelves.
- We use simple pantry staples for maximum flavor impact. We even have some fun ideas over here if you want to load them up for a party. Check out these loaded ideas!
Achieving Maximum Crunch: The Starch Removal Secret
If you skip this step, I promise you, your slices will turn out floppy, not crispy. See, potatoes are full of starch, and starch turns into gummy stuff when it gets hot. We need to trick the potato! By soaking those thinly sliced beauties in cold water for at least half an hour—or even longer if you have time—we convince the starch molecules to leach out into the water.
When you drain and dry them super well after that soak, those starch molecules are gone, meaning nothing is left behind to interfere with the crisping process in the oven or the air fryer. It’s simple food science, and it’s the foundation of the crunch!
Ingredients for Ultimate Crispy Homemade Potato Chips
When you’re aiming for that perfect, light texture, the ingredients really do matter—though honestly, there isn’t much here! We are keeping this super simple so you can focus on the technique. You likely have everything for these simple potato recipes in your pantry right now.
Here’s exactly what you’ll need to gather before you start slicing:
- 3 large Russet potatoes (These have the right amount of starch for the best texture, trust me!)
- 2 tablespoons olive oil (This is for tossing the slices before baking or air frying.)
- 1 tablespoon olive oil (We use this sparingly for the air fryer method, or you can use a light oil spray instead.)
- 1 teaspoon fine sea salt, or to taste (Fine salt sticks better than coarse varieties.)
- 1 teaspoon garlic powder
- 1/2 teaspoon paprika (This gives them that lovely golden tint!)
- A small pinch of black pepper
That’s it! We aren’t loading these down with a hundred spices because the real flavor here is the perfectly cooked potato. If you’re organized, this whole prep process is incredibly quick.
Step-by-Step Instructions for Perfect Potato Chips
Alright, this is where the magic happens! Remember, technique is everything when you’re aiming for that elusive crunch. Don’t rush the drying part—it’s the barrier between a crispy snack and a soggy mess. Once everything is prepped, we’ve got two wonderful paths to chip heaven: the oven or the air fryer. If you follow these directions, you’ll have the crispiest potato chips on the block, guaranteed! You can read a bit more about the philosophy behind my recipes over at Misty Plate.
Preparing the Thinly Sliced Potatoes
First things first: wash those potatoes—skins on! You want them super thin, about 1/16 of an inch is my goal. If you have a mandoline, now is the time to pull it out because uniformity is key for even cooking. Once sliced, immediately drop them into a giant bowl of very cold water. Let them take a bath for at least thirty minutes to wash away all that excess starch.
When that’s done, pull them out and spread them all over a couple of clean kitchen towels. You must pat them until they are bone dry. I mean ridiculously dry. If they feel damp at all, they won’t crisp up properly.
Method 1: Making Crispy Baked Potato Chips
Preheat your oven to 375°F (190°C). Line those baking sheets with parchment paper—this really helps them brown nicely and prevents sticking. Toss your super-dry slices with the oil and seasonings until they are lightly coated. Spread them out onto the prepared sheets in a single layer. Don’t let them touch! They need space to breathe and crisp. Bake these oven baked chips for about 15 to 20 minutes total, making sure to flip them halfway through. Keep an eye on them in the last five minutes; they go from golden to burnt quickly!
Method 2: Quick Air Fryer Chips
This method is fast, which is great when you need a snack pronto. Set your air fryer temperature to 350°F (175°C). Lightly spray the basket with oil or use a very light coating on the slices we already seasoned. Work in small batches because overcrowding the basket is the number one enemy of crispy air fryer results.
Pop the first batch in and cook for 10 to 15 minutes. The crucial part here is shaking the basket every five minutes. That movement flips them around so they cook evenly. When they look golden and feel rigid, they’re ready to come out. Check out this air fryer resource for a visual reference!
Tips for Success with Homemade Potato Chips
I know we focused on baking and air frying, but I have to mention the classic route for those days when you need mega indulgence. If you decide to go for deep-fried crispy baked snacks, please, please use a neutral oil like canola and make sure it hits exactly 350°F (175°C). Frying in oil that’s too cool equals greasy, soggy chips. Fry tiny batches!
Now, back to keeping your oven or air fryer batches perfect: the biggest pitfall is under-drying or overcrowding. If you see steam rising off your potatoes in the oven too long, pull them out, blot them again with a paper towel, and put them back in. A little extra attention saves the whole tray from becoming leathery disappointment.
If you want to see some other great takes on crunch, check out some advice from Laila over here—she has fantastic tips for seasoning variations, too! See Laila’s favorites!
Creative Potato Chip Seasoning Ideas
Okay, so you’ve mastered the crunch for your basic, salty potato chips—that’s step one! But now, let’s talk about making them fun! I love having three or four different seasoning jars ready to go when I make a big batch. It makes serving them up for game day or a party so much more exciting than just plain salt.
If you want a little tang and smoke, try making a quick BBQ blend. You can mix smoked paprika, a little brown sugar (or a sugar-free substitute!), onion powder, and a pinch of salt. It tastes incredible on both baked and fried versions.
For something creamy, ranch seasoning mix is brilliant, or you can make your own ‘ranch dust’ with dried dill, parsley, garlic powder, and dried buttermilk powder if you happen to have it. And if you need a real kick, a simple mix of cayenne and a tiny bit of lime zest goes a long way. Seriously, check out how flavorful these low-calorie honey BBQ versions are; it proves you don’t have to load up on oil for big flavor! They have a great smoky recipe idea!
Storage and Reheating Instructions for Your Potato Chips
Okay, I won’t lie to you—these homemade crispy slices are at their absolute peak texture about ten minutes after they come off the rack. That fresh-from-the-oven smell is just unbeatable, and the crunch is unreal right then. So, if you can eat them all immediately, please do!
But if you have leftovers (which sometimes happens, I suppose!), you need to be smart about how you store them so you don’t lose that hard-earned crispiness. The enemy here is humidity, so never, ever put them in the fridge or a loosely covered jar. That moisture will soften them right up.
For short-term storage—say, up to two days—grab a totally airtight container. A quality plastic container with a latching lid works great, or even a zip-top bag with all the air squeezed out will do the trick. Keep the container in a cool, dry place on the counter. Don’t stack them too tightly, or the ones on the bottom might get slightly crushed.
Now, what if they soften a little bit overnight? Don’t panic! You can almost always resurrect them. I just spread them back out on a clean baking sheet and pop them into a 300°F (150°C) oven for about three to five minutes. Keep the oven door slightly ajar if you can, just to let any trapped moisture escape. They come out hot, salty, and satisfyingly crunchy all over again!
Serving Suggestions for These Easy Homemade Snacks
Once you’ve got your batch of golden, crunchy goodness, the next challenge is keeping people’s hands out of the bowl! These aren’t just for sitting on the couch watching TV, though they certainly excel at that. If you’re planning for a big crowd or just need some fantastic game day snacks, these chips are the perfect centerpiece.
Honestly, simplicity wins most of the time. A big rustic bowl full of these salty wonders is sometimes all you need. But if you want to go above and beyond for your party snack recipes, try these combinations. They pair so well because the crispness of the homemade potato chips stands up to thick dips beautifully.
If you’re having a gathering, you absolutely have to serve them alongside a creamy French onion dip. The slight tang of the dip and the saltiness of the chip is just perfection. For something a little fresher, a homemade guacamole or a vibrant salsa also works wonders. They add color and freshness to the spread.
I also love using them instead of croutons on a quick Caesar salad—it adds a wonderful salty crunch that feels way more satisfying. Or, use them crumbled over mac and cheese for an epic, cheesy-crunchy topping. No matter how you serve them, enjoy that feeling of sharing something truly special and homemade!
Frequently Asked Questions About Crispy Potato Chips Recipe
It’s natural to have questions when you step away from the bag and cook something crunchy from scratch! I get asked all the time about different potatoes or why a batch went flat. I tried to use the methods discussed in this guide to answer the most common queries I receive about making these easy homemade snacks.
What is the secret to truly crunchy potato chips?
If I could tattoo the two most important steps onto my kitchen wall, they would be slicing thinness and drying thoroughly. You have to slice those potatoes so uniformly thin—aim for gossamer thin!—so they cook evenly under the heat. But even more critical? They must be absolutely, undeniably dry before they ever touch oil or a baking sheet. If they are even slightly damp, that moisture turns to steam and prevents that beautiful crisping reaction. Patience with the drying process is non-negotiable for crunchy snack ideas!
Are baked potato chips really healthier than store-bought?
In my opinion, yes, absolutely, especially when you use the amount of oil I recommend! Store-bought chips are often deep-fried in massive vats of who-knows-what oil. When you use the oven or air fryer, you significantly cut down on the amount of added fat. Plus, you know exactly what’s going into your snack—real potatoes, real salt, and whatever spices you choose. It makes them a fantastic healthy chip alternatives for when you want that salty hit without the heavy grease factor.
Here are a few more quick ones I hear all the time before you get back to batch making:
What is the best type of potato for making crunchy potato chips?
For the ultimate classic texture, Russet potatoes are my absolute go-to. They have a higher starch content and lower moisture, which means when you soak them and dry them, they fry up lighter and crispier than waxy potatoes like reds or Yukon Golds. If you try sweet potatoes, you’ll get a delicious result, but they behave differently—they tend to caramelize faster because of their natural sugars, so watch those closely if you experiment!
Why did my homemade potato chips turn out soggy?
Soggy chips usually point to one of two things, or sometimes both! First, were they sliced thick enough? If they were too dense, the inside didn’t cook all the way through before the outside burned, leaving a soft center. Second, and this is more common, they weren’t dry enough before cooking, or you crowded the pan. Crowding traps steam, and steam means limp chips. Make sure they have plenty of space on the sheet or in the air fryer basket so they can truly bake, not steam.
Can I use a mandoline slicer safely for these potato chips?
Yes, a mandoline is the best tool for getting the ultra-thin, restaurant-quality slices we need, but safety first! I can’t stress this enough: always use the guard that comes with your slicer. I know it feels awkward at first, but your fingertips will thank you later. If you’re worried about using a mandoline for this crispy potato chips recipe, use your sharpest knife and just measure your thickness carefully with a ruler before you start cutting your batch!
I hope these tips help you move forward confidently in your snack-making journey! If you have any other tricky questions, you can always check out my Privacy Policy or reach out through the contact page if you’re curious about something else related to the kitchen. My general policies are here.
Share Your Homemade Potato Chips Creations
Now you have all the secrets to making the crispiest, most satisfying potato chips right at home. I truly hope you took the plunge and tried either the oven or the air fryer method! I am so eager to know what you thought.
Did you stick to the simple sea salt or try one of the wilder seasoning ideas we talked about? Don’t keep that crunchy success to yourself! Please take a minute and leave a rating right here on the recipe card. Your feedback helps me know what’s working in your real home kitchens.
If you snapped a picture of your perfectly golden snack—especially if you managed an impressive stack—I’d love to see it! Tag us on social media or send your results through the contact page. Connecting with you is what Misty Plate is all about.
PrintUltimate Crispy Homemade Potato Chips (Oven and Air Fryer Methods)
Make the crispiest, golden homemade potato chips using simple ingredients. This guide provides clear steps for achieving maximum crunch in your oven or air fryer for a satisfying, guilt-free snack.
- Prep Time: 15 min
- Cook Time: 20 min
- Total Time: 35 min
- Yield: 4 servings 1x
- Category: Snack
- Method: Baking/Air Frying
- Cuisine: American
- Diet: Vegetarian
Ingredients
- 3 large Russet potatoes
- 2 tablespoons olive oil (for frying/tossing)
- 1 tablespoon olive oil (for air fryer, optional spray)
- 1 teaspoon fine sea salt, or to taste
- 1 teaspoon garlic powder
- 1/2 teaspoon paprika
- Pinch of black pepper
Instructions
- Prepare the potatoes: Wash and thinly slice the potatoes using a mandoline slicer or a very sharp knife to about 1/16 inch thickness. Uniform slicing is key for even cooking.
- Soak the slices: Place the potato slices in a large bowl of cold water for at least 30 minutes. This removes excess starch, which helps them crisp up. Drain the water completely.
- Dry thoroughly: Spread the slices in a single layer on clean kitchen towels or paper towels. Pat them completely dry. Moisture prevents crispiness.
- Seasoning: In a clean bowl, toss the dry slices with 2 tablespoons of olive oil, salt, garlic powder, paprika, and pepper until lightly coated.
- Oven Baking Method: Preheat your oven to 375°F (190°C). Arrange the seasoned slices in a single layer on baking sheets lined with parchment paper. Do not overlap them. Bake for 15–20 minutes, flipping halfway through, until golden brown and crisp. Watch closely near the end to prevent burning.
- Air Fryer Method: Preheat your air fryer to 350°F (175°C). Lightly spray the basket with oil. Place the seasoned slices in a single layer in the basket; work in batches to avoid overcrowding. Air fry for 10–15 minutes, shaking the basket every 5 minutes, until golden and crunchy.
- Cool and serve: Transfer the finished chips to a wire rack or paper towel-lined plate to cool completely. They will crisp up more as they cool. Taste and add extra salt if needed immediately after cooling.
Notes
- For the best results in the oven, use parchment paper to prevent sticking and promote even browning.
- If you prefer deep-fried potato chips, heat 2 inches of neutral oil (like canola) to 350°F (175°C) and fry small batches for 3–4 minutes until golden. Drain well on paper towels.
- Customize your flavor: Try onion powder, chili powder, or a light dusting of nutritional yeast for a cheesy flavor.
Nutrition
- Serving Size: 1 serving (approx. 1 cup)
- Calories: 180
- Sugar: 1
- Sodium: 250
- Fat: 9
- Saturated Fat: 1
- Unsaturated Fat: 8
- Trans Fat: 0
- Carbohydrates: 23
- Fiber: 2
- Protein: 3
- Cholesterol: 0