
There is just nothing on earth that smells as immediately comforting as fresh bread baking. I remember those frantic marketing days in the city, craving something real, something warm, but always being too rushed to make a proper dough. That’s exactly why I poured my heart into perfecting this Italian herb and cheese bread recipe. It’s the answer for anyone who wants that incredible flavor payoff without spending hours kneading or worrying about proofing on the counter. This recipe harnesses the magic of the bread machine to deliver a rich, cheesy, savory loaf that slices perfectly for sandwiches or sits beautifully next to any dinner. It’s all about bringing that simple, grounding joy back into your busy week, just like Ava Sinclair rediscovered when she turned back toward her own kitchen.
- Why This Italian Herb and Cheese Bread Machine Recipe Works for You
- Essential Ingredients for Your Italian Herb and Cheese Bread
- Step-by-Step Instructions for Bread Machine Herb Bread
- Tips for Success with Your Italian Herb and Cheese Bread Loaf
- Making Garlic Herb Bread: Adjusting Seasoning
- Storing Your Homemade Italian Herb and Cheese Bread
- Serving Suggestions for This Savory Loaf
- Frequently Asked Questions About Easy Bread Machine Recipes
- Sharing Your Experience with This Italian Cheese Bread
Why This Italian Herb and Cheese Bread Machine Recipe Works for You
The secret to making amazing bread when you’re running a million miles an hour is letting the machine do the heavy lifting. We developed this recipe because we believe you don’t need complicated techniques to get an incredible result. This loaf is pure flavor delivered with maximum ease.
- It delivers a sturdy, reliable structure that’s perfect for slicing thick for a hearty sandwich loaf.
- It’s one of those fantastic easy bread machine recipes that actually tastes like you spent all day on it.
- Everything goes in at once, meaning minimal hands-on time!
Perfect for the Beginner Bread Machine Owner
If your bread machine is still sitting on the counter gathering dust, this is the recipe to break it in! We keep the instructions dead simple because we know beginners need reassurance. You just follow the layering order, press the ‘White Bread’ button, and the machine handles all the kneading and rising for you. Trust me; you’ve got this!
Flavor Profile: Rosemary Oregano Bread Meets Parmesan Herb Bread
Don’t let the simplicity fool you—the flavor is huge. We’re blending classic herbs so this tastes like a beautiful rosemary oregano bread but with a wonderful salty depth. That Parmesan cheese melts right into the dough, making the whole thing sing. It’s the very best kind of parmesan herb bread you can whip up in less than five minutes of actual work.
Essential Ingredients for Your Italian Herb and Cheese Bread
When you’re relying on a machine, the quality of what goes in really matters. Since there isn’t a lot of fussy handling, we need to make sure our ingredients are set up for success, especially that yeast! For this Italian herb and cheese bread, we’re sticking to staple items. You need your water nice and warm—think bathwater temperature, about 105 to 115°F—and your butter needs to be softened. Don’t melt it; just leave it out on the counter for an hour or so.
We absolutely need bread flour here. It has higher protein than regular all-purpose flour, which gives the machine the structure it needs to produce a lovely, sturdy loaf perfect for slicing.
Ingredient Notes and Substitutions for Cheesy Dinner Bread
The biggest thing to watch out for is the yeast. Make sure it’s fresh! Pouring it into that little well you make in the flour prevents it from touching the salt and water prematurely, which can kill its ability to rise. If you don’t have a dedicated Italian seasoning blend, just grab a teaspoon each of dried oregano and basil and add a half teaspoon of dried thyme. That little homemade mix works wonders for this cheesy dinner bread. It gives you that authentic, savory feel every time.
Step-by-Step Instructions for Bread Machine Herb Bread
Okay, this is where your machine really shines! Once you’ve gathered your ingredients, the actual process is so straightforward you’ll wonder why you waited so long to try making Italian herb and cheese bread this way. It’s all about the sequence, which prevents clumping and ensures that lovely, even rise we’re hoping for. If you want to read more about why I moved away from complicated baking toward these simple, reliable methods, you can always check out my story over at the About page.
Loading the Pan: Liquid First for Perfect Italian Cheese Bread
Before you do anything, give your machine’s manual a quick peek—they sometimes have slightly different rules! Generally, it’s liquids first: get that warm water and softened butter into the pan. Then, gently pour in the flour, salt, and sugar on top. Don’t mix! The very next thing is making a little divot, a well, right in the flour where you carefully pour your yeast. Keep that yeast away from the salt and water for now. This layering builds the base for fantastic italian cheese bread.
The Secret to Flavorful Bread Machine Herb Bread: Timing the Add-Ins
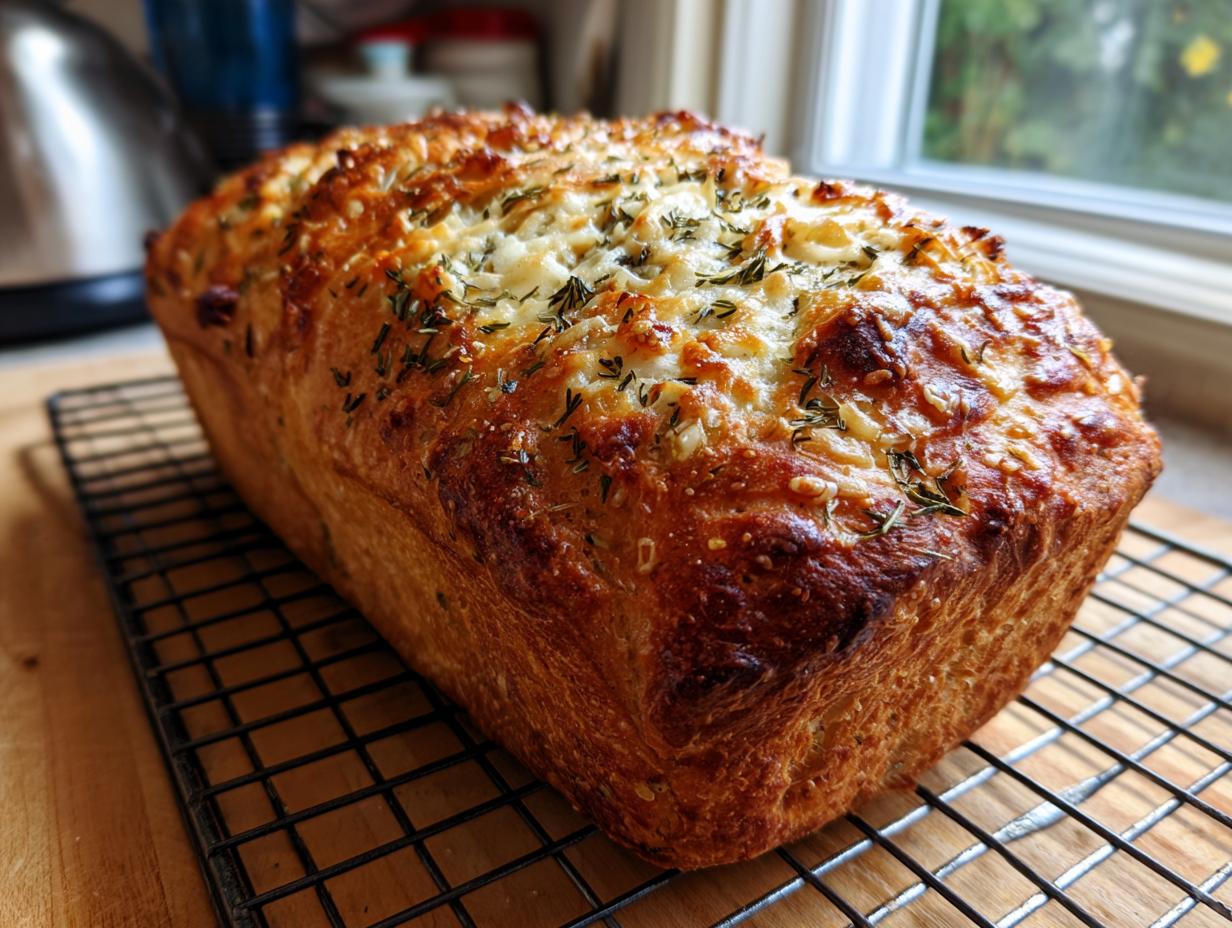
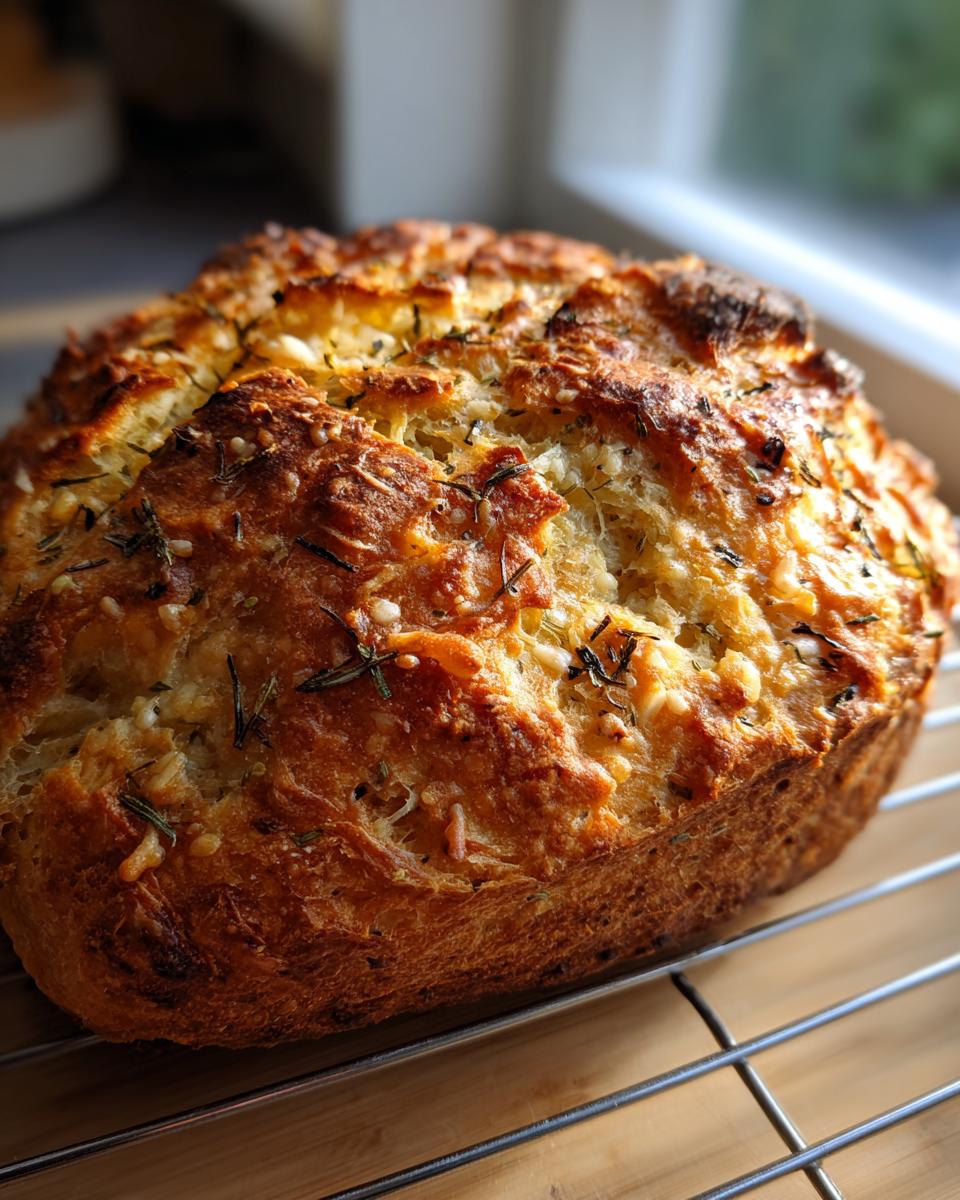
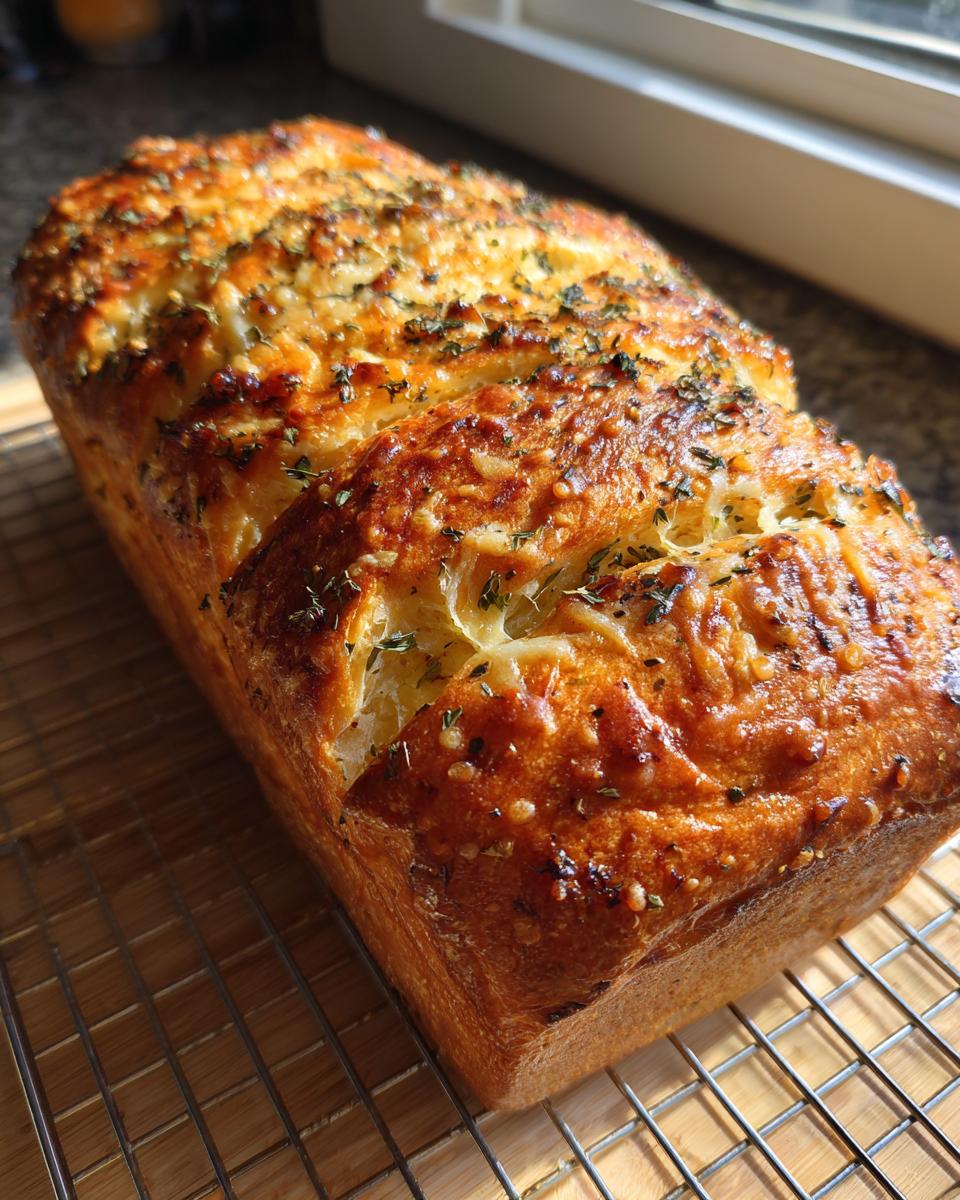
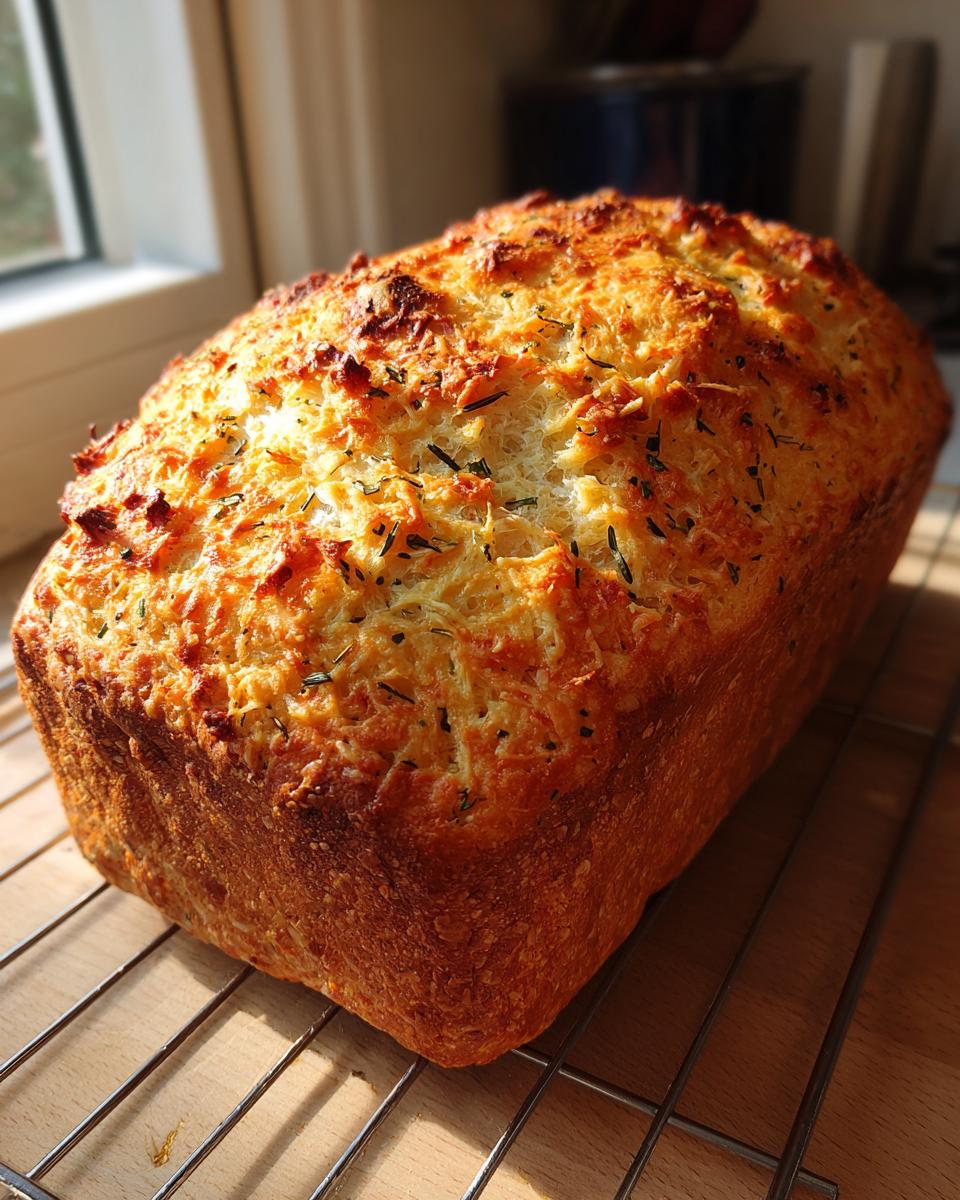
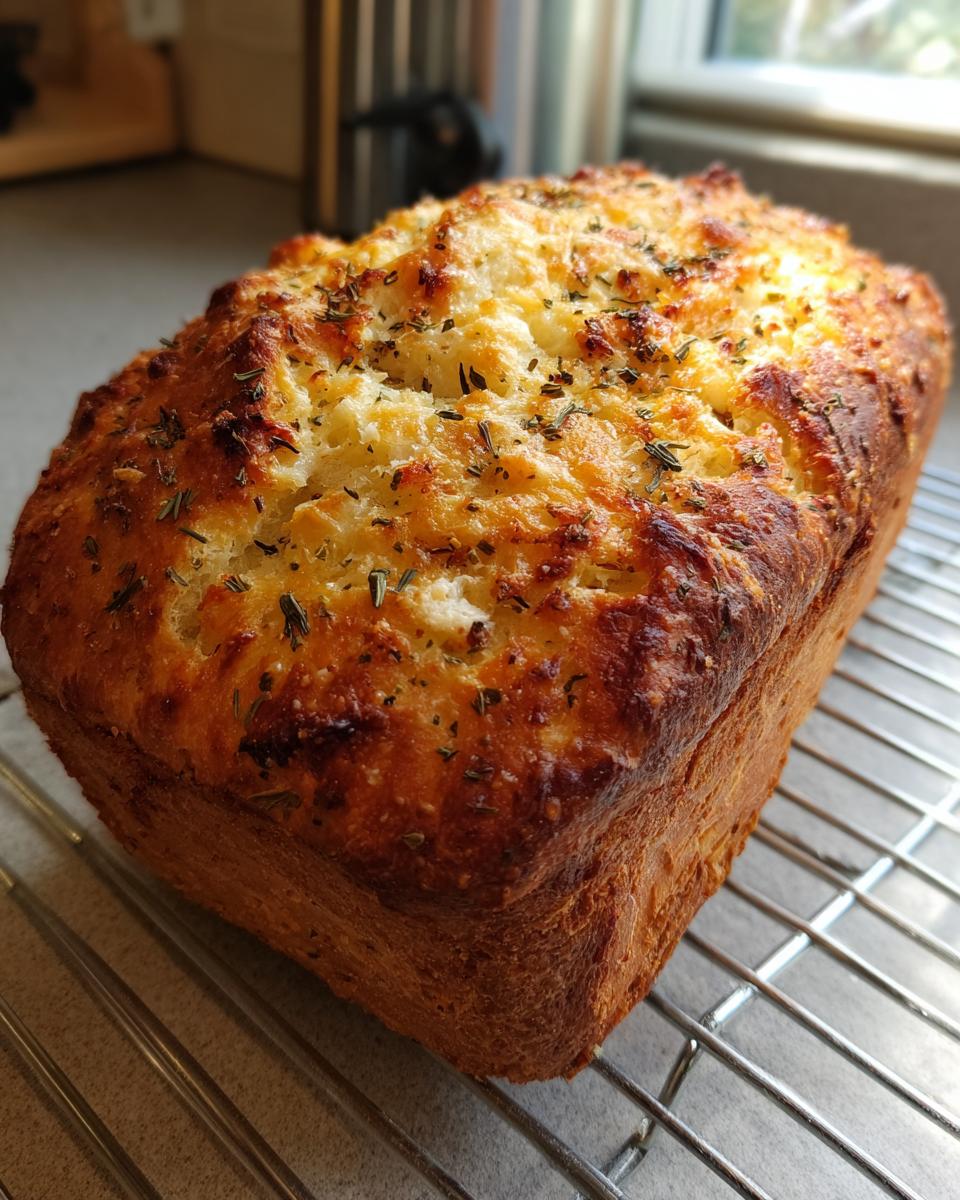
This is the part that separates a good loaf from a GREAT loaf when using your machine. First, load in your seasonings and a quarter cup of that Parmesan cheese, keeping it away from the yeast area. Start the machine on the Basic setting. Now, listen closely! When the machine beeps to signal the end of the kneading phase—usually around the one-hour mark—you need to act fast. Open the lid and immediately sprinkle the *rest* of that cheese right over the dough ball. Close it quick! Adding the last bit of cheese late ensures it melts in pockets rather than getting churned into the dough during the main mixing. That extra cheese melting late is key for great bread machine herb bread.
Tips for Success with Your Italian Herb and Cheese Bread Loaf
Even with a bread machine doing the heavy lifting, a few little tricks make the difference between an okay loaf and a spectacular slice of Italian herb and cheese bread. The most common mistake I see people make? Slicing it too soon! You absolutely must let this loaf cool on a wire rack for at least an hour—I know it’s torture—but slicing it hot makes the interior gummy because the steam hasn’t finished setting the starches.
Also, think about your cycle choice. While some modern machines have specific settings, you want a standard, sturdy bake. Stick to the ‘Basic’ or ‘White Bread’ cycle unless you specifically have a ‘Sandwich’ setting; that one works like a charm because it often uses a slightly shorter final rise time for a tighter crumb.
Making Garlic Herb Bread: Adjusting Seasoning
I love that this recipe is so flexible! If you aren’t serving this to a crowd and you really want to kick up that savory note, we can easily amp up the garlic. This combination makes the best kind of garlic herb bread.
If you find that one teaspoon of garlic powder just isn’t enough punch for your taste, try swapping half of it out for garlic salt. But hang on—you can’t just swap equally! Since the salt content is higher in garlic salt, you must pull back on the regular salt you added earlier by the same amount. So, for example, if you use 1/4 teaspoon of garlic salt, skip 1/4 teaspoon of your regular kosher salt.
Storing Your Homemade Italian Herb and Cheese Bread
That beautiful **Italian herb and cheese bread** won’t last long once everyone smells it, but if you do have leftovers, keeping it fresh is easy! For bread you plan to eat within two or three days, just wrap that cooled loaf tightly in plastic wrap and leave it on the counter. Don’t put it in the fridge—that’s the enemy of soft bread; it goes stale so fast!
If you are planning ahead for later, this loaves freezes wonderfully. Slice it up first, then wrap the slices tightly in aluminum foil followed by plastic wrap. You can toast slices right from frozen whenever you need a quick slice for a sandwich. It truly makes the best **sandwich loaf** right out of the toaster!
Serving Suggestions for This Savory Loaf
Now that you have this gorgeous, flavorful loaf, what do you do with it? Honestly, just tearing off a warm piece straight from the rack is an occasion in itself! But if you’re looking for a little more everyday magic, this bread is fantastic dipped into a good quality olive oil mixed with a splash of balsamic vinegar. For dinner, it cuts through rich tomato soup beautifully. And yes, it makes the absolute best grilled cheese you’ll ever have.
Frequently Asked Questions About Easy Bread Machine Recipes
I totally get it—sometimes the machine settings can feel like a mystery! When I first started using mine, I had so many questions swirling around about things like density and cycles. We want this to be a stress-free experience, so here are a few things I’ve learned over the years testing these **easy bread machine recipes**.
If you’re worried about privacy while looking up recipes, feel free to check out our Privacy Policy for peace of mind. It’s important to feel secure when you’re cooking!
Can I use whole wheat flour in this Italian herb and cheese bread recipe?
You sure can try, but you can’t just swap it 1:1 in the ‘Basic’ setting. Whole wheat tends to soak up more liquid and doesn’t develop gluten the same way. If you want to use it, switch the cycle to ‘100% Whole Wheat’ and you might need to add another tablespoon or two of water to get the right dough consistency for your **Italian herb and cheese bread**.
What is the best cycle for a soft sandwich loaf?
For the softest texture, look for the ‘Sandwich’ setting first—it bakes a bit denser and has shorter rise times, which is perfect. If your machine doesn’t have that, the standard ‘Basic’ or ‘White Bread’ cycle works perfectly fine, it just results in a slightly lighter crumb for your **sandwich loaf**.
Sharing Your Experience with This Italian Cheese Bread
I truly hope this incredibly easy **Italian cheese bread** becomes a staple in your kitchen rotation! Now that you’ve tried it, I’d love to hear all about it. Drop a comment below and tell me what cycle your machine used, or if you found a perfect temperature for the water. Head over to our Contact page to send me pictures of your gorgeous loaf!
PrintEasy Italian Herb and Cheese Bread Machine Loaf

Make a flavorful, savory Italian herb and cheese bread using your bread machine. This recipe yields a perfect sandwich loaf for dinner sides or sandwiches.
- Prep Time: 10 min
- Cook Time: 3 hr 30 min (machine cycle time)
- Total Time: 3 hr 40 min
- Yield: 1 loaf 1x
- Category: Bread
- Method: Bread Machine
- Cuisine: Italian
- Diet: Vegetarian
Ingredients
- 1 1/4 cups water, warm (105-115°F)
- 2 tablespoons unsalted butter, softened
- 3 cups bread flour
- 1 1/2 teaspoons salt
- 2 tablespoons granulated sugar
- 1 1/2 teaspoons active dry yeast
- 1 tablespoon dried Italian seasoning blend
- 1 teaspoon garlic powder
- 1/2 cup shredded Parmesan cheese, divided
Instructions
- Add the warm water and softened butter to the bread machine pan in the order recommended by your machine’s manual.
- Add the bread flour, salt, and sugar on top of the liquids. Create a small well in the flour.
- Pour the active dry yeast into the well. Do not let the yeast touch the salt or liquid yet.
- Add the dried Italian seasoning and garlic powder to the flour, avoiding the yeast well.
- Place 1/4 cup of the shredded Parmesan cheese on top of the flour mixture, away from the yeast.
- Select the Basic White Bread cycle (or Sandwich Loaf cycle if available) and press Start.
- Wait until the machine signals the kneading is complete, usually around the 1 hour mark for a 1.5 lb loaf.
- When the machine signals the end of the kneading cycle, open the lid and gently sprinkle the remaining 1/4 cup of Parmesan cheese over the dough. Close the lid immediately. The machine will continue the cycle.
- Once the cycle is complete, carefully remove the bread pan from the machine.
- Turn the bread out onto a wire rack to cool completely before slicing.
Notes
- For the best texture, use the ‘Basic’ or ‘White Bread’ setting on your machine. If your machine has a ‘Sandwich’ setting, use that.
- If you prefer a stronger garlic flavor, substitute 1/2 teaspoon of garlic powder with 1/4 teaspoon of garlic salt, remembering to reduce the added salt by 1/4 teaspoon.
- Allow the loaf to cool for at least one hour before slicing to prevent a gummy interior.
Nutrition
- Serving Size: 1 slice
- Calories: 165
- Sugar: 1.5
- Sodium: 320
- Fat: 4.5
- Saturated Fat: 2.5
- Unsaturated Fat: 2.0
- Trans Fat: 0.0
- Carbohydrates: 28
- Fiber: 1.2
- Protein: 5.5
- Cholesterol: 10