
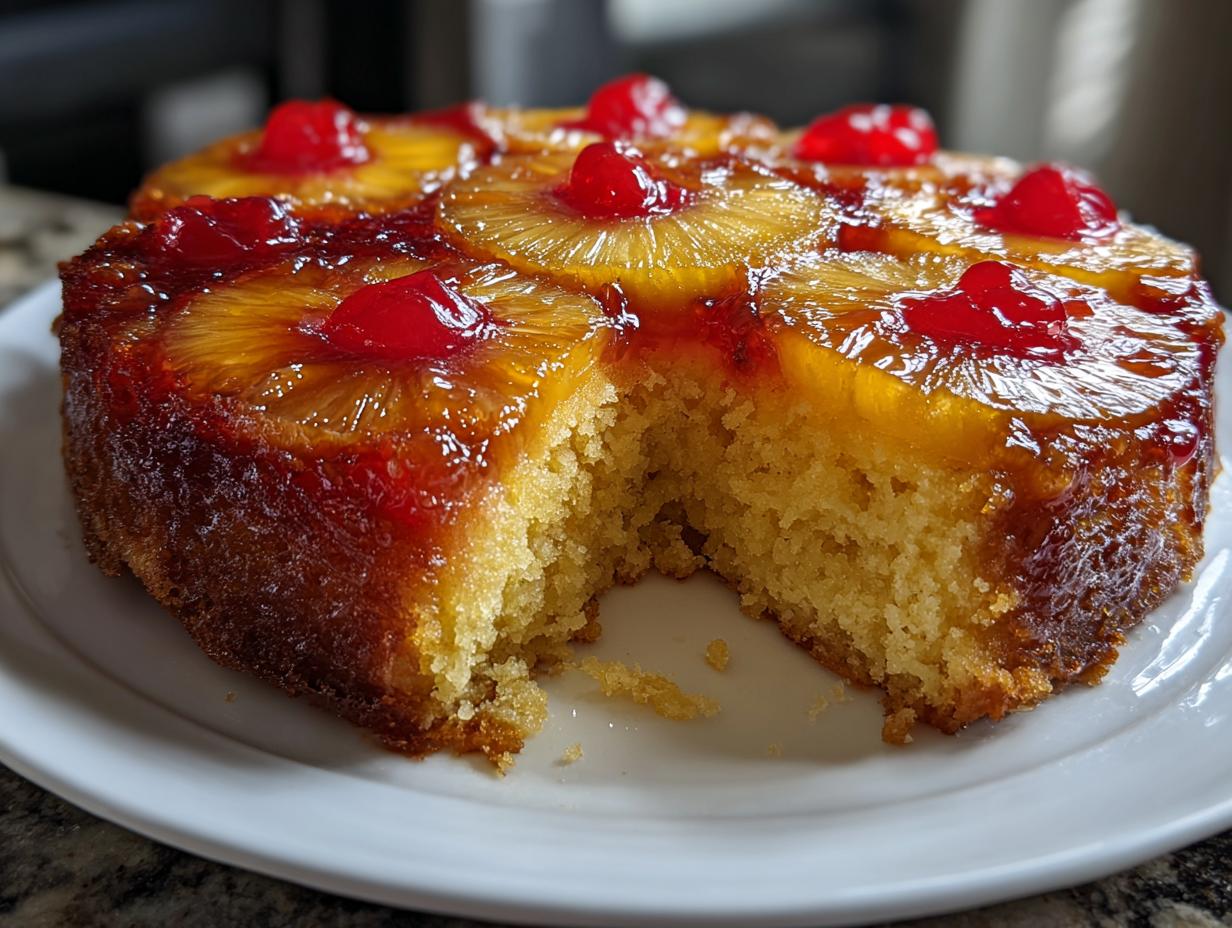
Oh, there’s nothing quite like turning on the oven and getting that warm, buttery, intensely sweet smell that just transports you right back to childhood parties. For me, that smell is all about the classic desserts we used to have at every family gathering. If I had to pick the one showstopper that is surprisingly simple to master, it’s hands-down the pineapple upside down cake. It looks incredibly fancy stacked up with those glistening rings and bright red cherries, but trust me, the magic happens right in one pan with almost no fuss! It’s the perfect recipe when you want to create something beautiful and utterly delicious without spending all day tethered to your mixer. This is baking that feels like love.
- Why This Is the Best Pineapple Upside Down Cake Recipe
- Ingredients for Your Classic Pineapple Upside Down Cake
- Step-by-Step Instructions for a Simple Pineapple Upside Down Cake
- Tips for Success with Your Homemade Pineapple Cake
- Serving Suggestions for This Retro Dessert Recipes Favorite
- Storage & Reheating Instructions for Leftover Pineapple Upside Down Cake
- Frequently Asked Questions About the Pineapple Upside Down Cake Recipe
- Estimated Nutritional Data for This Simple Tropical Dessert
- Share Your Baking Experience
Why This Is the Best Pineapple Upside Down Cake Recipe
When I started bringing this recipe back into my own kitchen, I tried about five different renditions, and honestly, they were all just okay. They were fine, but they weren’t the showstopper I remembered. The secret to making this the best pineapple upside down cake is balancing that rich, buttery pineapple glaze with the soft crumb of the cake itself. I finally nailed it when I stopped getting too fancy with the topping.
This recipe gives you that incredibly moist pineapple cake because you are literally baking the fruit right into a pool of buttery caramel. It’s simple, it’s quick, and it tastes like pure sunshine. Seriously, it’s the most nostalgic and impressive dessert you can make in under an hour.
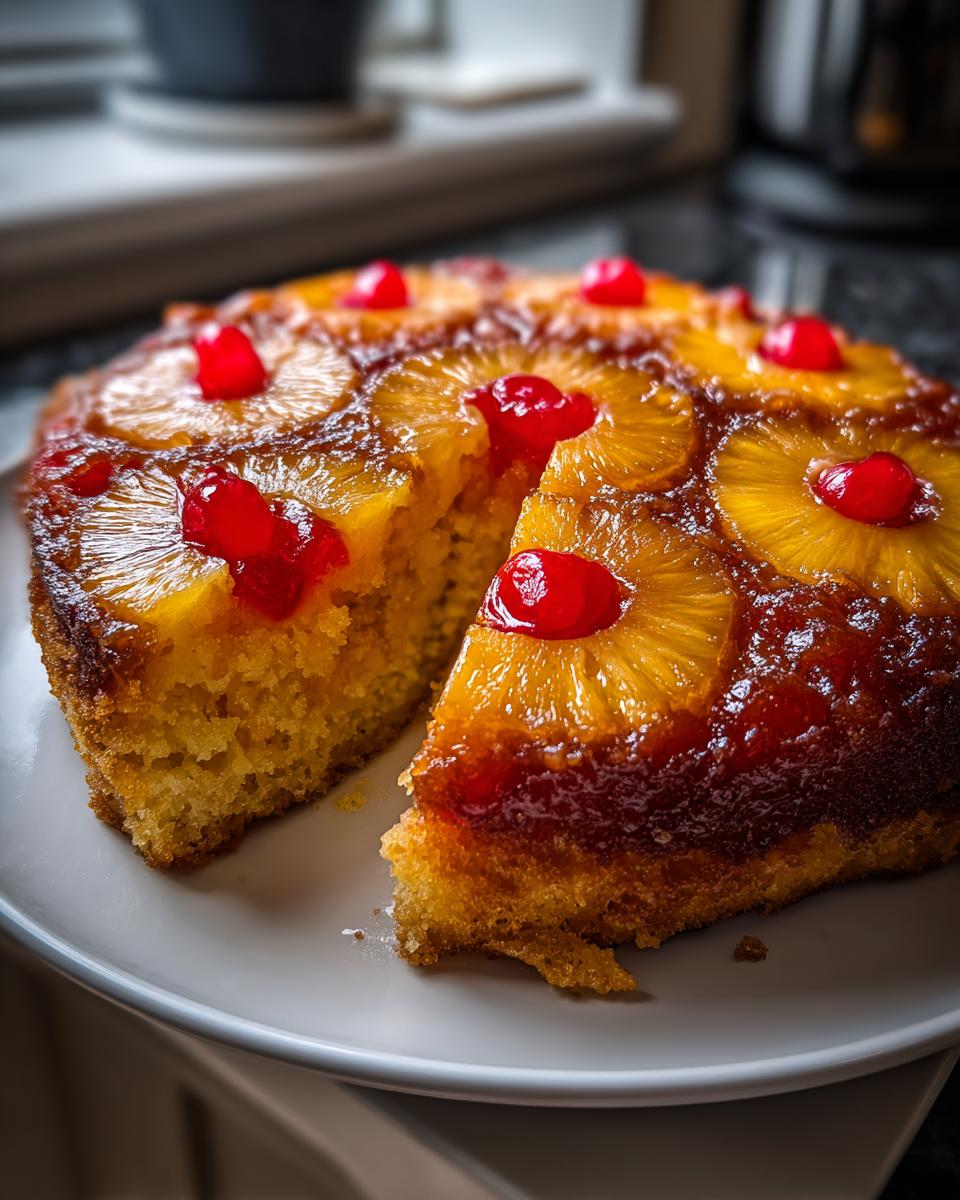
Achieving That Perfect Caramelized Pineapple Rings Topping
Okay, this step is crucial! You can’t skip melting that butter and brown sugar together right in the pan. Don’t just sprinkle the sugar on top later; you need to create that thick, gooey syrup first. When that butter melts and marries the brown sugar over the heat, it turns into liquid gold.
Once you pour that syrup in, gently place your drained pineapple rings and those bright cherries exactly where you want them to look perfect. They bake right into that caramel bath, making sure every single slice gets that sticky, glorious topping.
Ingredients for Your Classic Pineapple Upside Down Cake
When I say this is straightforward, I mean it! You probably have half of these things in your pantry already. Using good quality, **unsalted butter** is my one non-negotiable here. It makes that caramel topping so much cleaner and richer, which is vital for a classic pineapple cake experience.
I’ve broken everything down into two simple groups: the topping we prep first, and the cake mixture itself. Don’t substitute the light brown sugar for the topping; that molasses flavor is what creates that deep caramel complexity!
- For the Topping:
- 1/2 cup unsalted butter (for melting)
- 3/4 cup packed light brown sugar
- 1 (20 ounce) can pineapple slices in juice, drained (make sure you reserve that juice!)
- 10 maraschino cherries, drained
- For the Cake Batter:
- 1 1/2 cups all-purpose flour
- 1 1/2 teaspoons baking powder
- 1/2 teaspoon salt
- 1/2 cup (1 stick) unsalted butter, softened to room temperature
- 3/4 cup granulated sugar
- 2 large eggs, room temperature is best!
- 1 teaspoon vanilla extract
- 1/2 cup milk
- 1/4 cup reserved pineapple juice (this is essential for flavor!)
Seriously, just look at that ingredient list—it’s all standard stuff. But when combined in the right order, it creates something truly special. Have everything measured out before you start, because the topping comes together really fast!
Step-by-Step Instructions for a Simple Pineapple Upside Down Cake
Alright, let’s get baking! The beauty of this pineapple upside down cake is that you start by building the pretty part first. Don’t worry about whipping up the batter until the topping is ready to go. We want that caramel layer to be perfectly set before the batter hits it.
Preparing the Caramelized Pineapple Base
First thing, get your oven preheated to 350°F (175°C) and lightly grease that 9-inch round cake pan—I usually give it a good spray of baking release just to be safe. Now, over medium heat on the stovetop, melt that first 1/2 cup of butter right in a small saucepan. Once it’s liquid, stir in your packed light brown sugar until it’s dissolved and looks like a nice thick syrup. Pour that immediately into the bottom of your prepared cake pan and spread it around evenly.
Next, arrange those drained pineapple slices over the syrup. I like to put one cherry right in the middle of every ring—it’s just classic! You’ll use the rest of the cherries dotted in the empty spaces. Set that pan aside; it’s ready for the batter.
Mixing the Moist Pineapple Cake Batter
In a medium bowl, whisk together your dry ingredients: the flour, baking powder, and salt. Just a quick mix so everything’s acquainted. In your big mixing bowl, we’re creaming. Beat that softened 1/2 cup of butter with the granulated sugar until it’s genuinely light and fluffy. Don’t rush this part; you’re building air!
Beat in your eggs one by one, making sure each one is fully incorporated before adding the next, followed by the vanilla. Now for the alternating part: add a third of your dry mix, then half of your liquid mix (that’s the milk whisked with the reserved pineapple juice), mixing just until combined. Repeat this pattern, ending with the final third of the dry ingredients. This is key for a moist cake: mix only until the streaks of flour disappear. Overmixing develops gluten and you’ll end up with a tough cake, not the soft crumb we want!
Baking and Inverting the Pineapple Upside Down Cake
Gently spoon that beautiful batter right over your fruit layer without messing up the pattern underneath. Bake it for 35 to 40 minutes. The test is always the toothpick—if it comes out clean, you’re golden! Don’t cook it past that point or you’ll lose that essential moisture.
Here’s where patience pays off: let the cake cool in the pan on a wire rack for exactly 10 minutes. No more, no less! After 10 minutes, place your serving plate upside down over the pan top. Take a deep breath, hold the plate and pan tight together, and flip it quickly! Lift the pan off slowly. If any of those gorgeous caramelized pineapple rings stick to the bottom, don’t panic! Just use a little spatula to gently lift them off and place them right back where they belong. Serve it warm, and watch everyone dive in!
Tips for Success with Your Homemade Pineapple Cake
Even though this is such an easy pineapple dessert to pull off, I’ve gathered a few little tricks over the years to make sure it’s perfect every single time, especially if you want to make it for a bigger crowd or try a different shape. Baking is about knowing when to stick to the plan and when you can shake things up a little!
My biggest piece of advice, which I touched on in the notes, is about pan preparation. You must be generous with your greasing and flouring when making a standard round cake, but if the topping sticks, I know it can ruin the mood! Always use parchment paper on the bottom of a standard pan if you are nervous, even though the caramel often acts as its own glue.
- If you’re making this for a potluck and need a bigger batch, just double the recipe and use a 9×13 inch baking dish. You’ll need to check it around 40 minutes, but it might push toward 45 because it’s shallower.
If you’re looking for a showstopper for a holiday party, this cake shines in different forms too. If you visit a great recipe site, you’ll see people getting creative!
Variations: Pineapple Bundt Cake and Mini Pineapple Upside Down Cakes
If you want that beautiful, fluted shape, converting this to a pineapple Bundt cake is surprisingly easy. The key, as noted above, is greasing that Bundt pan really, really well. You need to get into all those nooks and crannies! You’ll likely have a little extra batter, so check it sooner rather than later—maybe start testing at 40 minutes, but expect it to take closer to 45 or 50 minutes deep in the center.
Now, for parties, I adore making mini pineapple upside down cakes in a standard muffin tin. This is fantastic for serving because everyone gets a perfect, personal portion, and you don’t have to worry about inverting one huge, heavy cake!
When making the minis, you need to adjust the topping time. Melt your butter, mix your sugar, and pour that caramel into the bottom of the muffin cups first. Then, place one pineapple ring (you might need to cut the ring in half depending on the size of your tin) and one cherry in each cup. The batter goes on top. Since they are small, they bake fast—usually 18 to 22 minutes maximum. They invert beautifully because the caramel layer is so thin on them.
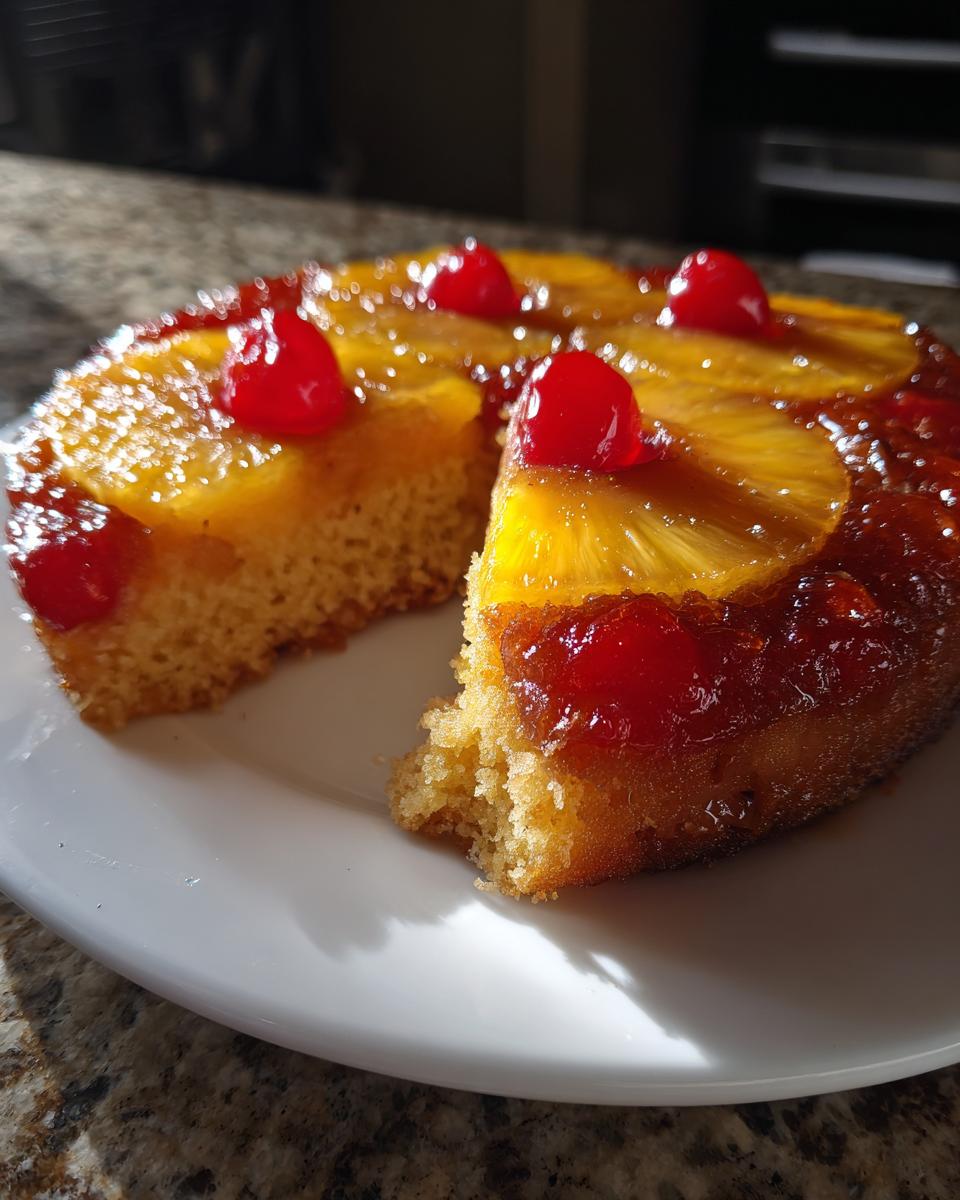
Serving Suggestions for This Retro Dessert Recipes Favorite
This is the part where you get to make it look like you spent days in the kitchen, even though we know it was super fast! Because the pineapple upside down cake is so intensely rich, buttery, and sweet from that caramel layer, you don’t need much else. It truly stands on its own as a magnificent dessert.
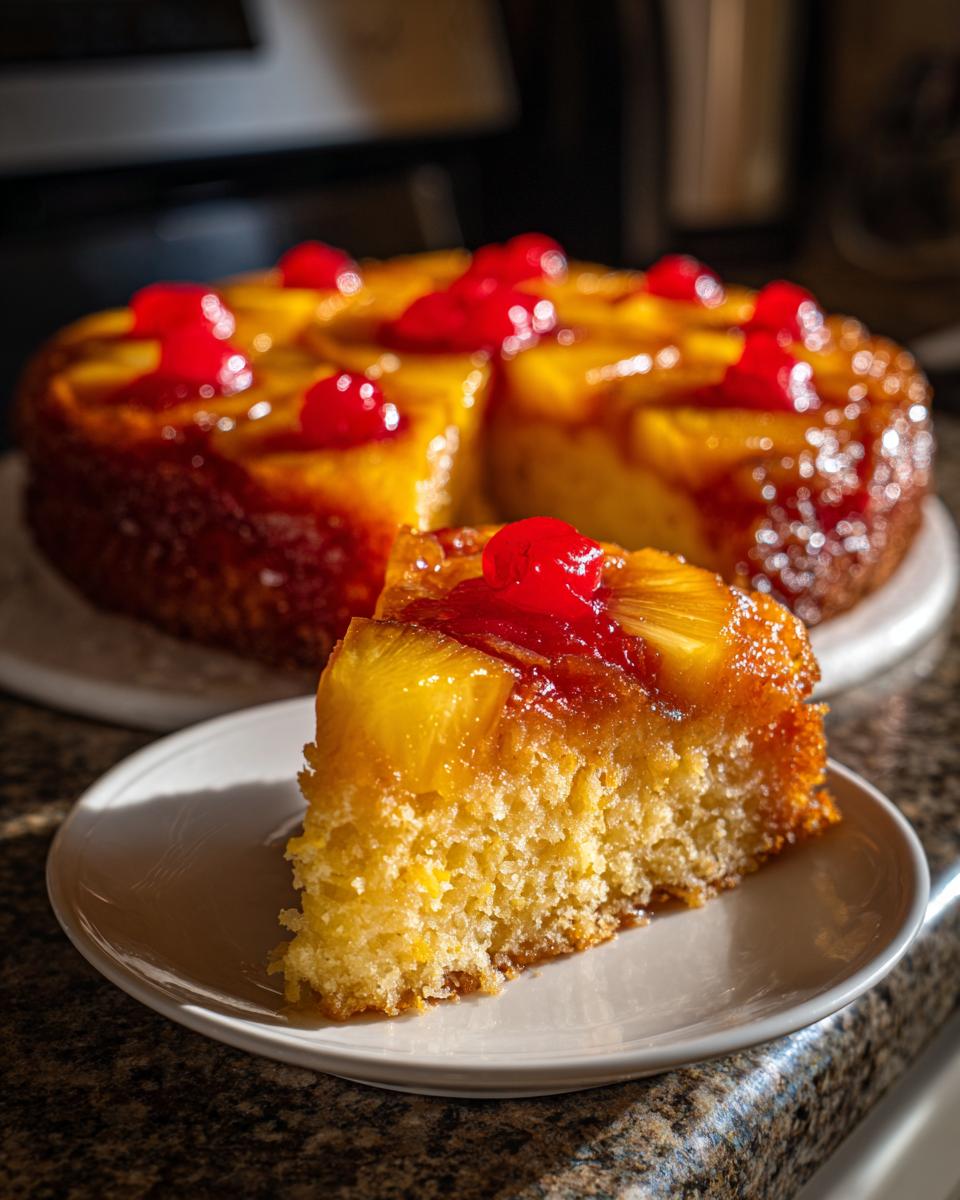
My favorite way to serve it, especially when I’m bringing it to a summer dinner or a family gathering, is slightly warm. That little bit of warmth makes the caramel just a touch gooey again, which is heavenly. Trust me on this, get a fantastic quality vanilla bean ice cream—none of that imitation stuff! The cool, creamy vanilla melting into the warm, sticky pineapple is just perfection.

If ice cream feels too much, fresh, lightly sweetened whipped cream is the perfect contrast. You want the slight airiness of the cream to cut through the density of the cake. A little dollop on the side, maybe sprinkled with a tiny bit more brown sugar if you’re feeling really decadent, is all you need. This is a true retro dessert recipes favorite, and keeping the toppings simple lets the fruit and the caramel shine.
Honestly, the best accompaniment is a big smile when you flip that pan over and reveal that gorgeous, glistening top. That’s the real reward!
Storage & Reheating Instructions for Leftover Pineapple Upside Down Cake
Now, I hope you get to eat most of this when it’s fresh—it’s just unbeatable right out of the oven after resting! But let’s be real, sometimes you hide the leftovers, and you need to know how to keep that caramel from getting weird.
Since this cake is so rich with butter in the topping, I usually keep it at room temperature for up to two days. Don’t seal it airtight, though! I just cover the serving plate loosely with plastic wrap or foil. Sealing it too tightly can make the topping sweat and get a little soggy, and we worked too hard for that gorgeous shine.
If you need to keep it longer than two days, pop it into the fridge. Just make sure you cover it well so it doesn’t pick up any fridge smells. Honestly, cakes loaded with sugar and butter usually do fine in the cooler air, but they tend to harden up a bit when cold. Don’t worry, that’s nothing that a little reheating can’t fix!
When it’s time to eat the leftovers, I hate eating cold, dense cake, so reheat gently! I usually take a slice out and pop it into the microwave for maybe 10 to 15 seconds—just until it loses that chilled edge and the caramel softens up again. If you’re heating a bigger piece, wrap it loosely in foil and warm it in a low oven (about 300°F) for about 10 minutes. That warmth brings that buttery flavor right back to life. It tastes almost as good as the first time!
Frequently Asked Questions About the Pineapple Upside Down Cake Recipe
I always get the best questions after a recipe goes semi-viral! You all have smart ideas, and I love seeing how you adapt things. Here are the common things I hear about making sure this pineapple upside down cake comes out perfectly every time. We’re covering everything from fresh fruit to sticking pans!
Can I use fresh pineapple instead of canned?
That’s a great question! Yes, you absolutely can use fresh pineapple, though the texture will be slightly different. If you use fresh rings, you need to peel and core them yourself, obviously. Since fresh fruit has more juice, you’ll need to cook the caramel topping (butter and brown sugar) first in the pan, and then arrange the pineapple on top. You might need to leave the topping simmering a tiny bit longer to let some of that excess liquid cook down, or you might find your cake batter needs 5 extra minutes in the oven because of the extra moisture.
Is it okay to use a cake mix instead of making the batter from scratch?
I get why you ask this! Sometimes we need super quick solutions, and whipping up a cake mix doesn’t take much time at all. If you follow some simple box cake hacks, you can certainly use one. However, if you want that amazing, moist texture we talked about—the one that absorbs flavor from that buttery base—you just can’t beat the from-scratch method. The homemade batter balances the richness of the topping so much better than a standard box mix would.
How do I guarantee the cake doesn’t stick when I flip it?
This is the number one fear, right? Before I pour my caramel in, I make sure my 9-inch pan is generously greased. I use butter first, then I dust lightly with flour. For the caramel layer, ensure you thoroughly melt the brown sugar in the butter until it’s a smooth, cohesive syrup that coats the entire bottom of the pan before you add the fruit. If you follow those steps, and you let it rest for those crucial 10 minutes before flipping, it should release beautifully every time. If you’re ever worried, check out my thoughts on kitchen organization on my privacy policy page regarding my favorite non-stick techniques!
Can I add nuts or different fruits to this classic cake?
You sure can personalize this! Chopped pecans or walnuts mixed in with the brown sugar and butter at the bottom are always a fantastic addition. They toast up beautifully during baking. As for substituting the cherries, you can use blackberries or even thinly sliced pears if you want a different flavor profile. Just remember, this recipe shines because of the traditional pineapple and cherry, so try that first!
Estimated Nutritional Data for This Simple Tropical Dessert
I know some of you are just as curious about the numbers as you are about the process! We all eat for love around here, but it’s helpful to have a general idea of what’s in this gorgeous simple tropical dessert. These figures are based on the recipe as written, dividing it evenly into 8 standard servings.
Please remember, this is just an estimate based on my ingredient breakdown. If you use slightly more butter for greasing, or if your pineapple slices are extra juicy, the final numbers will shift a bit! I always say, the joy of home baking is better than worrying about a spreadsheet.
- Serving Size: 1 slice
- Calories: 380
- Sugar: 35g
- Fat: 18g
- Carbohydrates: 53g
- Protein: 4g
See? Pretty reasonable for something that tastes this decadent! It’s a classic for a reason. Enjoy every bite—it’s worth it!
Share Your Baking Experience
Now that you have the secrets to the ultimate, impossibly moist pineapple upside down cake, I really, truly want to know what you think! This recipe connects us back to those wonderful, warm memories, and I cherish hearing about how it fits into your own traditions.
Did you serve it warm, or did you let it cool down? Did you stick with the classic pineapple and cherries, or did you get brave and add some toasted pecans to that caramel layer? Please, please drop a comment below and let me know how it turned out for you. Five stars if it brought a smile to your face!
When you bake this, snap a photo! Tag me on social media because seeing that glimmering, upside-down perfection that you made sends me right back to my grandmother’s kitchen. If you have any questions about substitutions or tweaks, don’t hesitate to reach out via my contact page. Happy baking, friends! For more great baking inspiration, check out what the folks over at Tasty Crest are sharing, too!
PrintThe Ultimate Classic & Easy Pineapple Upside Down Cake (Moist & Caramelized)
Make this classic, moist Pineapple Upside Down Cake with a rich, buttery, caramelized pineapple topping. This simple recipe is perfect for family gatherings or any time you want a nostalgic, impressive dessert.
- Prep Time: 15 min
- Cook Time: 40 min
- Total Time: 55 min
- Yield: 8 servings 1x
- Category: Dessert
- Method: Baking
- Cuisine: American
- Diet: Vegetarian
Ingredients
- 1/2 cup unsalted butter
- 3/4 cup packed light brown sugar
- 1 (20 ounce) can pineapple slices in juice, drained (reserve juice)
- 10 maraschino cherries, drained
- 1 1/2 cups all-purpose flour
- 1 1/2 teaspoons baking powder
- 1/2 teaspoon salt
- 1/2 cup (1 stick) unsalted butter, softened
- 3/4 cup granulated sugar
- 2 large eggs
- 1 teaspoon vanilla extract
- 1/2 cup milk
- 1/4 cup reserved pineapple juice
Instructions
- Preheat your oven to 350°F (175°C). Lightly grease a 9-inch round cake pan.
- In a small saucepan over medium heat, melt 1/2 cup of butter. Stir in the brown sugar until dissolved, creating a thick syrup. Pour this mixture evenly into the bottom of the prepared cake pan.
- Arrange the pineapple slices over the brown sugar mixture in the bottom of the pan. Place one maraschino cherry in the center of each pineapple ring.
- In a medium bowl, whisk together the flour, baking powder, and salt. Set this dry mixture aside.
- In a separate large bowl, cream together the softened 1/2 cup of butter and the granulated sugar until light and fluffy.
- Beat in the eggs one at a time, mixing well after each addition. Stir in the vanilla extract.
- In a small bowl, whisk together the milk and the reserved pineapple juice.
- Gradually add the dry ingredients to the wet ingredients, alternating with the milk mixture, beginning and ending with the dry ingredients. Mix until just combined; do not overmix.
- Gently spoon the cake batter over the pineapple and cherry layer in the pan, spreading it evenly without disturbing the fruit layer underneath.
- Bake for 35 to 40 minutes, or until a toothpick inserted into the center comes out clean.
- Let the cake cool in the pan on a wire rack for 10 minutes.
- Place a serving plate upside down over the cake pan. Carefully invert the cake onto the plate. Lift the pan away slowly. If any topping sticks, gently place the fruit back onto the cake. Serve warm or at room temperature.
Notes
- For an even richer flavor, substitute the milk and pineapple juice with buttermilk.
- If you prefer a Bundt cake format, grease and flour a Bundt pan well and adjust baking time as needed, checking for doneness around 45 minutes.
- This cake keeps well covered at room temperature for up to two days.
Nutrition
- Serving Size: 1 slice
- Calories: 380
- Sugar: 35g
- Sodium: 250mg
- Fat: 18g
- Saturated Fat: 11g
- Unsaturated Fat: 7g
- Trans Fat: 0.5g
- Carbohydrates: 53g
- Fiber: 1g
- Protein: 4g
- Cholesterol: 85mg