
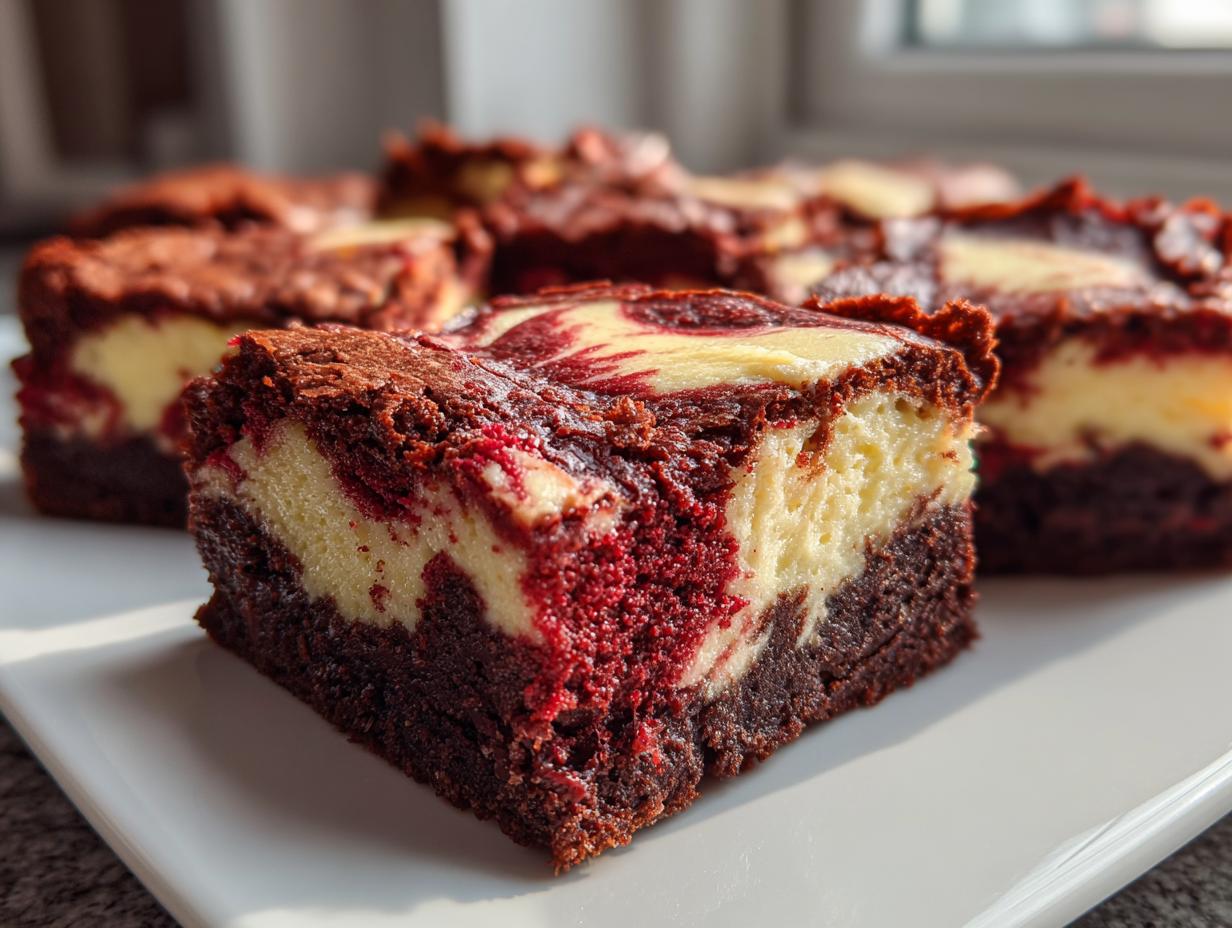
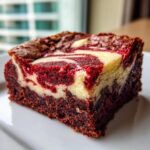
Sometimes you just need a dessert that feels completely over-the-top, right? I get it. We’re all busy, but that doesn’t mean we can’t make something truly showstopping in our own kitchens. That’s why I’m sharing what I truly believe is the Best Ever red velvet cheesecake brownies recipe with you today. Forget choosing between a dense, fudgy brownie and a tangy, smooth cheesecake—we get both! If you love visual impact, you might also want to check out my recipe for a simple red velvet cheesecake showstopper recipe.
This recipe is all about that incredible dual texture: that deep, cocoa-laced red velvet base meeting the bright ribbon of cream cheese swirl. It’s pure indulgence, but it comes from my heart, following the Misty Plate philosophy of making simple, beautiful food accessible to everyone. Trust me, once you try this red velvet cheesecake brownies hybrid, you’ll be saving it forever.
- Why This Recipe for red velvet cheesecake brownies is Your New Favorite
- Gathering Ingredients for Perfect red velvet cheesecake brownies
- Step-by-Step Guide to Making red velvet cheesecake brownies
- Expert Tips for the Best Ever red velvet cheesecake brownies
- Ingredient Notes and Substitutions for Cream Cheese Swirl Brownies
- Serving Suggestions for your Layered Dessert Bars
- Storage and Reheating Instructions for red velvet cheesecake brownies
- Frequently Asked Questions about red velvet cheesecake brownies
- Sharing Your Decadent Brownie Bake
Why This Recipe for red velvet cheesecake brownies is Your New Favorite
I know there are a ton of decadent brownie recipes out there, but this red velvet cheesecake brownies recipe just hits different. I spent ages perfecting the two distinct layers so you don’t have to worry about them collapsing into one big mess!
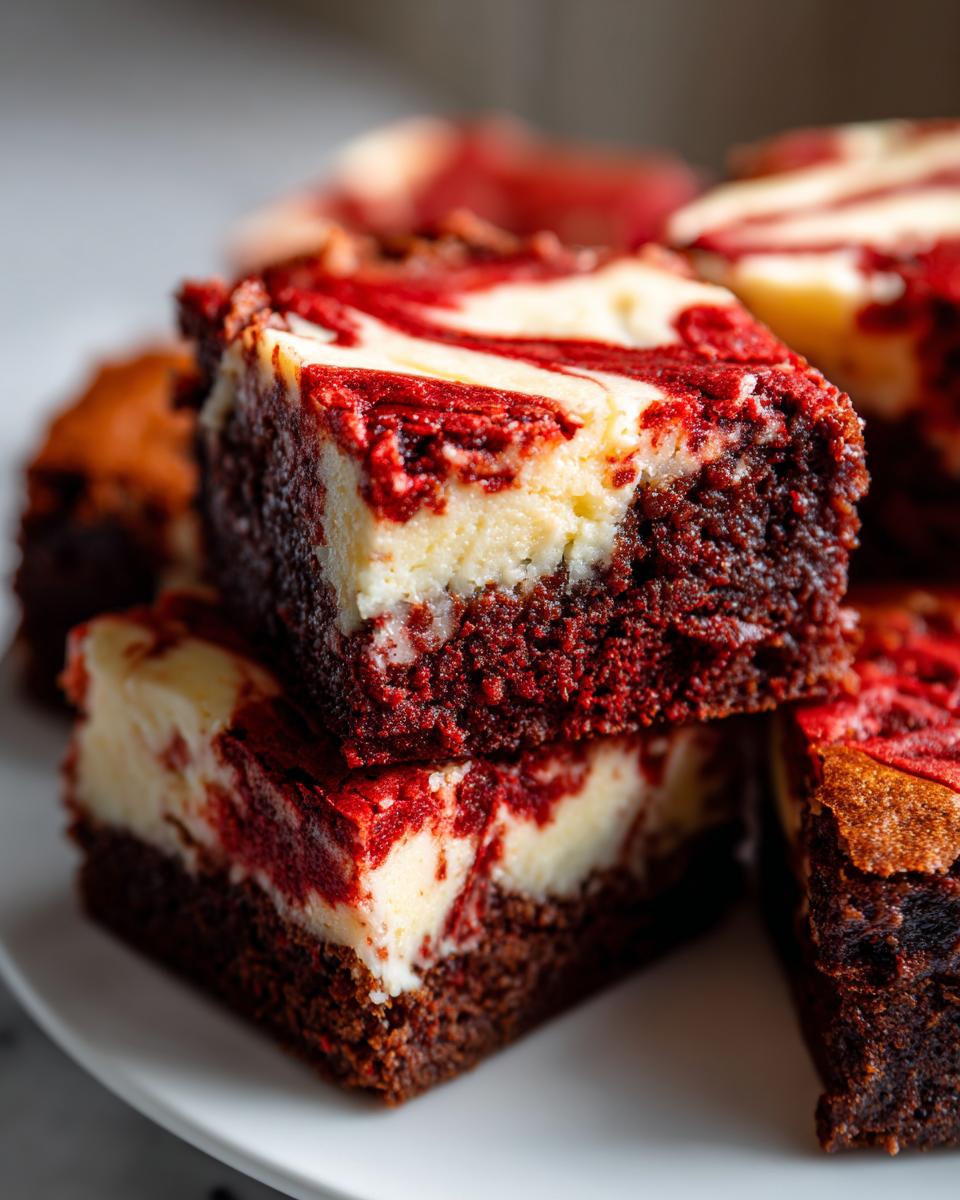
- The Texture Wow: You get that perfect fudgy layer paired seamlessly with a bright, creamy cheesecake swirl. It’s the best of both worlds!
- Visual Feast: The marbling effect makes these look like a gourmet bake, earning them the title of ‘Showstopping Dessert’ for any party.
- It’s Easier Than It Looks: Trust me, achieving this beautiful look for your Layered Dessert Bars is straightforward.
- Perfect for Sharing: This recipe makes 16 generous squares, so it’s ideal for sharing at holidays or your next gathering. You can see more of my favorite dessert recipes here!
Gathering Ingredients for Perfect red velvet cheesecake brownies
Okay, let’s get serious about gathering supplies. Because this recipe has two parts—the fudgy red velvet brownies and the creamy cheesecake—we need to be organized. Seeing these ingredients laid out helps me feel completely ready, like I’m about to pull off a masterpiece!

One thing I learned the hard way is that the temperature of your dairy matters hugely for the swirl layer. Always, always make sure your cream cheese and egg for that layer are at room temperature first. It stops lumps and gives you that unbelievably smooth finish. If you need a fantastic dip to tide you over while these bake, you have to try my strawberry cheesecake dip recipe!
For the Red Velvet Brownie Batter
- 1/2 cup unsalted butter, melted
- 1 cup granulated sugar
- 2 large eggs, room temperature
- 1 1/2 teaspoons red food coloring
- 2 teaspoons vanilla extract
- 1/2 teaspoon salt
- 3/4 cup all-purpose flour
- 3 Tablespoons Dutch process cocoa powder
For the Cream Cheese Swirl
- 8 ounces cream cheese, room temperature
- 1 large egg, room temperature (for cheesecake layer)
- 1/3 cup granulated sugar (for cheesecake layer)
Step-by-Step Guide to Making red velvet cheesecake brownies
Wow, these red velvet cheesecake brownies look complicated, but I promise you, they come together faster than you think! We’re layering up two textures here, so stick close for the assembly part. Once they’re out of the oven, patience is your secret weapon for those amazing clean cuts!
Preparing the Pan and Brownie Base
First thing’s first: get that oven warmed up to 350°F (175°C). Grab your 9×9 inch pan and line it with parchment paper. Make sure you leave some overhang on the sides—that’s our handle later! Now, for the red velvet brownies batter, whisk your melted butter and the full cup of sugar until they hang out nicely. Then, whisk in your 2 room temperature eggs, the red coloring, and vanilla. In a separate dish, mix your flour, cocoa powder, and salt. Only add the dry mixture to the wet when you’re ready, and mix just until you don’t see streaks of white flour anymore. Seriously, stop mixing when you think you should stop!
Mixing the Cream Cheese Swirl
While the oven heats up, we mix the cheesecake layer. This needs to be super smooth, so remember what I said about room temperature ingredients! Use a separate bowl and beat that 8 ounces of cream cheese until it’s wonderfully creamy and has zero lumps. Then, gently beat in the remaining 1/3 cup of sugar and that final room temperature egg until everything is just combined and silky. That’s it for the swirl!
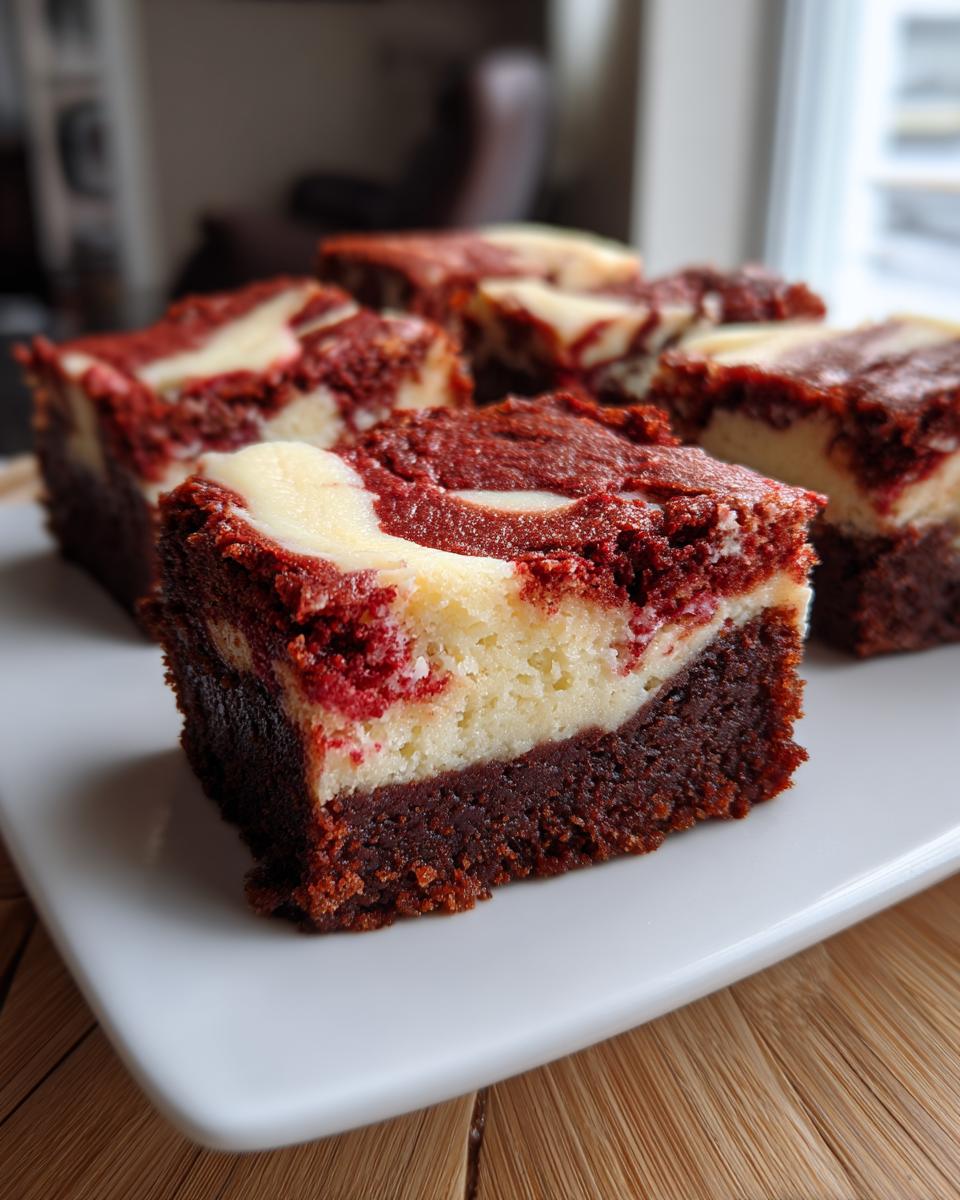
Assembling and Swirling the red velvet cheesecake brownies
Time to assemble your Marbled Brownies Recipe! Spread exactly half of your red velvet brownie batter into that prepared pan, getting it mostly even. Next, just drop spoonfuls of that lovely cream cheese mixture all over the top. Now, pour the rest of the red batter right over the top of those dollops. Take a knife or a skewer, and gently run it through the layers, making those beautiful figure-eights to create your swirl. Don’t go crazy swirling, or they’ll blend totally!
Baking and Cooling for Fudgy Red Velvet Brownies
Bake these beauties for about 30 to 35 minutes. You’re looking for the edges to be set firm. When you test the center, the toothpick should come out with moist crumbs attached—not wet batter, please! That’s the key to the fudgy red velvet brownies taste. The absolute hardest part is next: these must cool completely in the pan. If you can resist, chilling them for a couple of hours makes cutting them into perfect squares so much easier. You can find my favorite guide to fudgy brownies right here, too!
Expert Tips for the Best Ever red velvet cheesecake brownies
Making these red velvet cheesecake brownies look as good as they taste takes just a tiny bit of insider knowledge. I’ve pulled notes straight from my testing journals because I want your result to be absolutely stunning, just like mine!
First, let’s talk color. If you want that deep, signature red velvet look, you can’t skimp on the food coloring. Start with the amount in the recipe, but if your batter looks a little shy of truly vibrant, add another half teaspoon—just a drop at a time—until you get that gorgeous saturation. You want that bright color to really pop against the white cheesecake swirl.
Remember that Dutch process cocoa powder I mentioned? It makes a real difference for the chocolate cream cheese dessert flavor. It’s less acidic than regular cocoa, which means it darkens the overall color slightly while giving you a smoother, nearly black cocoa undertone. This is crucial for balancing the sweetness of the cheesecake layer.
The most important step, honestly, might be waiting. Please, please let these cool completely. Better yet, wrap them up and chill them for at least two hours, just like I mentioned in the notes. This firms up that delicate cream cheese, giving you those beautiful, clean slices that make these look like a true gourmet brownie bake. If you need another great idea for an easy fruit bake, you can check out my easy, moist, old-fashioned fruit cake recipe!
Don’t rush the batter mixing, especially the brownie part. Overmixing develops gluten, and that turns fudgy squares into cakey squares. We want dense, fudgy perfection here!
Ingredient Notes and Substitutions for Cream Cheese Swirl Brownies
When you’re aiming for perfect red velvet cheesecake brownies, the ingredients matter more than they sometimes seem to. Don’t let this list scare you; it’s mostly about making sure things are ready when it’s time to bake!
Let’s talk cocoa first. We specifically ask for Dutch process cocoa powder for the brownie base. Why? Because regular cocoa powder can react weirdly with the red dye and sometimes lead to a duller color. The Dutch process gives us a deeper, smoother chocolate base that really lets that vibrant red pop and brings out the best in your chocolate cream cheese dessert.
And if you ignore everything else I say, please don’t ignore the room temperature rule for the cream cheese and the eggs! If your cream cheese is cold, it will NEVER mix smoothly with the sugar and egg for the cheesecake layer. You end up beating air into cold lumps, which leads to chunky swirls—and we want smooth, luxurious ribbons here. If you are ever in a pinch and need a creamy sauce recipe, you can check out my quick creamy garlic sauce recipe, but for this, room temp is non-negotiable!
What about that red color? If you are trying to avoid commercial food coloring, I totally get it! For an alternative in these swirled brownies dessert bars, you can try a high-quality, finely ground beet powder. You’ll need much more, maybe 1 to 2 tablespoons mixed right into the dry ingredients, but it gives a lovely, earthy red hue, though it won’t be quite as intense as liquid dye.
Serving Suggestions for your Layered Dessert Bars
Now that you’ve mastered the art of the red velvet cheesecake brownies, the real fun begins: setting up the perfect dessert display! These are already rich and decadent all on their own, so sometimes simple is best. I always think about balancing the richness. You don’t want to overpower that amazing cream cheese swirl brownies flavor.
For an easy finish that honors the brownie’s natural beauty, sometimes I just grab a small sifter and give them a very light dusting of powdered sugar right before serving. It catches the light beautifully and really highlights the dark red base.
If you’re serving these after a heavy meal, a little something light on the side cuts through the richness perfectly. A sprinkle of fresh raspberries or sliced strawberries works magic against the chocolate and cream cheese. It brightens everything up, trust me. You can even serve them alongside a little bowl of whipped cream—maybe not the full ice cream experience, but close!
Speaking of cold treats, these brownies shine when paired with a quality vanilla ice cream. If you’re feeling ambitious, you could try making a simple no-bake pie to serve alongside, but I suggest checking out my recipe for an easy ice cream pie recipe if you want to keep the temperature contrasts going!
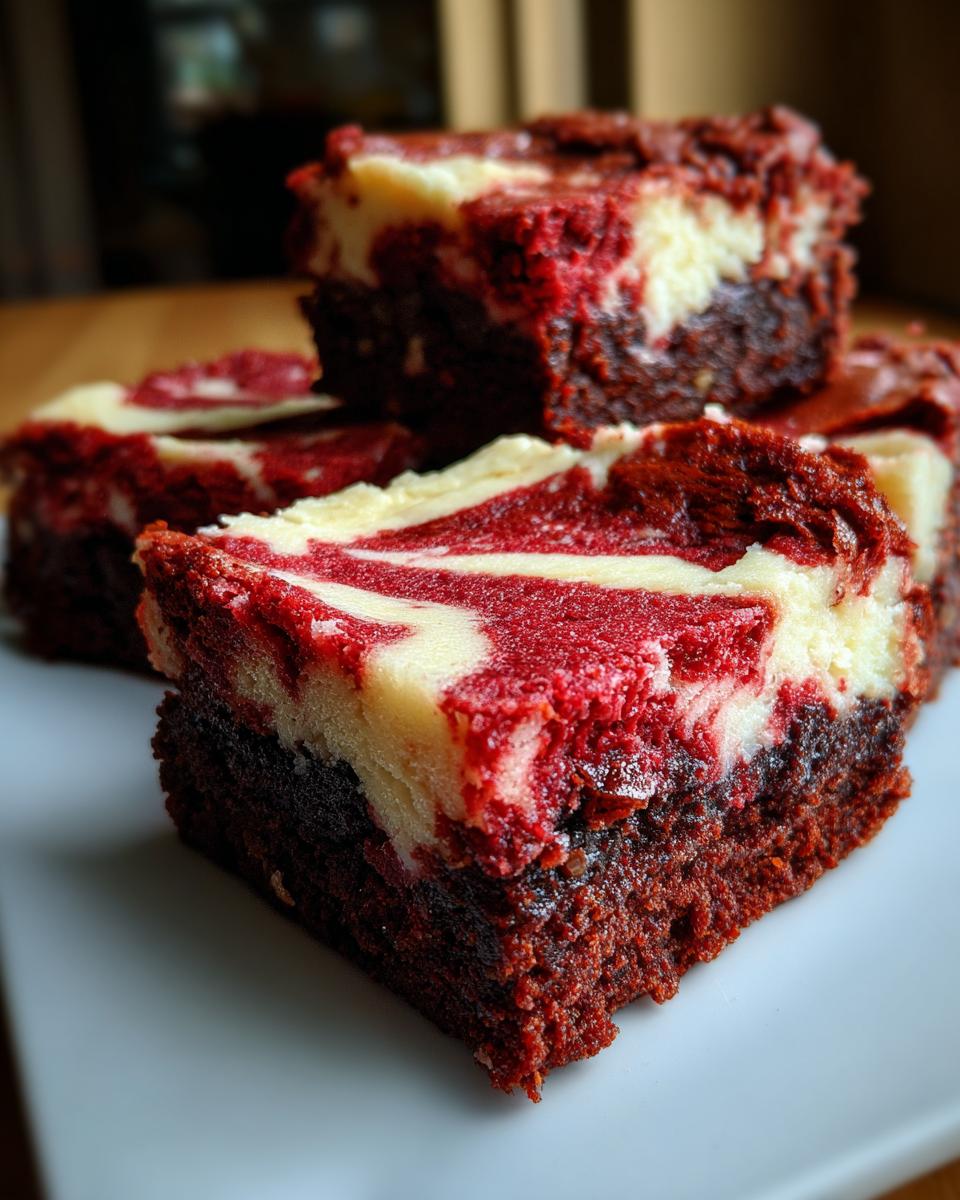
Honestly though, these gourmet brownie bakes are fantastic all by themselves, served slightly warm or chilled. They are showstoppers straight out of the pan once they are cut into those perfect squares!
Storage and Reheating Instructions for red velvet cheesecake brownies
These red velvet cheesecake brownies are so rich, you rarely ever have leftovers, but when you do, storing them correctly is key to keeping that fudgy texture and creamy swirl intact. Since we have that cream cheese layer in here, we can’t treat them like simple chocolate chip cookies—they need a bit more care, which is fine by me!
The absolute best way to store them is completely cooled in an airtight container. Because of that cheesecake swirl, I always recommend keeping them in the refrigerator. They’ll last beautifully for about four to five days tucked away in there. This makes them wonderful easy cheesecake swirl bars to prep ahead of time for a party!
If you try to keep them on the counter, the cream cheese component can get a little soft too quickly, and that beautiful swirl might lose definition. You can totally make these a day or two ahead of when you plan to serve them, which is a huge bonus when you’re juggling holiday baking schedules!
Now, how should you eat them? This is where personal preference kicks in! Some folks love them straight from the fridge because the cheesecake layer becomes really firm and dense—almost like a chilled cheesecake bar. I, for one, prefer to take one out about 30 minutes before I’m going to eat it. Just letting them sit on the counter warms them up just enough so the brownie bottom softens back up into that amazing fudgy consistency we worked so hard for. It’s the perfect texture!
Don’t even try to reheat them in the microwave; that just makes the brownie edges tough and the cheesecake layer gummy. If you’re prepping lots of things, keep the chilling in mind, just like when I make my no-bake granola bars—a little chill time helps everything firm up perfectly for storage!
Frequently Asked Questions about red velvet cheesecake brownies
I get asked about these red velvet cheesecake brownies all the time, especially when folks are trying to nail that perfect swirl. Don’t worry if little things seem tricky; baking is all about practice! I’ve gathered the most common questions here so you feel like a pro next time you bake these Valentine’s Day desserts.
Why does my cream cheese swirl disappear into the brownie layer?
Oh, that’s the worst feeling! Usually, this happens for two main reasons. First, you might be over-swirling them in the pan—you just want to gently marble, not blend completely, or they lose definition before they even bake. Second, if the brownie batter is too thin or the cheesecake batter is too thick, they can migrate during baking. Make sure you follow the ratio perfectly, and try chilling them really well before you cut them next time! This is key for all cheesecake brownies recipe variations.
Can I skip the cocoa powder and just use red food coloring for the brownie layer?
You absolutely could, but then you wouldn’t really have a Red Velvet Brownies flavor, would you? The cocoa powder is what gives red velvet its subtle, distinct chocolatey background that perfectly complements the tang of the cream cheese. If you skip it, you just get a colored vanilla brownie. For the best results in this red velvet cake and brownie hybrid, stick with the 3 tablespoons of Dutch process cocoa powder—it makes all the difference!
How do I get that super intense, vibrant red color?
The color is half the fun in a good red velvet dessert idea! To get that true, vivid red that pops against the white swirl, you need a good quality gel food coloring, not the weak liquid kind you find in the baking aisle of every grocery store. I usually start with the amount called for in the recipe, but I always have an extra half teaspoon of gel coloring ready just in case my batter looks a little dull. A little goes a long way with the gel stuff!
Is it okay if I use a different pan size for these layered dessert bars?
If you change the size of your pan, you definitely have to change the baking time, so you have to be more careful checking them. For this recipe, I strongly recommend sticking to the 9×9 inch size. If you use a larger pan, like a 9×13, the layer will be too thin, and they will bake in maybe 20 minutes, yielding dry, nearly burnt edges. If you want to see the timing for other pans, you might find some helpful general tips over at weeknight dinner ideas, but for these specific homemade cheesecake brownies, the 9×9 is your friend!
Can I make the brownie batter ahead of time?
That’s a great question if you are planning a big party! You can certainly mix the standard brownie batter component—the wet and dry ingredients without the cream cheese swirl added yet—and keep it covered tightly in the fridge for up to 24 hours. However, the cheesecake swirl batter needs to be mixed fresh right before you layer it, especially since it uses raw egg. For the cleanest results in your chocolate cream cheese desserts, mix both components right before assembly.
If you want more insights into why recipes work the way they do, check out this great piece on making similar treats: Valentine’s Day red velvet cheesecake brownies recipes.
Sharing Your Decadent Brownie Bake
Now that you’ve created these absolutely stunning red velvet cheesecake brownies, I really, really want to hear all about them! Seeing your beautiful marbled creations is seriously the best part of my day. This isn’t just about following directions; it’s about putting a little piece of your own joy into the oven, right?
Did you cut them into 16 perfect squares, or did you sneak a taste right out of the pan while they were still warm? Don’t be shy! Tell me everything! Did the kids go crazy for the color? Did they disappear instantly at your gathering? Leave a rating for the recipe down below, and I promise I read every single comment you leave.
If you snapped a picture of your perfect swirls, tag me! I love seeing how these rich, velvety baked goods look on your tables. Whether you made them for a special occasion or just because you needed a major chocolate boost, I’m so glad you made these showstopping desserts with me today.
If you have any lingering questions after your first bake, or if you just want to tell me how much you loved that fudgy-to-creamy transition, please get in touch! You can always reach out through the contact page. Happy baking, friends!
PrintBest Ever Red Velvet Cheesecake Brownies
Make these decadent red velvet cheesecake brownies that feature a fudgy red velvet base swirled with a creamy cheesecake layer. This recipe delivers a showstopping dessert that is easy to make for any gathering.
- Prep Time: 20 min
- Cook Time: 35 min
- Total Time: 55 min
- Yield: 16 servings 1x
- Category: Dessert
- Method: Baking
- Cuisine: American
- Diet: Vegetarian
Ingredients
- 1/2 cup unsalted butter, melted
- 1 cup granulated sugar
- 2 large eggs, room temperature
- 1 1/2 teaspoons red food coloring
- 2 teaspoons vanilla extract
- 1/2 teaspoon salt
- 3/4 cup all-purpose flour
- 3 Tablespoons Dutch process cocoa powder
- 8 ounces cream cheese, room temperature
- 1 large egg, room temperature (for cheesecake layer)
- 1/3 cup granulated sugar (for cheesecake layer)
Instructions
- Preheat your oven to 350°F (175°C). Line a 9×9 inch baking pan with parchment paper, leaving an overhang on the sides for easy removal.
- Prepare the red velvet brownie batter: In a medium bowl, whisk together the melted butter and 1 cup of sugar until combined.
- Whisk in the 2 room temperature eggs one at a time, followed by the red food coloring and vanilla extract. Mix until the color is uniform.
- In a separate small bowl, whisk together the flour, cocoa powder, and salt.
- Gradually add the dry ingredients to the wet ingredients, mixing only until just combined. Do not overmix.
- Prepare the cream cheese swirl: In another bowl, beat the room temperature cream cheese until smooth.
- Beat in the 1/3 cup sugar and the remaining room temperature egg until the mixture is creamy and lump-free.
- Spread half of the red velvet brownie batter evenly into the prepared pan.
- Dollop spoonfuls of the cream cheese mixture over the brownie layer.
- Spread the remaining red velvet batter over the cream cheese layer.
- Use a knife or skewer to gently swirl the layers together to create a marbled effect. Do not over-swirl.
- Bake for 30 to 35 minutes, or until the edges are set and a toothpick inserted near the center comes out with moist crumbs attached, not wet batter.
- Let the brownies cool completely in the pan on a wire rack before lifting them out using the parchment overhang.
- Cut into 16 squares before serving.
Notes
- For the best swirl definition, ensure your cream cheese layer is slightly thicker than your brownie batter layer.
- Use high-quality Dutch process cocoa powder for a deeper chocolate flavor in the red velvet base.
- Chill the brownies for at least two hours before cutting for clean, professional-looking squares.
Nutrition
- Serving Size: 1 brownie square
- Calories: 280
- Sugar: 25g
- Sodium: 150mg
- Fat: 16g
- Saturated Fat: 9g
- Unsaturated Fat: 7g
- Trans Fat: 0.5g
- Carbohydrates: 32g
- Fiber: 1g
- Protein: 4g
- Cholesterol: 60mg