
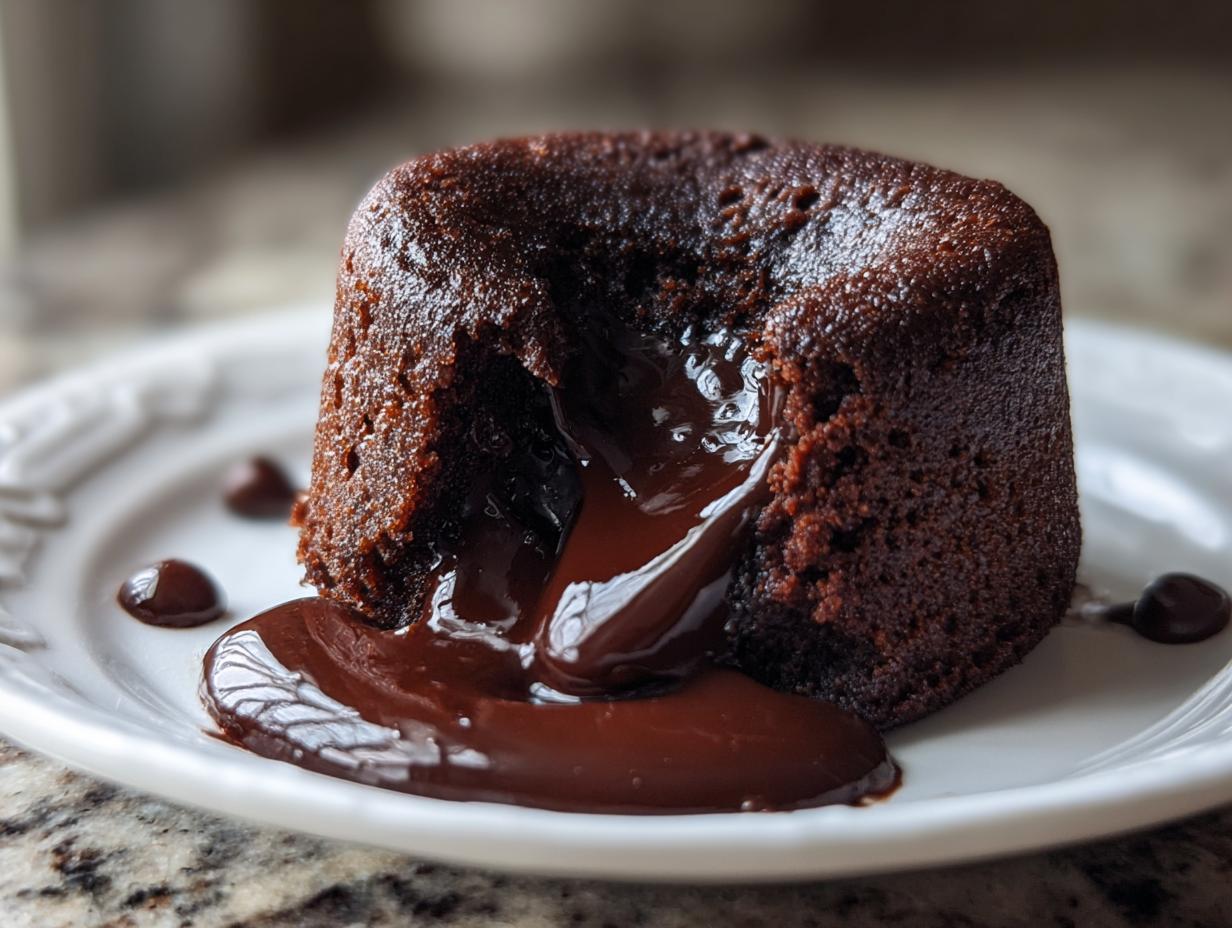
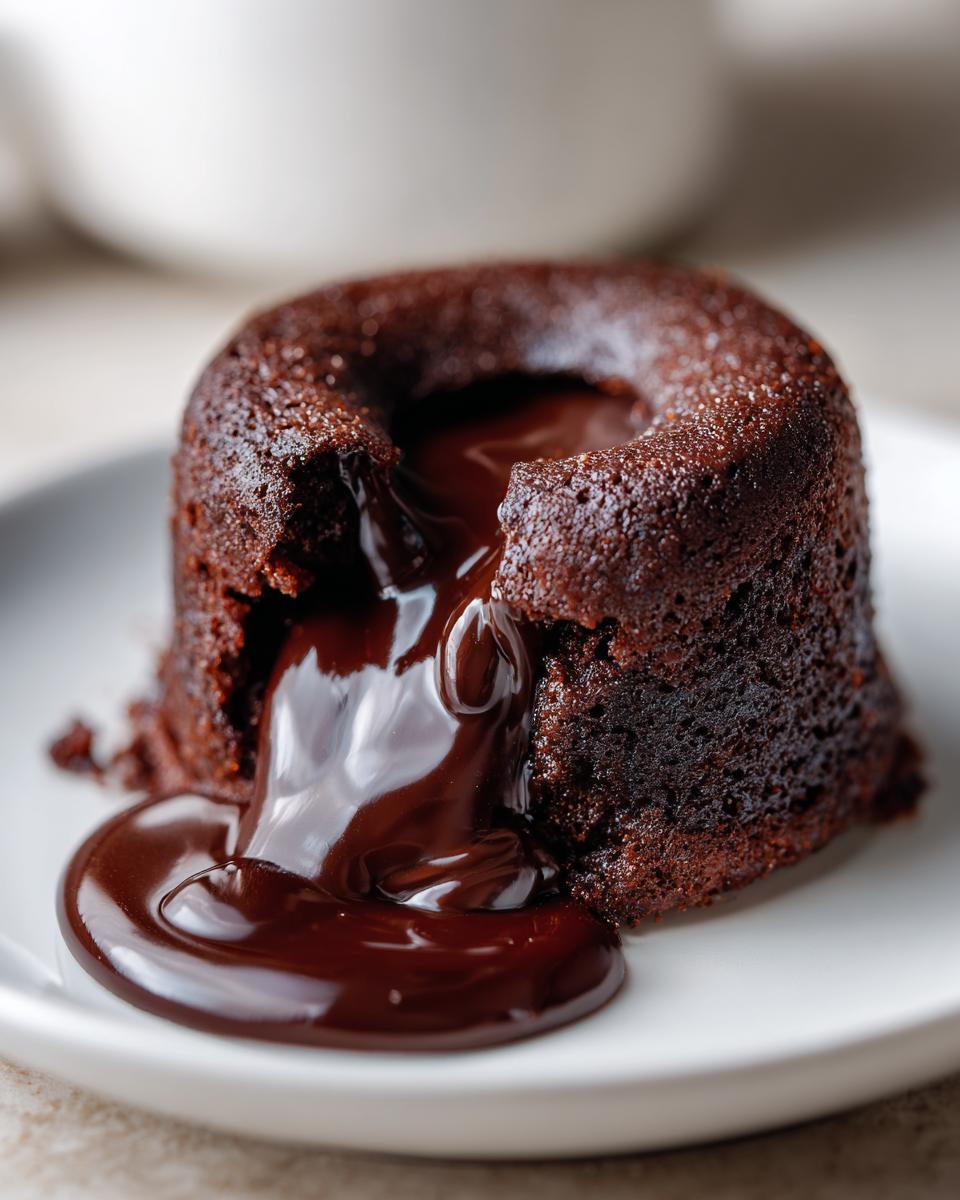
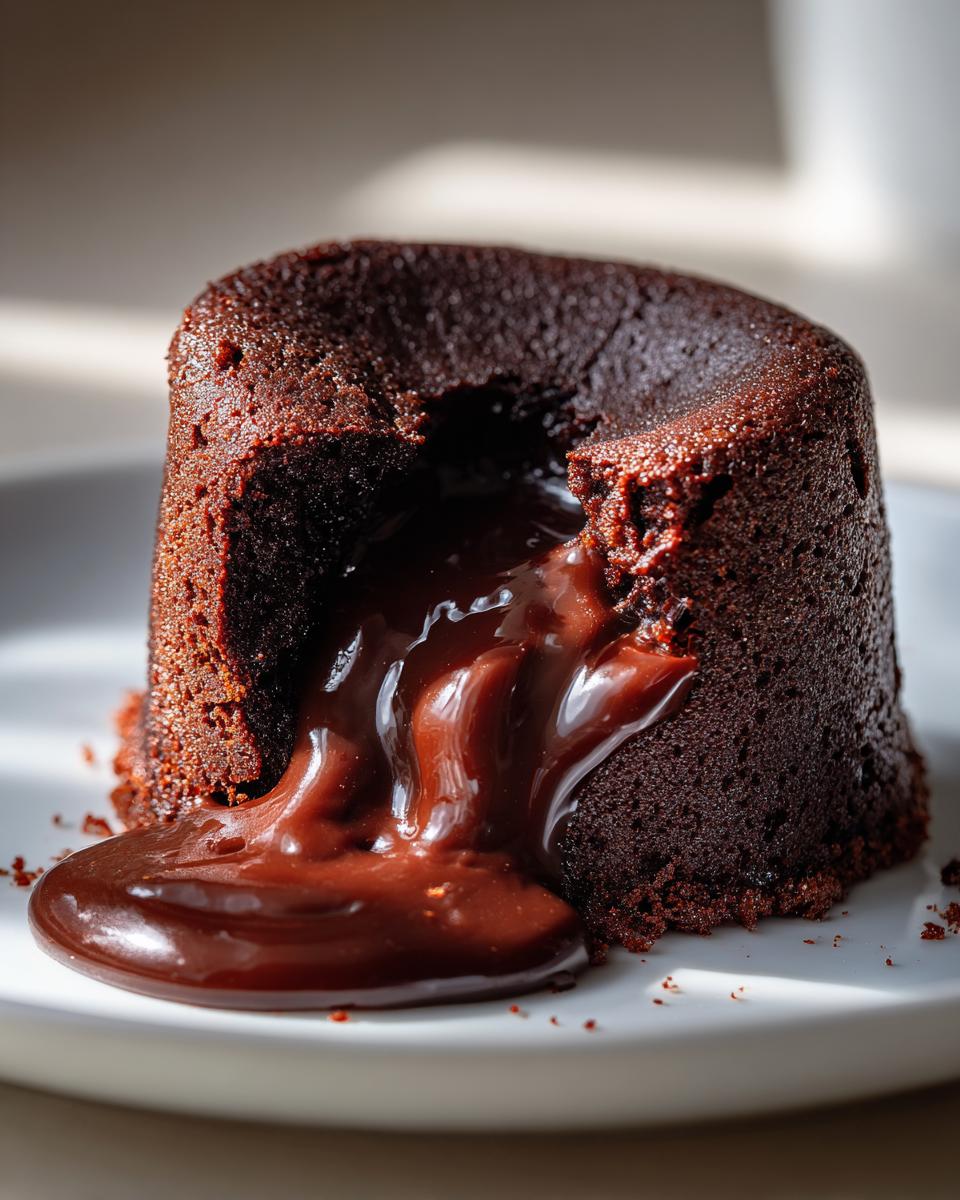
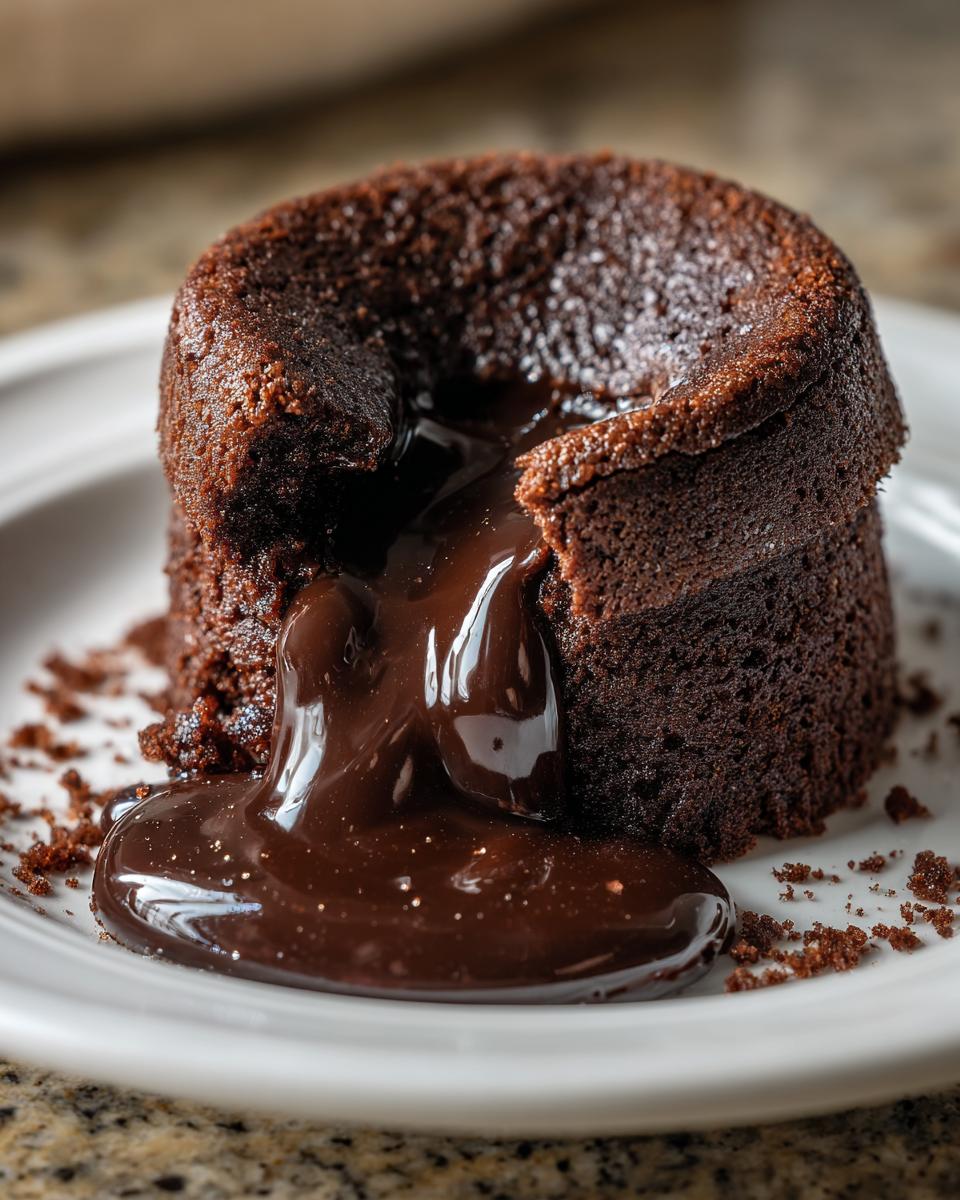
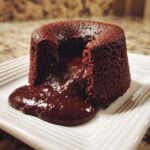
There’s nothing quite like the moment you pierce the outer edge of a dessert and watch rich, warm chocolate ooze across your plate. That’s the magic we’re capturing today with the easiest, most reliable recipe for a classic lava cake. When I started cooking again, I needed simple, satisfying moments, and this dessert is pure success from basic ingredients. It proves that transforming simple pantry items into something spectacular for your date night or just because, is totally achievable. If you’re looking for more accessible sweet ideas, check out my collection of dessert recipes. You deserve this chocolate indulgence.
- Why This is the Best Lava Cake Recipe for a Gooey Center Dessert
- Ingredients for Your Homemade Molten Cake
- Simple Steps to Make the Perfect Chocolate Lava Cake
- Tips for Success with Your Quick Dessert Ideas
- Variations: From Nutella Lava Cake Recipe to Air Fryer Lava Cake
- Serving Suggestions for Your Decadent Chocolate Treat
- Storage and Reheating Instructions for Individual Chocolate Cakes
- Frequently Asked Questions About Making Lava Cake
- Nutritional Information Estimate for Your Chocolate Indulgence
Why This is the Best Lava Cake Recipe for a Gooey Center Dessert
I spent way too long trying to find a recipe that actually delivered that oozing, gooey center dessert look without turning into soup! This chocolate lava cake recipe is the one because we use a specific blend of butter and high-quality bittersweet chocolate. That ratio is crucial; it keeps the center liquid while the outside firms up just enough. Trust me, this is the best lava cake recipe because it nails that exact temperature contrast. For quick inspiration on other single-serving treats, you might love my fudgy chocolate mug cake. It’s all about simple, reliable results!

Achieving Bakery Style Chocolate Cake Perfection
The secret to that bakery style chocolate cake finish is all preparation. First thing: high heat! The oven needs to be screaming hot at 425°F. This shocks the outside of the batter, forcing it to bake quickly into that tender shell. Second, don’t skimp on prepping those ramekins. A generous layer of butter followed by a dusting of cocoa powder creates a non-stick barrier that lets you invert the cake perfectly without tearing the edges. That clean release is what guarantees that beautiful presentation.
Ingredients for Your Homemade Molten Cake
When it comes to this rich chocolate indulgence, simple ingredients are truly the key. I only use four core components for the batter, plus the prep materials, which keeps things really streamlined. Always use good quality chocolate here, since it’s the star! For the perfect texture, we need both whole eggs and extra yolks to get that velvety interior.
Here is exactly what you’ll gather up:
- 4 ounces of bittersweet chocolate, chopped into small pieces
- 4 ounces unsalted butter, cut into cubes
- 2 large eggs PLUS 2 large egg yolks
- 1/4 cup granulated sugar
- 2 tablespoons all-purpose flour
- A tiny pinch of salt
- Butter and cocoa powder, just for prepping the ramekins
Simple Steps to Make the Perfect Chocolate Lava Cake
This is where the magic happens, and honestly, it moves fast! Once you have your ingredients ready, the whole batter comes together in about five minutes. The trick is keeping things slightly warm but not hot when mixing the chocolate into the eggs. Remember how I said we need patience in the kitchen sometimes? Well, for this lava cake, we just need timely precision. If you need a break between baking projects, check out my ideas for a moist lemon loaf to change things up!
Preparing Ramekins for Easy Release
If you skip this, you’re just asking for trouble later. You must treat your ramekins well! First, take softened butter—not melted, but soft—and smear a nice, thick, even coat all over the inside. Don’t miss those little corners. Then, grab unsweetened cocoa powder (not flour!) and dump about a tablespoon inside each buttered cup. Tilt and tap the ramekin all around until the cocoa completely coats the butter. Dump out the excess; what’s left is a slick, non-stick surface that lets the cake slide right out later. This step is non-negotiable for presentation!
The Critical Baking Time for a Flowing Center
This is the moment of truth for your chocolate cake with flowing center. We are baking at a high 425°F, and the window is narrow. I tell everyone to set a timer for 12 minutes, seriously. When you peek through the glass, you want the edges to look firm, maybe even slightly puffed up, but the very center should still look soft and jiggly, like unset custard. If the whole thing looks firm, you’ve gone too far and you have a delicious, but regular, chocolate cake. Trust the jiggle! After 12 to 14 minutes, pull them out immediately. We only let them sit for one single minute before inverting them onto the plate. That one minute lets the structure set just enough to hold its shape.
Tips for Success with Your Quick Dessert Ideas
Since these lava cakes are such fantastically quick dessert ideas—ready in under 25 minutes total—we can’t afford mistakes! My biggest, loudest rule is this: Do. Not. Open. The. Oven. Door. Seriously, resist the urge! Opening the door lets that intense heat rush out, and it will immediately deflate the fragile center structure you’re trying to build. Keep your eyes on the glass and judge the cake by its edges.
Also, if you’re making these for a busy weeknight, you can prep the batter earlier. I often mix it up and keep the ramekins covered in the fridge for up to a day. When you are ready to bake, you just add 1 or 2 extra minutes to the timer. Getting organized first means you can whip up this impressive treat anytime! Need more help streamlining your evening meals? I share lots of shortcuts in my weeknight dinner ideas post.
Variations: From Nutella Lava Cake Recipe to Air Fryer Lava Cake
Part of the fun in the kitchen is adapting something a little bit to make it your own, right? While I absolutely stand by the classic version above for the best molten result, people always ask about variations, and I’ve tested a few! If you’re craving that hazelnut creaminess, swapping in some Nutella is super simple. To make a quick Nutella lava cake recipe, just replace two tablespoons of your chopped chocolate with two tablespoons of Nutella when you melt it down with the butter. That’s it! It gives it a lovely, rich depth.
Now, for those of you who are loving your air fryers, yes, you can absolutely make these! The technique is almost identical, but the baking time will be much shorter, usually around 8 to 10 minutes. It’s a great kitchen tool for making individual chocolate cakes fast. If you want to dive deeper into that world, I saw a fantastic guide on making an Air Fryer Lava Cake that might help you get started. And if you’re curious about other appliances, check out how I use my air fryer for crispy Air Fryer Pork Chops!
Serving Suggestions for Your Decadent Chocolate Treat
A decadent chocolate treat like this deserves the grand finale treatment! The absolute must-have pairing for me is a scoop of good quality vanilla bean ice cream. The contrast between the warm, intensely chocolate cake and the cold, creamy scoop is just heaven. If you need another cold dessert idea, I have a great recipe for an easy ice cream pie.
If you want something lighter, fresh raspberries or sliced strawberries cut through the richness perfectly. Honestly though, even just a light dusting of powdered sugar right before serving is all you really need to make these individual chocolate cakes look gorgeous. Serve them immediately—that warmth is essential!
Storage and Reheating Instructions for Individual Chocolate Cakes
If you manage to have leftovers—which honestly, is a feat in my house—don’t worry about these individual chocolate cakes going to waste! You can wrap each one tightly in plastic wrap, and they’ll keep well in the fridge for about two days. Don’t try to reheat them in the microwave for too long, or you’ll lose that gooeyness instantly.
Instead, pop them (still in their ramekins, if you stored them that way) into a preheated 350°F oven for just about 5 to 7 minutes. That gently warms the outside and re-melts the center perfectly. If you froze them, thaw them overnight first, then follow the oven instructions!
Frequently Asked Questions About Making Lava Cake
I always get so many questions about timing and chocolate types when people try this recipe out for the first time. It’s totally normal! Getting the texture just right takes a little practice, but once you know these few tricks, you’ll be whipping up these beauties like a pro. If you ever have more questions or just want to send me a photo of your beautiful results, please don’t hesitate to reach out via my contact page; I love hearing from you all!
How do I know if my lava cake is done without cutting into it?
This is the million-dollar question! You want those perfectly set edges, but the middle needs that beautiful wobble. Look closely when the timer goes off—the edges should look baked and firm, maybe slightly pulling away from the sides of the ramekin, but the very center should actually look duller and still jiggle slightly when you gently tap the pan. Do not, under any circumstance, wait until the jiggle is gone, or you’ve lost your molten liquid magic!
Can I make this lava cake ahead of time?
Yes, you absolutely can, which makes these a perfect “impress guests dessert” option for entertaining! You can prepare the batter all the way up to dividing it into the buttered and dusted ramekins. Cover them tightly with plastic wrap and refrigerate for up to 24 hours. When you are ready to bake, just put them straight into the preheated 425°F oven, but add 1 to 2 extra minutes to the baking time because they are starting cold. If you freeze the batter-filled ramekins, bake them for about 18 minutes from frozen.
What is the best chocolate to use for the molten center?
For the ultimate chocolate indulgence, I really recommend using bittersweet chocolate, around 60% to 70% cacao. It gives you that deep, dark chocolate flavor that cuts through the sweetness of the sugar. Semi-sweet is often too sweet for me in this application, making the final product taste a little flat. You want that slight bitterness to balance the gooeyness. Remember, since chocolate is the foundation here, better quality chocolate really shows itself off in the final product!
Nutritional Information Estimate for Your Chocolate Indulgence
I always think it’s helpful to have a rough idea of what’s in our favorite treats, even if we’re not tracking every single bite! Since these are meant to be special moments of pure chocolate indulgence, we aren’t worrying too much once that center flows out, but here are the estimates based on the four servings this recipe makes. Keep in mind these numbers are rough because the exact type of chocolate you use makes a real difference!
For one serving of this rich dessert:
- Calories: 380
- Sugar: 25g
- Fat: 25g
- Carbohydrates: 30g
- Protein: 8g
Just a friendly note from my kitchen to yours: these are just estimates based on the ingredients I use. If you decide to add a swirl of whipped cream or extra berries, that’s going to shift things! For more whole-food inspiration, take a peek at my easy protein balls if you’re looking for a different kind of satisfying bite later in the week.
PrintEasy Chocolate Lava Cake Recipe for a Gooey Center
Make this easy chocolate lava cake recipe for a decadent dessert with a perfectly molten center. It is surprisingly simple and ideal for date nights or impressing guests.
- Prep Time: 10 min
- Cook Time: 14 min
- Total Time: 24 min
- Yield: 4 servings 1x
- Category: Dessert
- Method: Baking
- Cuisine: American
- Diet: Vegetarian
Ingredients
- 4 ounces bittersweet chocolate, chopped
- 4 ounces unsalted butter
- 2 large eggs
- 2 large egg yolks
- 1/4 cup granulated sugar
- 2 tablespoons all-purpose flour
- Pinch of salt
- Butter and cocoa powder for ramekins
Instructions
- Preheat your oven to 425 degrees Fahrenheit. Lightly butter four 6-ounce ramekins. Dust the inside of each ramekin with cocoa powder, tapping out any excess. Place the prepared ramekins on a baking sheet.
- Place the chopped chocolate and butter in a heatproof bowl set over a saucepan of simmering water (or use a microwave in short bursts). Stir until the mixture is completely smooth. Remove from heat and let it cool slightly.
- In a separate bowl, whisk together the eggs, egg yolks, and granulated sugar until the mixture is pale and slightly thickened, about 2 minutes.
- Gently whisk the slightly cooled chocolate mixture into the egg mixture until just combined.
- Sift the flour and salt over the chocolate mixture. Fold gently with a spatula until no streaks of flour remain. Do not overmix.
- Divide the batter evenly among the four prepared ramekins.
- Bake for 12 to 14 minutes. The edges should look set, but the center should still appear soft and jiggly. This timing is key for the molten center.
- Let the cakes cool in the ramekins for exactly 1 minute. Carefully run a thin knife around the edge of each cake. Invert each cake onto a small serving plate.
- Serve immediately while warm with ice cream or fresh berries for a rich chocolate indulgence.
Notes
- For a Nutella lava cake variation, substitute 2 tablespoons of the chopped chocolate with 2 tablespoons of Nutella, mixing it in with the melted chocolate and butter.
- To achieve bakery style results, do not open the oven door while the cakes are baking.
- If you prefer a slightly firmer center, bake for an additional minute.
Nutrition
- Serving Size: 1 cake
- Calories: 380
- Sugar: 25g
- Sodium: 110mg
- Fat: 25g
- Saturated Fat: 15g
- Unsaturated Fat: 10g
- Trans Fat: 0g
- Carbohydrates: 30g
- Fiber: 2g
- Protein: 8g
- Cholesterol: 140mg