
Oh, fall baking—doesn’t that just smell like home? When the air gets crisp, I immediately start craving those comforting flavors, but honestly, sometimes I just don’t have the energy for fussy recipes. That’s why I became obsessed with the **pumpkin crunch** dessert. Forget the layered fuss; this is pure Midwest comfort made easy, borrowing that brilliant dump-and-layer technique that makes life simpler!
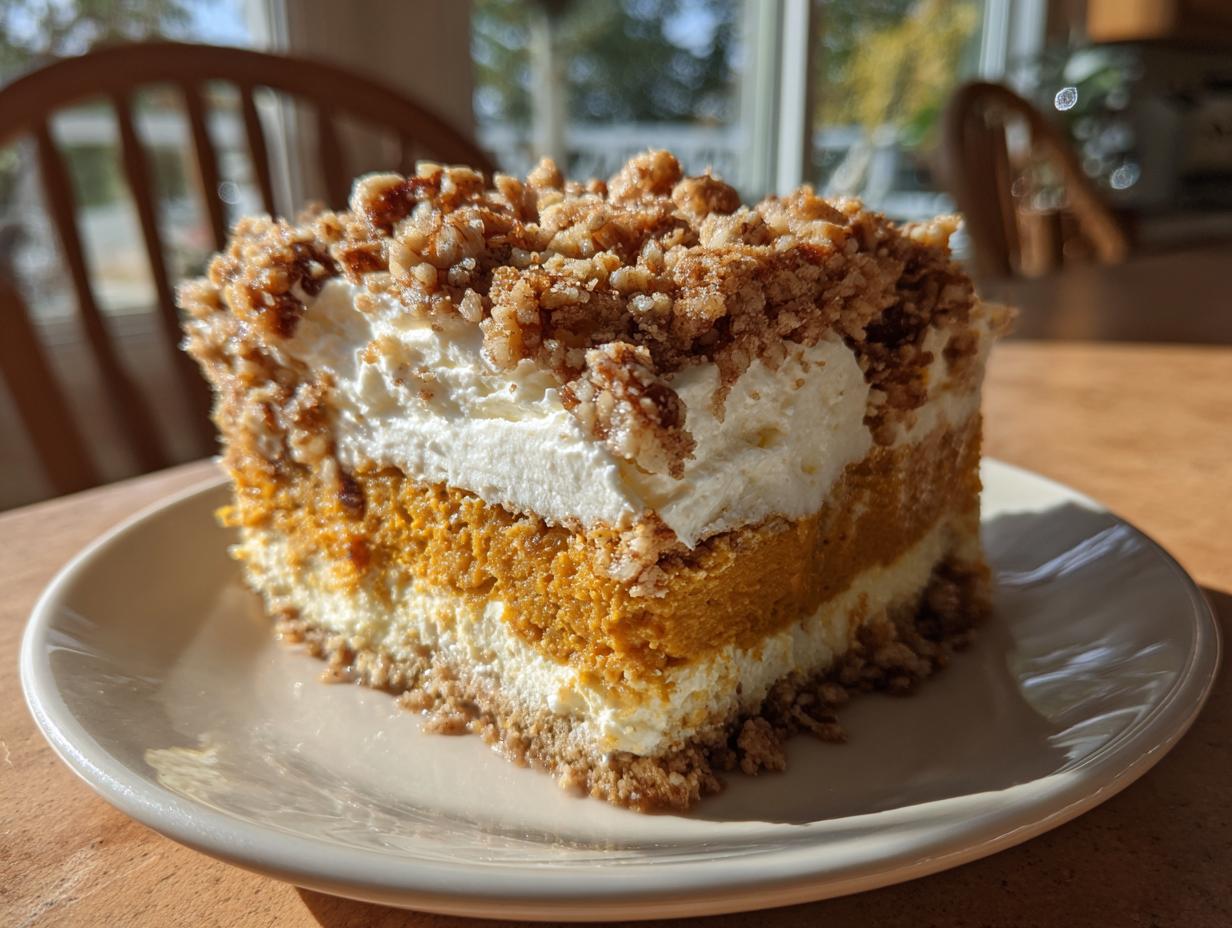
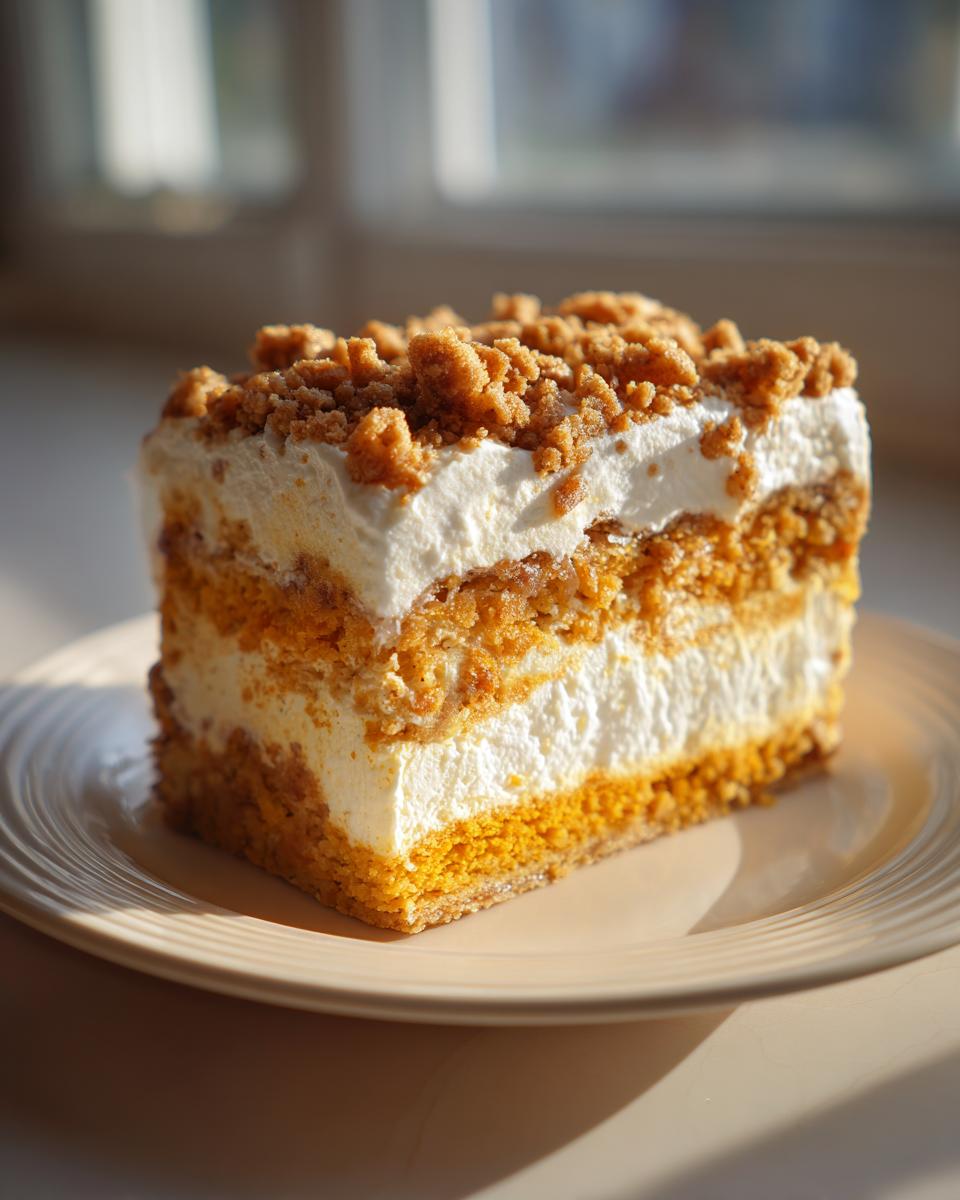
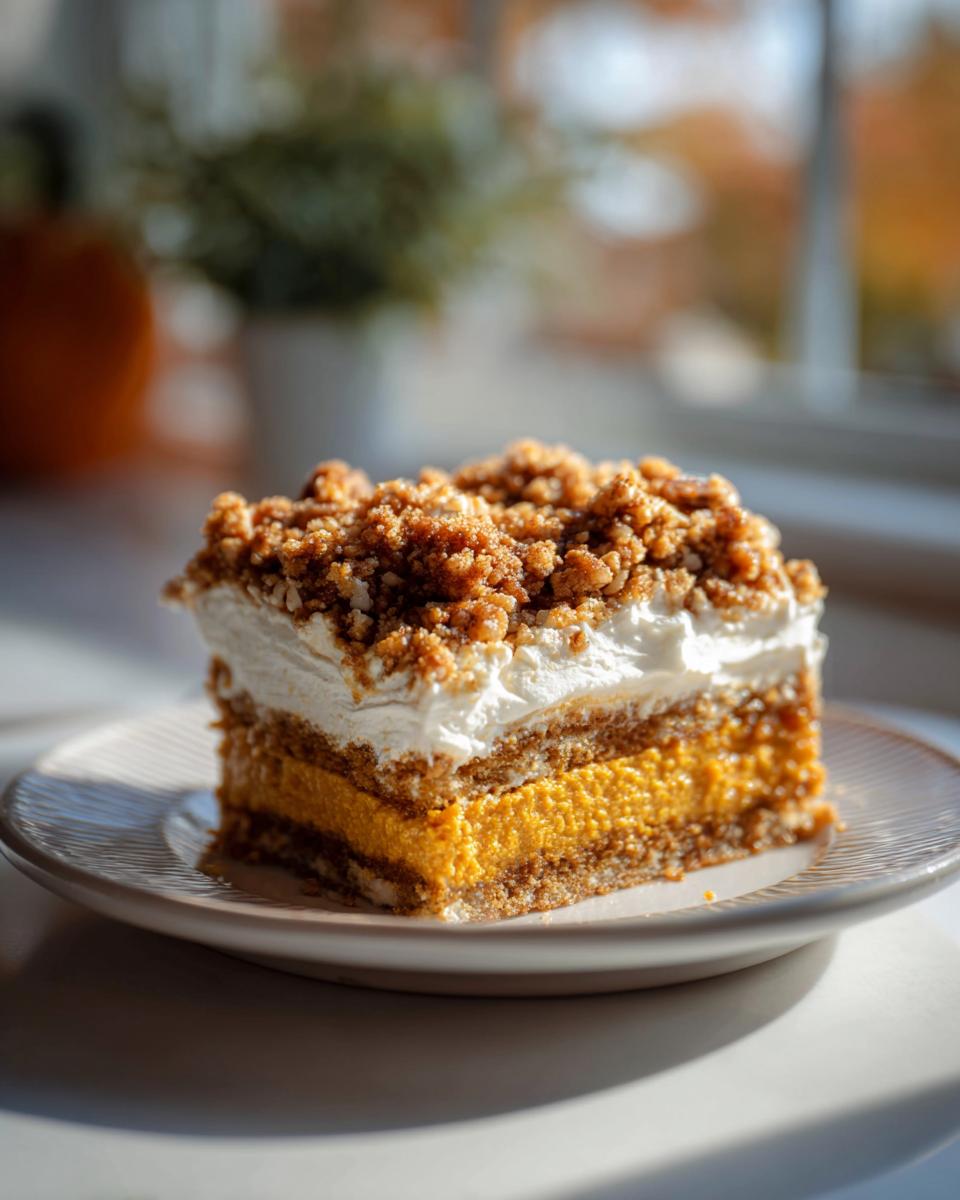
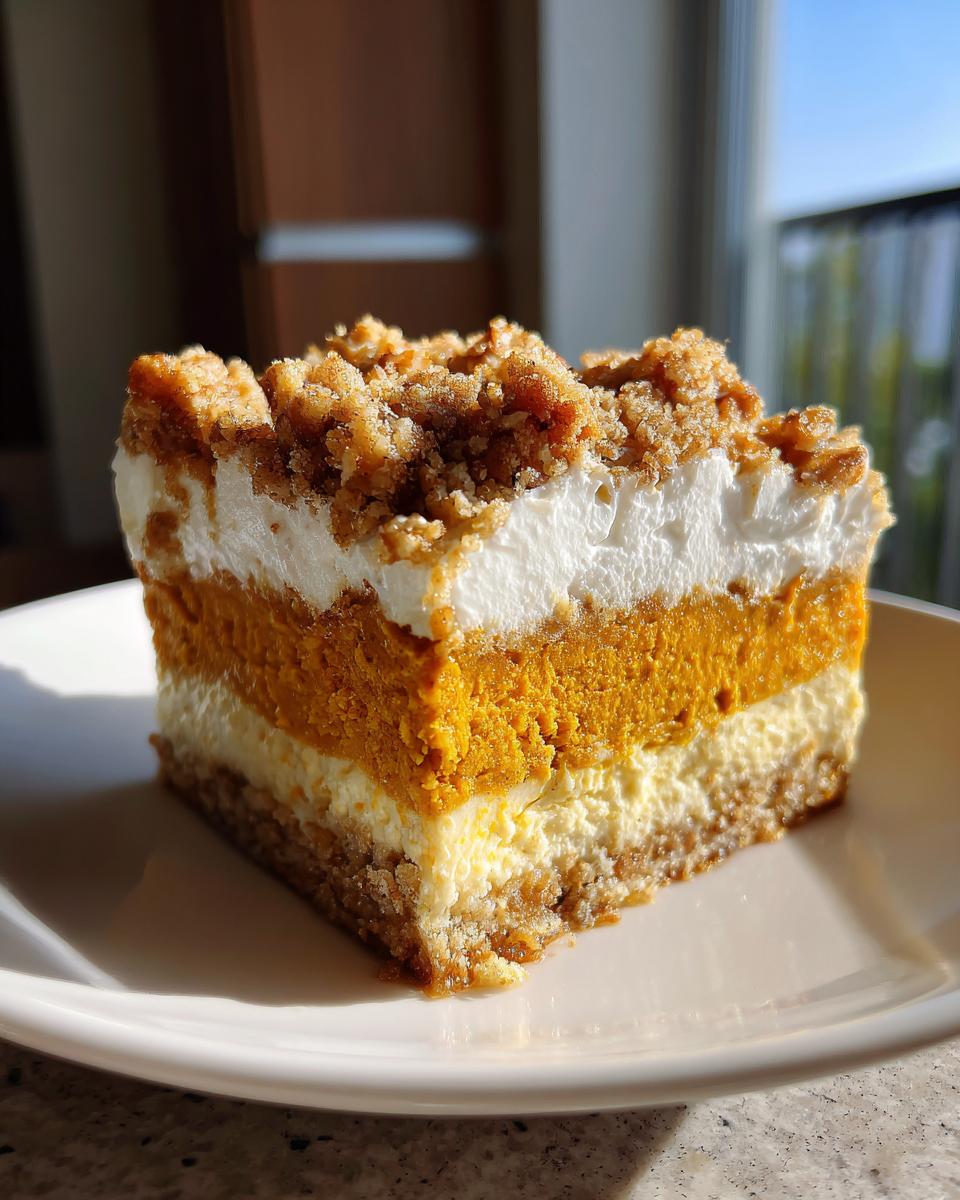
This isn’t just another pumpkin thing; it’s the ultimate marriage of textures: a creamy, spiced pumpkin layer hugging a butter-soaked, nutty crunch topping. It reminds me of the simple, satisfying desserts my grandmother used to whip up when company showed up unexpectedly. It’s practically foolproof, which means you get big-time flavor with minimal stress. If you’re looking for easy ways to get something delicious on the table, check out my guide to quick weeknight dinner ideas, but for now, this is the **Layered Pumpkin Dessert** that will steal the show!
- Why This Easy Pumpkin Crunch Cake Is Your New Favorite Fall Pumpkin Recipe
- Ingredients for the Best Pumpkin Crunch Recipe
- How to Prepare Your Layered Pumpkin Dessert Step-by-Step
- Tips for Success with Your Pumpkin Dump Cake Variation
- Ingredient Notes and Substitutions for Perfect Pumpkin Crunch
- Serving Suggestions for This Holiday Crowd Pleaser Dessert
- Storage and Reheating Instructions for Pumpkin Crunch Cake
- Frequently Asked Questions About Making Pumpkin Crunch
- Nutritional Information Estimate for This Simple Autumn Baking Treat
Why This Easy Pumpkin Crunch Cake Is Your New Favorite Fall Pumpkin Recipe
Seriously, if you make one **Halloween** or **Thanksgiving Dessert** this year, make this one. This isn’t some delicate soufflé; this is robust, comforting perfection developed right here in my own kitchen. I tested this **Easy Pumpkin Crunch Cake** recipe until I knew it was absolutely foolproof—that’s the Misty Plate promise!
Here’s what sets it apart:
- It’s a dream recipe for busy cooks. Prep time is crazy fast, maybe 20 minutes tops!
- That contrast! You get the **Creamy and Crunchy Dessert** appeal in every single bite. Soft pumpkin, smooth filling, and that buttery topping.
- It travels beautifully, which is a must for any holiday dessert.
If you’re looking for more simple, beautiful bakes, you have to browse all my amazing dessert recipes. But trust me, this layered pumpkin delight is going straight into your ‘favorites’ folder.
Ingredients for the Best Pumpkin Crunch Recipe
Okay, let’s talk ingredients. This is where the magic of this **Layered Pumpkin Dessert** starts, and because it’s so simple, we need to be precise! I don’t want you reaching for accidental pumpkin pie filling instead of the real deal. Having these exact components ready makes the assembly go lightning fast, which is exactly what we need for a guaranteed-to-succeed fall bake.
If you love baking with pumpkin spice, make sure you check out my amazing pumpkin cream cheese bread recipe too, while you’re getting your shopping done!
For the Crunchy Topping Dessert Base
This mixture forms that crisp, buttery crown we all love. Don’t skip melting the butter fully—it needs to coat everything evenly!
- 1 box (15.25 ounces) yellow cake mix (Don’t worry, we aren’t making cake, just using the dry mix!)
- 1 cup chopped pecans
- 1 cup (2 sticks) unsalted butter, completely melted
For the Moist Pumpkin Layer
This is the heart of the **pumpkin crunch**. Using *pure* pumpkin puree is non-negotiable here! Pie filling has too much sugar and set ingredients. We need that pure, earthy pumpkin goodness to balance the sweetness later on.
- 1 can (15 ounces) pure pumpkin puree
- 1 can (14 ounces) sweetened condensed milk
- 2 large eggs
- 2 teaspoons pumpkin pie spice
- 1 teaspoon vanilla extract
For the Creamy Filling
This layer comes in after baking and cooling a bit, and it turns this crunchy base into an absolute delight. Make sure your cream cheese is actually softened, or your mixer is going to fight you on this step!
- 1 container (8 ounces) cream cheese, softened
- 1 cup powdered sugar
- 1 cup whipped topping (I use the store brand whipped topping; it keeps things stable!)
How to Prepare Your Layered Pumpkin Dessert Step-by-Step
When I say this is easy, I truly mean it. We aren’t even using a mixer for the main bulk of this dessert! It sets up almost like a magic trick where you just layer things, and boom—you have an incredible **Layered Pumpkin Dessert**. Just make sure your oven is warming up to 350 degrees Fahrenheit while you mix the first part, and lightly grease that 9×13 inch pan. We want easy cleanup later, trust me!
Assembling the Crunchy Topping Dessert
First up is that glorious crunch! Grab a medium bowl—no need for fancy bowls here. You’re just stirring together the dry yellow cake mix and those chopped pecans. Now, slowly pour the melted butter over that dry mix. Stir it around until every speck of cake mix looks damp and coated. It’ll look sort of like wet sand. That’s perfect! Set that buttery pecan mixture aside; it’s going on top later. Don’t forget to check out my tips for quick weeknight dinner ideas so you can save more time for desserts like this!
Baking the Pumpkin Crunch
In your clean (or separate big) bowl, whisk up the pumpkin puree, condensed milk, eggs, spice, and vanilla until everything is smooth as velvet. Pour that wet pumpkin mixture right into your prepared 9×13 pan. Now, take all that reserved crunchy topping and sprinkle it evenly right over the wet pumpkin. This is critical: do not stir! This layering is what creates the separation you want. Bake it for 50 to 60 minutes until that topping is golden brown and firm. When you check it with a toothpick, you want moist crumbs, not wet batter. This baking time is what locks in the wonderful **pumpkin crunch** texture!
Finishing the Creamy Layer and Chilling
Once it comes out, let that beauty cool on the counter for a good 30 minutes. We don’t want the hot pan melting our creamy topping right away! While it’s cooling, beat your softened cream cheese until it’s light, then mix in the powdered sugar, and gently fold in the whipped topping. Once that cake base is only warm (not piping hot!), spread the cream cheese mixture smoothly over the top. This is the part that sets up perfectly in the fridge. Pop the whole thing in the refrigerator for at least 2 hours—a little longer is even better—before slicing. That chilling time is essential to let all those layers marry together!
Tips for Success with Your Pumpkin Dump Cake Variation
Listen, I love that this recipe is easy, but easy doesn’t mean we can skip a few little tricks that make the difference between good and absolutely amazing, right? Since this **pumpkin crunch** relies heavily on texture contrast—that smooth middle versus that crispy top—we need to give those ingredients a little boost before they go into the oven. These are the veteran tips I use whenever I whip this up for a fall gathering.
First things first: the pecans. Don’t just throw them in raw! If you take five extra minutes to toast those pecans lightly in a dry pan over medium heat, the flavor deepens so much. You’ll smell the difference right away—it adds such a nutty richness to the final crunch. Just watch them closely, because they go from fragrant to burnt in about thirty seconds flat!
Also, when you’re mixing up your crunchy topping, pay attention to how you handle the melted butter. Don’t just pour it on top and stir gently. You really need to make sure that melted butter gets everywhere and coats those cake mix granules. If you see dry patches, you’ll end up with hard, dusty spots in your topping instead of that perfect, buttery crumb.
Another thing to consider: the cake mix itself. While yellow cake mix gives you that classic, slightly sweet, buttery texture that contrasts beautifully with the spice, if you swap it out for a spice cake mix instead, wow! It deepens the fall flavor considerably. It’s essentially the same amount of work, but you get a richer result. If you want to see what else I bake that requires zero fuss but huge flavor payoff, check out my banana oatmeal cookies recipe next!
Finally, whatever you do, do not stir the topping into the pumpkin layer before baking! That’s the cardinal sin of the **Pumpkin Dump Cake Variation** approach. The topping needs to sit high and dry so it can brown and crisp up properly. If you mix it, you just end up with a dense, spicy pumpkin bread, and we are *not* here for dense bread today. We are here for that essential, light, **crunchy topping dessert**!
Ingredient Notes and Substitutions for Perfect Pumpkin Crunch
Okay, so we’ve got the assembly down, but I want to chat about ingredients for just a second longer because choosing the right base makes all the difference between a good **pumpkin crunch** and the absolute best one. We aren’t just throwing things in a bowl; we are engineering a textural masterpiece here!
The biggest point I get questions on is the pumpkin. You absolutely *must* use 100% pure pumpkin puree. If you grab canned pumpkin pie filling by accident, you’ll end up with a soupy bottom layer because that filling already has spices and sweeteners mixed in. We want pure pumpkin so we can control the spice and sweetness ourselves. It really keeps that **Moist Pumpkin Layer** exactly how I need it!
Remember how I mentioned swapping out the cake mix? While the yellow cake mix gives you that classic, slightly sweet, buttery texture that contrasts beautifully with the spice, if you try a spice cake mix, wow! It deepens the fall flavor considerably. It just makes the whole thing richer, almost like a gingerbread-meets-pumpkin experience. It’s a super easy way to change things up next time you make it, especially if you’re serving it to a crowd that really loves warm spices.
Now, I know some of you might be thinking about the famous **Hawaiian Pumpkin Crunch**—and yes, there are regional differences in how people make it, often using slightly different spices or even different cream toppings. But for this recipe, I stuck to the most straightforward, crowd-pleasing layered method using the yellow cake mix base. It’s dependable, easy to source ingredients for, and nails that **Creamy and Crunchy Dessert** profile everyone craves.
If you want something equally seasonally appropriate but maybe a little less sweet, you absolutely have to try my apple cider Moscow mule recipe for a festive drink pairing. It cuts through the richness of the cream cheese layer perfectly!
Serving Suggestions for This Holiday Crowd Pleaser Dessert
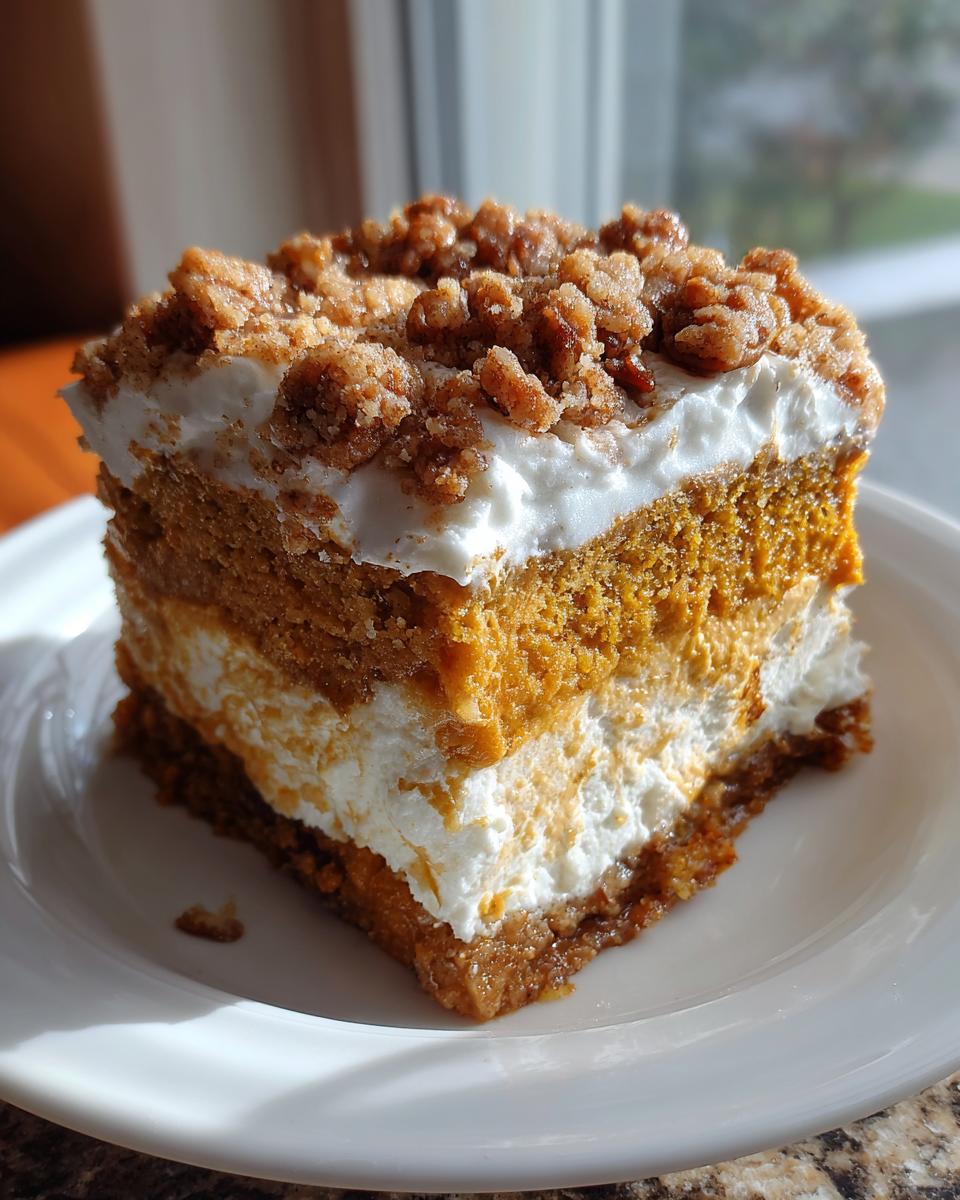
Planning on serving this amazing **pumpkin crunch** cake at a party or family dinner? Fantastic! This is truly a **Holiday Crowd Pleaser Dessert**, and presentation makes such a difference. Since the layers are already so stunning—that solid orange base, the white ribbon of cream cheese filling, and the golden pecan topping—it honestly doesn’t need much help to look spectacular on a dessert table.
But if you want to send it over the top, I have a few of my favorite ways to serve it that really play up those lovely textures.
First, I love the simplicity of just a light dusting of cinnamon right before it hits the table. It pulls the spice notes forward and makes it smell even more incredible. You can use a fine-mesh sieve for a beautiful, even coat. It’s such a tiny step, but it feels really professional!
If you’re serving it slightly warm (after it’s rested for that required 30 minutes after you put the cream cheese layer on), a scoop of good vanilla bean ice cream is perfection. The contrast between the slightly warm, sometimes slightly gooey pumpkin layer and that cold, creamy ice cream is what makes people go back for a second piece. It works beautifully because the ice cream melts slightly into the creamy layer.
For a real autumnal vibe, especially if you’re serving this after a big meal like Thanksgiving, pair a slice with a warm cup of coffee or even some homemade eggnog. I have a recipe for creamy classic homemade eggnog that you absolutely have to try—it’s decadent and pairs wonderfully with the spiced pumpkin. It feels cozy, satisfying, and very Martha Stewart, even though the cake itself was just a quick assembly!
Since this dessert is so rich and satisfying, you don’t need a big slice to feel complete. Cutting slightly smaller squares often works best for serving a crowd so everyone gets a taste without feeling overwhelmed by sweetness. It’s a wonderfully dense treat, so a little goes a long way!
Storage and Reheating Instructions for Pumpkin Crunch Cake
Now that you’ve successfully navigated making this incredible **pumpkin crunch**—and you probably ate a slice or two already—you need to know how to keep those leftovers tasting just as good as day one. Because this layered dessert has that gorgeous, dairy-based cream cheese filling sitting on top of that moist pumpkin base, we have to be smart about storage. This isn’t something you leave sitting on the counter, even overnight!
Refrigeration is mandatory, darling! This dessert needs to stay cold to maintain the integrity of that creamy layer and keep everything safe to eat. When you’re done slicing it up after that initial chill time, just cover the whole 9×13 dish tightly. I usually recommend using plastic wrap that’s pressed lightly onto the top surface of the filling initially, then covered securely with a lid or foil over the whole thing. If you only have partial pieces left in a smaller container, make sure the lid fits snugly.
What about reheating? This is where we have to be honest: you generally don’t want to reheat this dessert at all. Remember, the magic of the **Layered Pumpkin Dessert** is that contrast: warm, spiced pumpkin meeting that cold, smooth cream cheese layer and the room-temperature crunch. Heating it up will melt that filling into a loose puddle, and it changes the texture of that beautiful cake mix topping.
So, the rule is: serve this slightly chilled or at cool room temperature. If it’s been sitting out for serving for a few hours (say, during a party), it’s time to tuck the leftovers away. It stays wonderfully fresh in the fridge for about three or four days. It holds up really well!
If you find yourself needing a quick, no-bake snack for later, I highly recommend checking out my recipe for easy protein balls. They store beautifully on the counter and are perfect when you need a little something healthy!
Frequently Asked Questions About Making Pumpkin Crunch
I know you might still have a few questions swirling around—it happens when you make a dessert this popular! Don’t worry, I’ve gathered the most common ones I get asked about this specific **pumpkin crunch** cake. Getting these little details right is what turns a good recipe into a *great* recipe. Let’s clear up any confusion so you can bake with total confidence!
Can I make this ahead of time?
Yes, absolutely! In fact, I actually prefer making this **Layered Pumpkin Dessert** a day ahead. Since the creamy layer needs that full 2 hours of chilling time minimum, preparing it the day before lets the flavors really settle in. Just make sure you don’t put the cream cheese layer on until the pumpkin base has cooled completely after baking. It holds up beautifully in the fridge for up to four days, making it the best **Thanksgiving Dessert** helper!
What kind of pecans should I use? What if I hate nuts?
I strongly recommend using either regular or lightly toasted pecans for that signature **Pecan Streusel Pumpkin** feel. Toasting them first (like I mentioned earlier!) gives you a much richer flavor. Now, if you have nut allergies or just aren’t a fan, you can definitely substitute them! For a similar texture in your **Crunchy Topping Dessert**, try swapping the pecans for slivered almonds or even using an extra half cup of the dry yellow cake mix coated in the butter. It won’t have the same nutty depth, but the crunch factor will still be there!
Can I skip the cream cheese layer in this pumpkin crunch recipe?
You *can*, but I really hope you don’t! That cream cheese layer is the key part of what makes this a **Creamy and Crunchy Dessert** instead of just a spiced cake with a streusel. It adds that essential tangy, cool contrast to the warm, heavily spiced pumpkin layer underneath. If you *must* skip it, your best bet is to top the warm pumpkin layer with a simple dusting of powdered sugar, like my grandma used to do on her cakes. But wow, you’d miss out on so much!
Is this recipe related to the Hawaiian Pumpkin Crunch versions?
That’s a great question! While this recipe captures the *spirit* of the incredibly popular **Hawaiian Pumpkin Crunch**, which is famous on the islands, I developed this version to rely solely on easily accessible US pantry staples. The concept is the same—that unmistakable creamy, crunchy layering—but traditional **Hawaiian Pumpkin Crunch** sometimes uses specific spices or ingredients related to local sourcing. This method is my tried-and-true, no-fail version for fall gatherings here in the mainland!
If you’re looking for other easy recipes that let you spend less time cooking and more time gathering, you should take a look at my easy chicken and green beans skillet recipe. It’s another fast favorite!
Nutritional Information Estimate for This Simple Autumn Baking Treat
I always like to include a little bit of the facts, not because I think anyone is counting calories when they are diving into a slice of **pumpkin crunch**, but because transparency is key here at Misty Plate. We want you to know what you’re serving up!
You’ll find the estimated breakdown below. Please remember what I always say: these are just general guidelines. Because we are using real ingredients from the store—and depending on if you use full-fat cream cheese or a certain brand of whipped topping—these numbers are going to shift a little. I mean, they are estimates based on standard portion sizes, so take them as a general guide while you enjoy this **Simple Autumn Baking** marvel!
If you need something that is a bit lighter but still hits that snack requirement, you should definitely peek at my recipe for easy protein balls. They are fantastic!
- Serving Size: 1 slice
- Calories: 450
- Fat: 25g
- Saturated Fat: 12g
- Carbohydrates: 55g
- Sugar: 45g
- Protein: 6g
- Cholesterol: 60mg
- Sodium: 250mg
- Fiber: 2g
So, yes, it’s a treat! But it’s a completely worthwhile treat, especially when you look at how little time it took to create this wonderful **Layered Pumpkin Dessert** for your family. Enjoy every last bite!
PrintEasy Layered Pumpkin Crunch Cake
Make this simple, layered pumpkin crunch cake for a satisfying fall dessert. It features a moist pumpkin base, a creamy middle layer, and a buttery, crunchy pecan topping.
- Prep Time: 20 min
- Cook Time: 60 min
- Total Time: 140 min
- Yield: 12 servings 1x
- Category: Dessert
- Method: Baking
- Cuisine: American
- Diet: Vegetarian
Ingredients
- 1 box (15.25 ounces) yellow cake mix
- 1 cup chopped pecans
- 1 cup (2 sticks) unsalted butter, melted
- 1 can (15 ounces) pure pumpkin puree
- 1 can (14 ounces) sweetened condensed milk
- 2 large eggs
- 2 teaspoons pumpkin pie spice
- 1 teaspoon vanilla extract
- 1 container (8 ounces) cream cheese, softened
- 1 cup powdered sugar
- 1 cup whipped topping (like Cool Whip)
Instructions
- Preheat your oven to 350 degrees Fahrenheit. Lightly grease a 9×13 inch baking dish.
- In a medium bowl, combine the dry yellow cake mix and the chopped pecans. Pour the melted butter over this mixture and stir until the dry ingredients are evenly moistened. This forms the crunchy topping. Set aside.
- In a separate large bowl, whisk together the pumpkin puree, sweetened condensed milk, eggs, pumpkin pie spice, and vanilla extract until smooth. This is your pumpkin layer.
- Pour the pumpkin mixture evenly into the prepared baking dish.
- Sprinkle the reserved cake mix and pecan mixture evenly over the top of the pumpkin layer. Do not stir.
- Bake for 50 to 60 minutes, or until the topping is golden brown and a toothpick inserted near the center comes out mostly clean. The topping will look dry and crunchy.
- While the cake cools slightly, prepare the cream cheese layer. In a bowl, beat the softened cream cheese until smooth. Gradually beat in the powdered sugar until fully combined. Fold in the whipped topping gently.
- Once the cake has cooled for at least 30 minutes, spread the cream cheese mixture evenly over the warm pumpkin layer.
- Chill the pumpkin crunch cake in the refrigerator for at least 2 hours before slicing and serving.
Notes
- For a richer crunch, toast the pecans lightly before mixing them with the cake mix and butter.
- You can substitute the yellow cake mix with a spice cake mix for a deeper flavor profile.
- Serve this dessert slightly chilled for the best contrast between the creamy layer and the crunch topping.
Nutrition
- Serving Size: 1 slice
- Calories: 450
- Sugar: 45
- Sodium: 250
- Fat: 25
- Saturated Fat: 12
- Unsaturated Fat: 13
- Trans Fat: 0.5
- Carbohydrates: 55
- Fiber: 2
- Protein: 6
- Cholesterol: 60