

Oh, that chocolate craving hits, doesn’t it? Sometimes only something truly rich, piled high, and unapologetically decadent will do. If you’re nodding your head right now, let me introduce you to the centerpiece of my dessert repertoire: the classic Mississippi Mud Pie. This isn’t some fussy, complicated pastry; it’s pure Southern indulgence made simple. Here at Misty Plate, I believe the greatest food comes from real kitchens, not from impossibly grand settings. That’s why this mud pie recipe is designed to give you that magnificent, layered look with minimal fuss, creating an easy homemade pie experience that tastes like it took all day. Check out all my favorites in my full collection of dessert recipes. Trust me, this is the chocolate hug you need.
- Why This Mississippi Mud Pie is Your New Favorite Dessert
- Gathering Ingredients for Your Decadent Chocolate Dessert
- Step-by-Step Instructions to Make the Perfect Mud Pie
- Tips for Success When Making a No Bake Dessert
- Make Ahead Dessert Planning for Your Mud Pie
- Serving Suggestions for This Mississippi Dessert
- Storage and Reheating Instructions for Leftover Mud Pie
- Frequently Asked Questions About Making a Mud Pie
- Nutritional Estimates for This Indulgent Comfort Food
Why This Mississippi Mud Pie is Your New Favorite Dessert
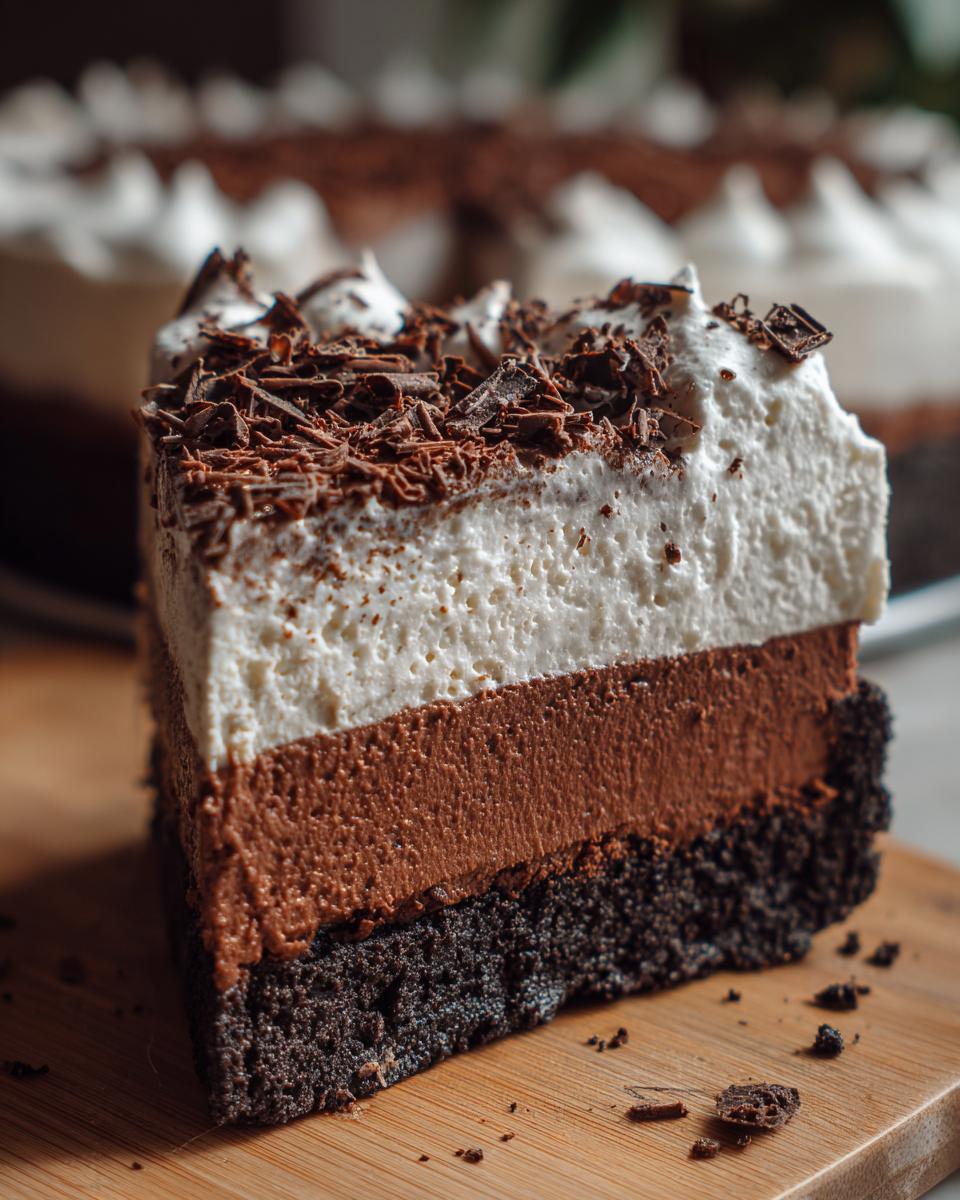
Honestly, once you try this layered beauty, you’ll see why it’s so beloved. It delivers major flavor without turning on the oven, which is a huge win in my book! This is the perfect example of a rich layered pie that looks complicated but is truly an easy homemade pie experience. It’s one of the best no bake dessert recipes out there.
Here are the reasons why you should make this mud pie today:
- It’s ridiculously fast to assemble, making it the ultimate potluck favorite dessert.
Quick Prep for a Party Showstopper Dessert
You read that right—the active prep time is famously fast, usually under 25 minutes! Even though this mud pie looks like a massive, spectacular showstopper dessert that took hours, you can have all the layers ready for chilling before your guests even arrive. It’s always the first thing gone at any gathering.
The Ultimate Indulgent Comfort Food Experience
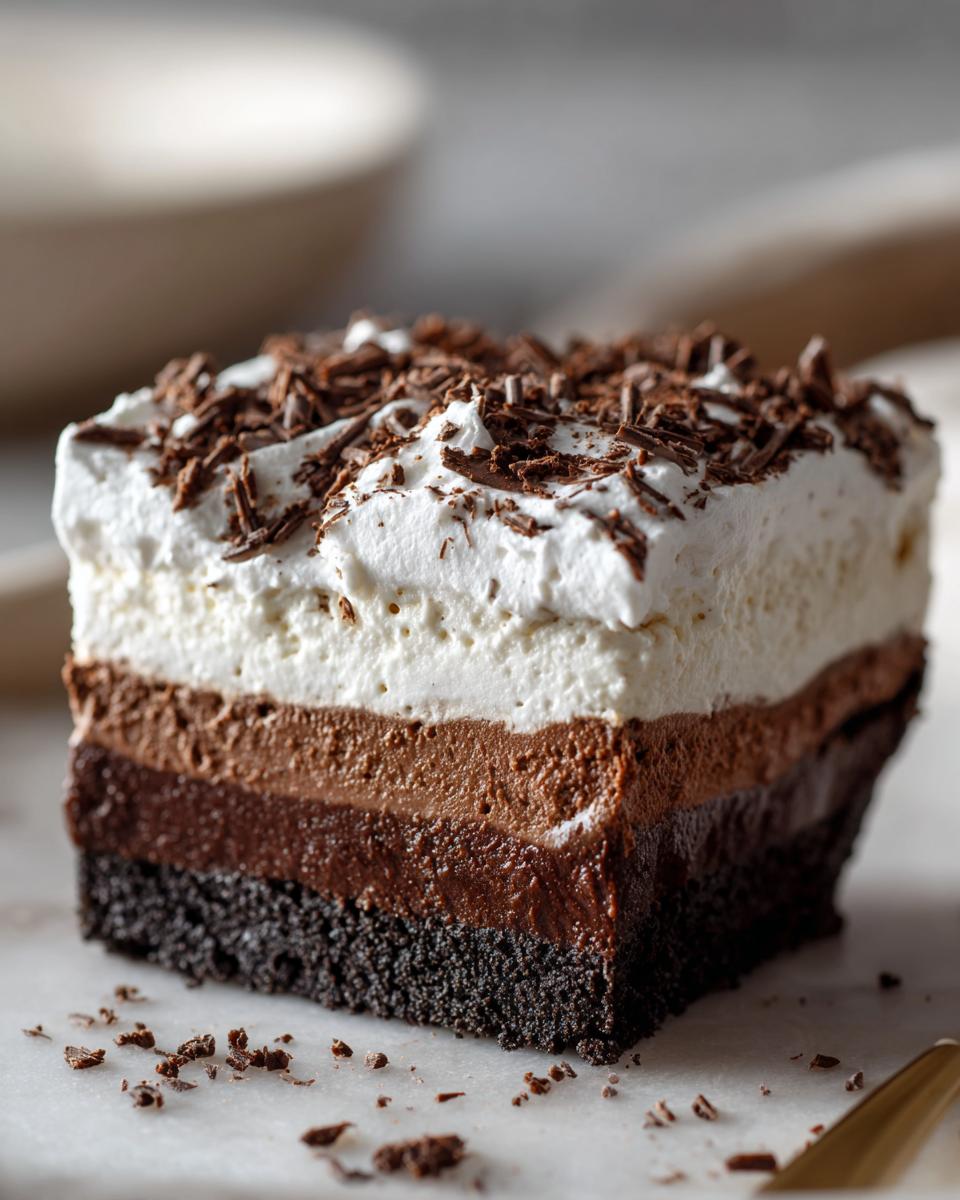
This hits every single texture marker for the best treats. You get that satisfying crunch from the buttery Oreo crust, followed immediately by the smooth, velvety pudding, and then the light, cool creaminess of the topping. It’s intensely chocolatey—a true fudgy chocolate pie that finishes as a delightfully creamy dessert recipe.
If you’re looking for other easy frozen treats, don’t forget to check out my recipe for an easy no-bake Butterfinger pie!
Gathering Ingredients for Your Decadent Chocolate Dessert
Okay, getting ready to bake this incredible mud pie is almost as fun as eating it! Since this is a no-bake situation, the quality of what you put in really shines through because there’s no oven heat to mask anything. Make sure your cream cheese is nice and soft—that’s crucial for getting that lovely smooth layer later on. Below is what you’ll need for this amazingly decadent chocolate dessert.
- 1 1/2 cups chocolate cookie crumbs (We usually use Oreos, but scrape out that white filling first, or those who prefer a less intense chocolate crust can skip that step!)
- 6 tablespoons unsalted butter, melted—using real butter here makes such a big difference!
- 1 (8 ounce) package cream cheese, softened (make sure this sits out for a bit!)
- 1 cup powdered sugar
- 1/2 cup milk (for the cream cheese layer)
- 1 (12 ounce) container frozen whipped topping, thawed, divided (We need this in two parts!)
- 1 (3.4 ounce) package instant chocolate pudding mix (the regular size container)
- 2 cups cold milk (for the pudding mix—must be cold!)
- 1 (8 ounce) container frozen whipped topping, thawed (This is for the final top layer!)
- 1/4 cup chocolate shavings, for garnish (A little fancy finish, but you deserve it.)
I always keep my backup recipe for easy homemade naan bread ready for when I need something savory to balance out all this chocolate, but for now, let’s stick to the sweets!
Ingredient Notes and Substitutions for Your Mud Pie
Let’s talk specifics so your mud pie layers set up perfectly. When using chocolate sandwich cookies like Oreos, if you leave the filling in, your crust will actually hold together better, but it will be sweeter, so you might want to cut back on the added powdered sugar just a tiny bit. If you’re in a pinch or just want a slightly less chocolatey foundation, swapping to graham cracker crumbs is totally fine, just like my source notes suggest! We talked about that in the ingredient list, but it bears repeating.
The whipped topping situation can be confusing, I know! You need *one* container thawed for splitting between Layer Two and Layer Three. Then, you need a *second* container thawed just for the very top, Step 5. When I say thawed, I mean take it out about an hour before you need it so it’s soft and spreadable, but not soupy. It needs to maintain some structure to help trap the air that makes the layers light.
Step-by-Step Instructions to Make the Perfect Mud Pie
Alright, let’s get down to the fun part—layering this gorgeous, fudgy treat! Since this is a no bake dessert, technique is everything here. We need to build those layers carefully so your final slice of mud pie stands up proud. Don’t rush the chill times; they are mandatory! If you follow these steps exactly, you’ll nail it every time, just like I do in my own kitchen. I’ve found that making easy protein balls or even this pie is all about mise en place—get everything ready before you start mixing!
Creating the Oreo Crust Dessert Base
First things first, we make that amazing crunchy base. Just mix your chocolate cookie crumbs—I mean every crumb, including the butter—right in a bowl until it looks like wet sand. Then, press it down into your 9-inch pie plate. You want this packed tight, both on the bottom and a little up the sides. When I say tight, I mean really press it! Use the bottom of a measuring cup to really firm things up. Once it’s pressed, immediately slide that pie plate into the freezer while you tackle the next layer. It needs to be rock solid, or the next layer will just push it right up the sides when you spread it.
Building the Cream Cheese and Pudding Layers
Now for the creamy center! In a separate bowl, you absolutely must beat that softened cream cheese until it’s perfectly smooth. If it’s stiff, you’ll get lumps, and nobody wants a lumpy mud pie! Once it’s silky, beat in the powdered sugar and the first half-cup of milk—it should look fluffy, almost like a thick frosting. Now, gently fold in half of your first container of thawed whipped topping. Key word here is gently; you want to keep all the air in there. Spread this delicate mixture evenly over your frozen crust.
Next up is the chocolate pudding. Whisk the instant pudding mix with 2 cups of very cold milk. You need to whisk hard for a full two minutes until you see it actually starting to thicken up. Don’t stop early! Spread this fudgy mixture right over the cream cheese layer. Take the remaining portion of that first whipped topping container and spread it lightly over the pudding layer. Now, cover the whole thing loosely and get it into the fridge. This layer needs time to firm up!
Chilling and Finishing Your Rich Layered Pie
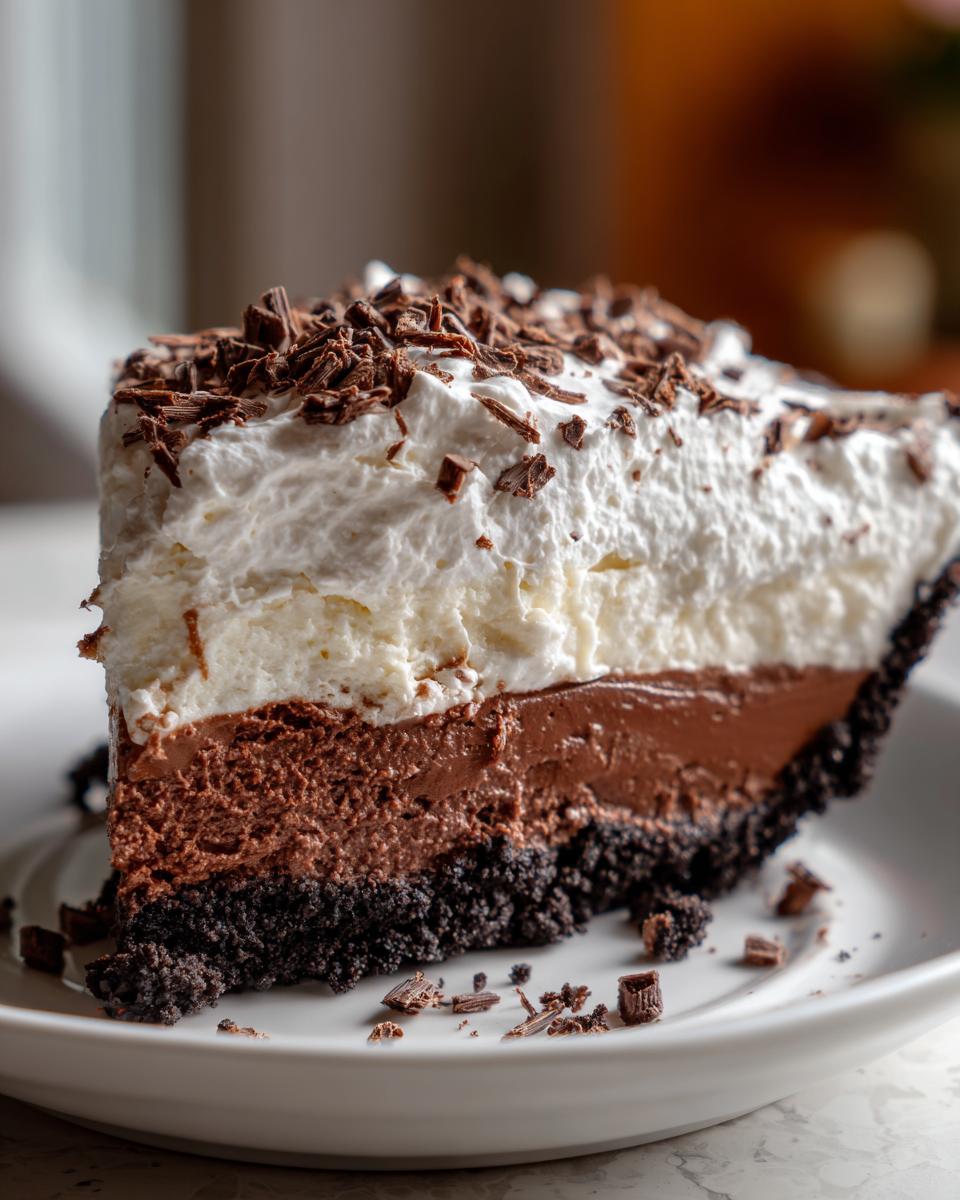
This is the hardest part: waiting! You need to chill this rich layered pie for a minimum of four hours. Seriously, if you cut it earlier, you’ll have soup, not slices. Those four hours allow the cream cheese and pudding layers to cooperate and set properly so the whole Mississippi Mud Pie holds its shape.
Once it’s completely firm—give it a gentle wiggle test—it’s time for the grand finale! Use that second container of thawed whipped topping to cover the entire surface. Make it look nice and fluffy! Finally, take those chocolate shavings and scatter them all over the top for that classic, showstopping presentation. Slice it up cold and serve immediately. It’s decadent perfection!
Tips for Success When Making a No Bake Dessert
Even though this mud pie skips the oven, there are definitely a few places where things can go sideways if you aren’t mindful. My goal for you is a perfect, sliceable dessert every single time, so let me share the lessons I learned the hard way!
The biggest enemy in any no-bake creation is moisture management and temperature control. If your crust isn’t fully frozen before you add the wet layers, it tends to get soggy where the cream cheese touches it. That’s why I’m such a stickler about the freezing time in Step 1—don’t skip that!
Another common slip-up involves the pudding. If you don’t whisk the instant pudding and cold milk vigorously enough, it won’t set to that wonderfully thick texture we need to support the top layers. If it looks too thin after two minutes, keep going for another 30 seconds. It stiffens up fast once it starts working!
When it comes to pans, I usually stick to a standard 9-inch glass pie plate because it looks so traditional when serving this Mississippi Mud Pie. However, if you’re planning on serving this to a crowd and you know you need pristine, clean slices (like for a big potluck), I highly recommend using a 9-inch springform pan instead. The removable sides mean you can peel the ring away without destroying those beautiful, layered edges. You just have to make sure that crust is pressed super firmly against the bottom and sides, as those walls aren’t as tight as a regular pie plate.
If you ever struggle with baked goods getting too moist, check out my tips on keeping things light and dry in my banana zucchini bread recipe—the principles of layering and moisture control are often the same!
Make Ahead Dessert Planning for Your Mud Pie
This is my absolute favorite feature of this mud pie: it begs to be made ahead of time! Seriously, this isn’t one of those desserts you want to rush through. In fact, the chilling time is part of the magic because it allows all those beautiful, distinct layers to marry together into one perfect, sliceable texture. It truly lets the rich layered pie set up into its final, glorious form.
For the absolute best results, I recommend planning to make this dessert the day before you intend to serve it. That gives it a solid 12 to 24 hours in the refrigerator. This long chill ensures that the cream cheese layer is firm enough to hold the pudding layer without getting squished, and that the whole thing is perfectly cold when you top it with that final blanket of whipped cream.
Now, let’s talk freezing. Since this particular mud pie relies on cold-set pudding and cream cheese (rather than ice cream), freezing it solid isn’t my first choice. If you freeze it, the texture of the whipped toppings can get a little grainy when they thaw—and we want silky smooth, remember?
However, it *is* freezer-stable for short periods IF you need to cram space or travel! If you must freeze it, wrap that chilled pie (Step 4, before the final topping) tightly in plastic wrap, then maybe a layer of foil. Push it into the back of the freezer for up to two weeks. When you pull it out, let it thaw in the fridge for at least 6 to 8 hours, then move it to the counter for about 30 minutes before you apply that final whipped topping and shavings. It works, but I still stand by the overnight fridge chill!
If you’re trying to plan ahead for other dishes, checking out my easy pumpkin crunch recipe can also give you great ideas on make-ahead timing, as that often benefits from a good solid chill time too!
Serving Suggestions for This Mississippi Dessert
When you serve up a slice of this intensely rich mud pie, you need something nearby to cut through all that absolute chocolate decadence. This is not a light dessert, bless its heart, so the best pairings are those that offer balance—especially something hot or something tart!
My absolute favorite way to serve this Mississippi Dessert is with a piping hot cup of deeply brewed coffee. The bitterness of a good espresso or French roast is the perfect counterpoint to the sweet cream layers and fudgy pudding. It just makes the whole experience feel more sophisticated, even if you made the whole thing in less time than it takes to bake a single cookie!
If you’re serving this at a big gathering or brunch where you have a spread, keep the fruit light. Heavy sauces just weigh this down further. Instead, I love whipping up a quick raspberry drizzle. It’s just a few fresh raspberries simmered with a tiny splash of water and maybe a teaspoon of sugar until they break down a little. That tartness is incredible poured over the cream topping. It’s simple, bright, and makes this party showstopper dessert feel just a little bit healthier—ha! Don’t forget, if you’re looking for simpler, creamier recipes that skip a heavy chocolate hit, you should browse my banana oatmeal recipe for a totally different kind of comfort food.
Storage and Reheating Instructions for Leftover Mud Pie
Oh, the glorious problem of having leftovers of this incredible mud pie! Since this is built on cream cheese, pudding, and whipped topping—all wonderful things when cold—storage is simple, but you have to treat it right. This is not a dessert you want to try and reheat, folks; think of it like a giant, delicious ice cream sandwich that’s been tempered slightly.
The best place for any leftover slices is right back in the refrigerator. Keep them in an airtight container, or—if you are worried about bumping them—just cover the cut pie tightly with plastic wrap, making sure the wrap doesn’t touch the whipped topping too much. If you use plastic wrap directly on the topping, it can sometimes cause those beautiful peaks to deflate or bead condensation, which we definitely don’t want on our indugent comfort food.
You can comfortably keep this **Mississippi Mud Pie** fresh, cold, and absolutely delicious in the fridge for about three to four days. Honestly, ours rarely lasts that long, but it stays wonderfully stable. The crust might soften *slightly* around day four, but the flavor is still there!
Why You Shouldn’t Reheat Your Mud Pie
I need to be totally clear here: do not, under any circumstances, microwave this! We are working hard to keep those layers distinct and cool. Microwaving this will turn your structured, creamy layers into a soupy, warm chocolate mess instantly. You’d lose the entire texture contrast that makes this a great creamy dessert recipe.
If, for some weird reason, you wanted it slightly warmer than fridge-cold (though I can’t imagine why!), the only safe tactic would be to let a slice sit on the counter for about 15 to 20 minutes before serving. That slight warming just takes the hard chill off without melting the structural integrity. But truly, this mud pie is designed to be enjoyed ice-cold.

For ideas on what to do when you have leftover baked goods that *can* be reheated, you might enjoy my guide on warming up homemade fudgy cosmic brownies. That’s a completely different game, though!
Frequently Asked Questions About Making a Mud Pie
I always get so many questions when people see how grand this mud pie looks! It’s great that you’re thinking ahead. I’ve pulled together the most common things I hear when people are getting ready to tackle this Southern classic. We want your experience to result in a flawless, decadent chocolate dessert!
Can I use a different cookie for the crust in this mud pie?
Absolutely, you can switch up the cookie base! While the chocolate wafer crust is traditional and gives you that deep, intense chocolate profile, you certainly have options. If you use graham crackers, you’ll get a crisper, slightly saltier base that lets the rich filling shine even more. Just make sure—whether you use Oreos or graham crackers—that you process them finely and pack that butter in really well. That crust is the foundation of all our great fudgy chocolate pie recipes, so don’t skimp on the pressing!
How long does this Mississippi Dessert need to chill?
If you are in a hurry, the absolute minimum chilling time for this Mississippi Dessert is four hours in the refrigerator. That’s just enough time for the pudding and cream cheese layers to solidify enough so you can get a decent slice. But sweet friend, if you can manage it, please let it chill overnight! Seriously, 8 to 12 hours makes a world of difference for the texture. When it chills longer, the flavors blend beautifully, and you get a much cleaner slice because the layers are fully supportive of each other. It’s the secret to making it a great no bake dessert recipe that actually cuts cleanly.
Can I turn this into an Ice Cream Cake Recipe?
That’s a fun idea for a sweltering summer day! Since this recipe here is a creamy, pudding-based mud pie, switching it to an ice cream version requires changing out the middle layers. If you want that true Ice Cream Cake Recipe feel, you’d skip the cream cheese layer completely. Instead, you would use your prepared crust, followed by a layer of softened vanilla or coffee ice cream. Then, you would top that with a layer of softened chocolate ice cream—or use a canned chocolate fudge sauce that stays soft when frozen—and finish it with whipped topping. If you go the ice cream route, it *must* be served fully frozen, straight from the freezer!
Nutritional Estimates for This Indulgent Comfort Food
Now, I know we aren’t making this mud pie because we are counting calories—it’s an indulgence, pure and simple! But I still like to give you an idea of what you’re truly sharing when you serve up this amazing Decadent Chocolate Dessert. Just remember, these figures are estimates based on standard ingredient brands and the way I prepare it here in my kitchen.
The beauty of a Southern Dessert Classic like this is that when you share a slice of pure joy, it’s worth every bit of richness!
- Serving Size: 1 slice
- Calories: 450
- Sugar: 35g
- Fat: 28g
- Saturated Fat: 15g
- Carbohydrates: 45g
- Protein: 5g
That fat content reflects all that glorious butter in the crust and the creaminess in those middle layers, of course! If you are looking for lighter options but still want something super satisfying, you might check out my recipe for chia seed pudding, which offers great texture with less guilt!
If you ever use different brands of cookies or perhaps add extra mix-ins, your final count will shift, so use this as a good baseline for your amazing Rich Layered Pie.
PrintDecadent Mississippi Mud Pie: Rich Layered Dessert

Make this rich, layered Mississippi Mud Pie. It features a crunchy crust, fudgy chocolate filling, and creamy topping for an indulgent, easy homemade pie experience.
- Prep Time: 25 min
- Cook Time: 0 min
- Total Time: 4 hr 25 min
- Yield: 8 servings 1x
- Category: Dessert
- Method: No Bake
- Cuisine: American
- Diet: Vegetarian
Ingredients
- 1 1/2 cups chocolate cookie crumbs (like Oreos)
- 6 tablespoons unsalted butter, melted
- 1 (8 ounce) package cream cheese, softened
- 1 cup powdered sugar
- 1/2 cup milk
- 1 (12 ounce) container frozen whipped topping, thawed, divided
- 1 (3.4 ounce) package instant chocolate pudding mix
- 2 cups cold milk
- 1 (8 ounce) container frozen whipped topping, thawed (for topping)
- 1/4 cup chocolate shavings, for garnish
Instructions
- Prepare the crust: Combine the chocolate cookie crumbs and melted butter in a bowl. Press the mixture firmly into the bottom and up the sides of a 9-inch pie plate. Place the crust in the freezer while you prepare the filling.
- Make the cream cheese layer: In a medium bowl, beat the softened cream cheese until smooth. Gradually beat in the powdered sugar until combined. Add 1/2 cup of milk and mix until smooth. Gently fold in half of the thawed whipped topping (about 1/2 cup). Spread this mixture evenly over the chilled crust.
- Make the pudding layer: In a separate bowl, whisk together the instant chocolate pudding mix and 2 cups of cold milk for about 2 minutes, or until the mixture begins to thicken. Spread this chocolate pudding mixture over the cream cheese layer.
- Top the pie: Spread the remaining half of the first whipped topping portion over the pudding layer. Cover the pie loosely with plastic wrap and chill in the refrigerator for at least 4 hours, or until firm.
- Finish and serve: Before serving, spread the remaining container of thawed whipped topping over the pie. Sprinkle the top evenly with chocolate shavings. Slice and serve this decadent chocolate dessert cold.
Notes
- You can substitute graham cracker crumbs for the chocolate cookie crumbs if you prefer a less intense chocolate base.
- For a firmer pie, use a 9-inch springform pan instead of a pie plate.
- This pie tastes best when made ahead of time, allowing the layers to set completely.
Nutrition
- Serving Size: 1 slice
- Calories: 450
- Sugar: 35g
- Sodium: 310mg
- Fat: 28g
- Saturated Fat: 15g
- Unsaturated Fat: 13g
- Trans Fat: 0.5g
- Carbohydrates: 45g
- Fiber: 2g
- Protein: 5g
- Cholesterol: 45mg