
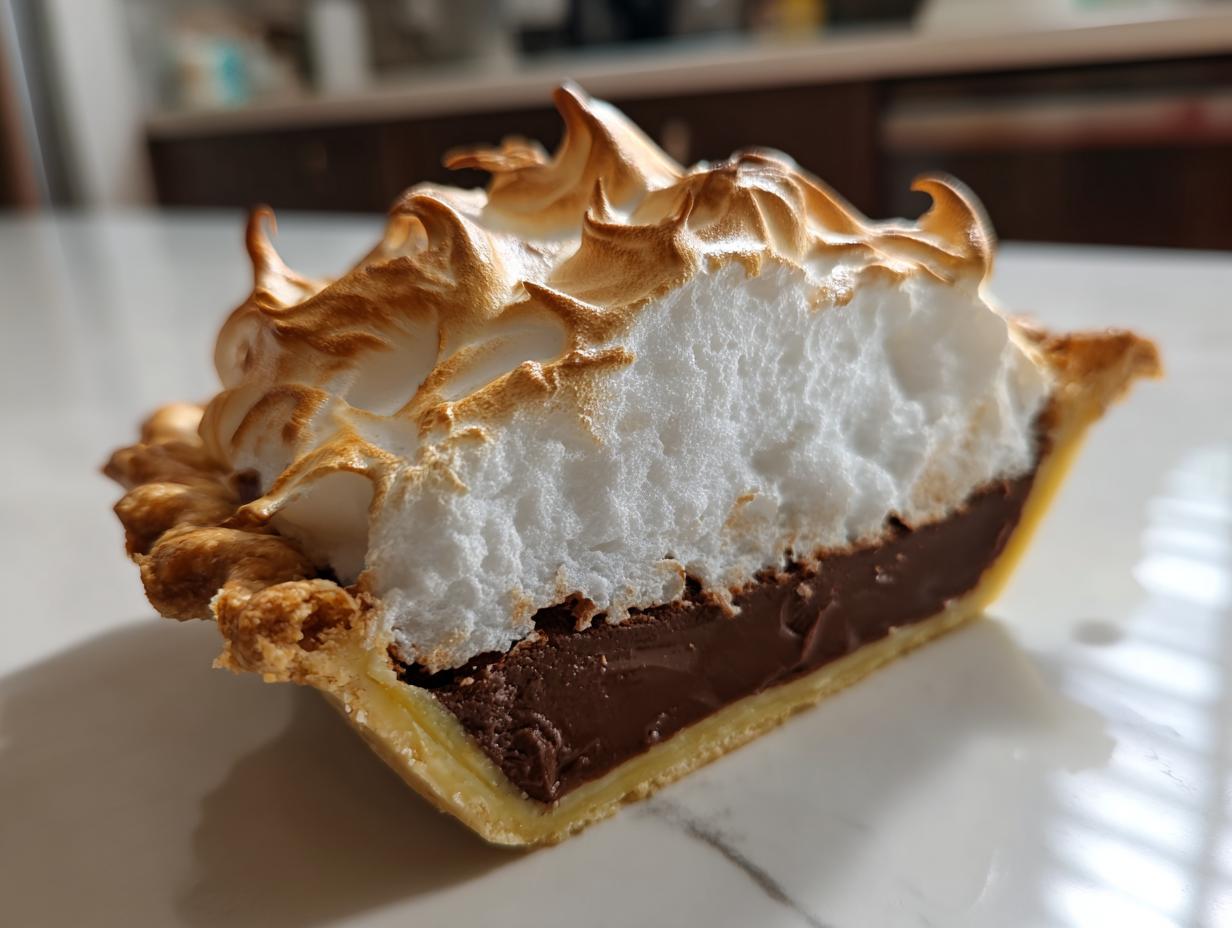
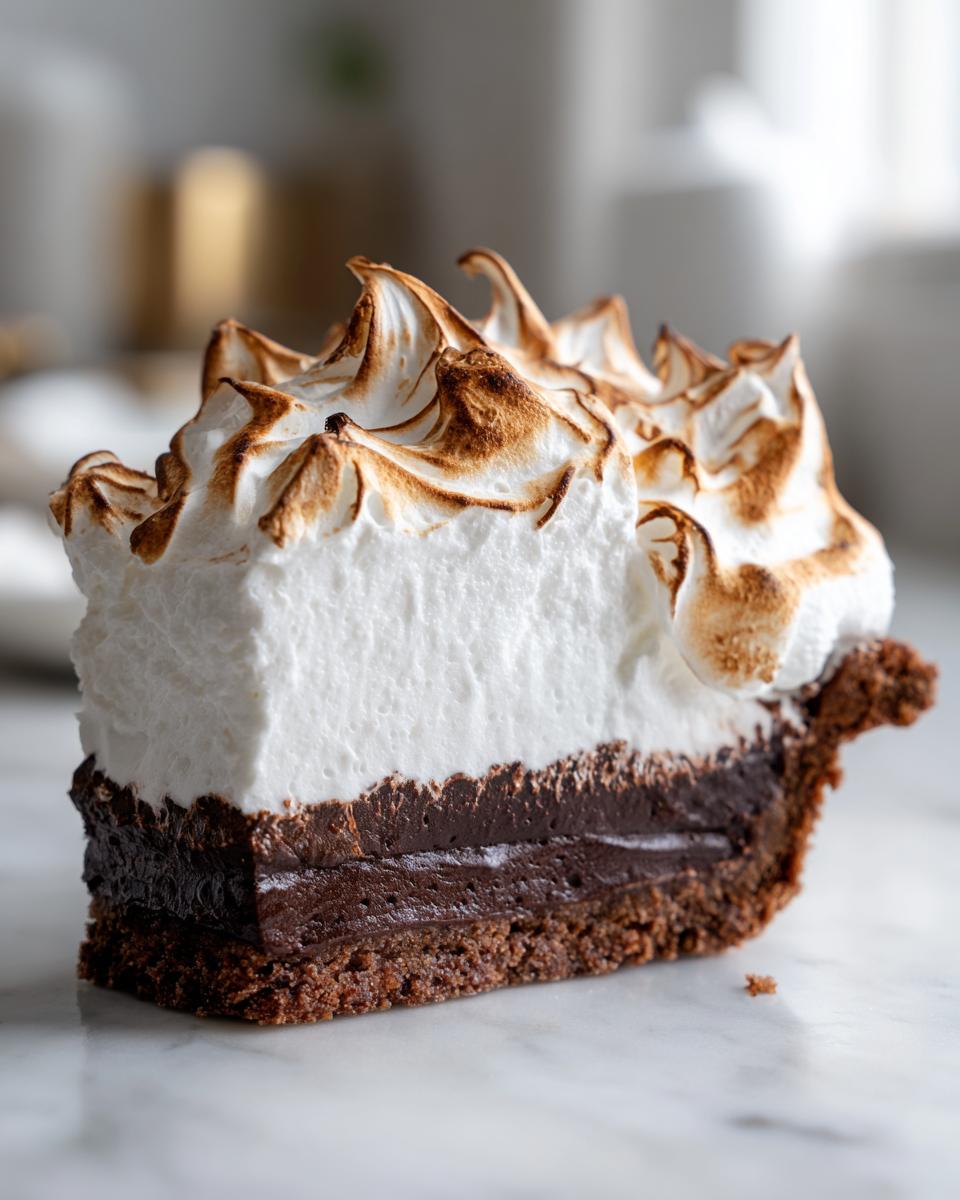
There is something incredibly comforting about an old fashioned chocolate dessert, isn’t there? They feel familiar, warm, and instantly special. But let’s be honest: achieving the perfect chocolate meringue pie can feel like walking a tightrope! Runny filling or weeping meringue stops me in my tracks every time. That’s why I spent weeks perfecting this exact recipe. My goal here at Misty Plate is to make those showstopper desserts accessible to you, right in your home kitchen. Trust me, this version delivers hands down: a filling so silky smooth it melts in your mouth, topped with a towering, flawless, fluffy meringue cloud. You won’t believe how simple it is when you follow these steps!
- Why This Chocolate Meringue Pie Recipe Works (Your Showstopper Dessert)
- Gathering Ingredients for the Perfect Chocolate Meringue Pie
- Step-by-Step Instructions for Your Chocolate Meringue Pie
- Baking Tips for Perfect Meringue on Your Chocolate Meringue Pie
- Ingredient Notes and Substitutions for Rich Chocolate Custard Dessert
- Serving Suggestions for This Classic Chocolate Pie Recipe
- Storing Your Homemade Meringue Topping and Chocolate Meringue Pie
- Frequently Asked Questions About Chocolate Meringue Pie
- Nutritional Estimates for Your Indulgent Sweet Treats
- Share Your Experience Making This Chocolate Meringue Pie
Why This Chocolate Meringue Pie Recipe Works (Your Showstopper Dessert)
I promise you, this isn’t just another recipe card you pull out of a drawer. This is the one that fixes all those frustrating meringue issues you’ve probably run into before. We’ve engineered this method to give you absolute confidence when you serve it up. It’s what turns an everyday chocolate pie into the star of the table—a true showstopper dessert recipe! If you loved the foolproof nature of my Red Velvet Cheesecake, you are going to adore how reliable this pie is.
Here is exactly what makes this specific approach the absolute best for your next gathering:
- The Filling is Pure Velvet: We use a careful ratio of cornstarch and tempered egg yolks to guarantee a thick, creamy chocolate custard pie filling that refuses to break or weep.
- It’s Truly Decadent: The addition of real unsweetened chocolate gives us that deep, rich flavor profile that keeps people reaching for seconds. These are decadent chocolate desserts at their finest!
- The Meringue Stays Put: We build stability right into the foam using cream of tartar, ensuring you get that gorgeous, fluffy meringue topping that stays tall and golden brown without sagging.
Gathering Ingredients for the Perfect Chocolate Meringue Pie
Alright, the secret to this incredible pie isn’t just the technique—it starts right here with beautiful, measured ingredients. Don’t eyeball anything when it comes to the filling; precision is key to getting that thick, velvety chocolate pie filling we both dream about! We need a fully baked 9-inch crust ready to receive its creamy treasure. Remember, my biggest tip? Make sure those three egg whites for the meringue are completely at room temperature. Seriously, warm whites whip up into such high volume and stability, which is vital for eliminating that dreaded weeping later on. It’s that small foundational detail that makes all the difference.
For the Velvety Chocolate Pie Filling
You’ll need:
- 1 (9-inch) unbaked pie crust (homemade or store-bought—no judgment here!)
- 1 1/2 cups granulated sugar, divided
- 1/3 cup cornstarch
- 1/4 teaspoon salt
- 1 1/2 cups cold water
- 3 large egg yolks, lightly beaten
- 2 ounces unsweetened chocolate, chopped
- 2 tablespoons unsalted butter
- 1 teaspoon vanilla extract
For the Fluffy Meringue Topping
This light cloud needs just a few things, but that cream of tartar is essential! It acts like a little scaffolding for your egg whites.
- 3 large egg whites, at room temperature
- 1/4 teaspoon cream of tartar
- The remaining sugar from the filling amount (which is 1/2 cup)
Step-by-Step Instructions for Your Chocolate Meringue Pie
Okay, let’s get this stunning chocolate meringue pie assembled! Baking requires focus, especially when dealing with custards and meringue, but I’m going to walk you through every single step so you can feel totally confident. We are going from prepped crust to a luscious slice of heaven in three main phases. Remember, the key to success here is not rushing the cooking of that filling!
Phase 1: Preparing the Pie Crust and Preheating
First things first, crank that oven up to 350 degrees F. Get your 9-inch pie crust baked until it’s just lightly golden—this step locks in crispness! If you’re using my favorite easy crust recipe, just follow that guide. The most important thing here, and I mean it, is that you let that crust cool completely on a wire rack. If it’s even a tiny bit warm when you pour in the custard, you’re asking for a soggy bottom on your chocolate meringue pie.
Phase 2: Making the Creamy Chocolate Custard Pie Filling
This is where we build that incredible texture. In a medium saucepan, whisk together 1 cup of the sugar, the cornstarch, and salt until they are marriage-bound. Now, slowly add the 1 1/2 cups of cold water and keep whisking until everything looks smooth—no dry cornstarch pockets allowed! Cook this over medium heat, stirring constantly until it gets thick and actually boils for one minute. Take it off the heat!
Now, pay attention because this is critical for the creamy chocolate custard pie filling: Temper those egg yolks! Whisk about a cup of that hot chocolate goo into your lightly beaten yolks slowly. Don’t rush this! After that, pour the yolk mix back into the saucepan with the rest of the chocolate base. Return it to the heat and cook, stirring non-stop, until it thickens again and bubbles slowly. Stop before it goes wild boiling again. When it’s thick, stir in your chopped chocolate, butter, and vanilla until velvety smooth. Pour that gorgeous filling straight into your cooled pie shell right away.
Phase 3: Building and Baking the Fluffy Meringue Topping on the Chocolate Meringue Pie
You need a lightning-fast start for the topping because the filling needs to be hot when the meringue goes on! In a completely grease-free mixer bowl—and I mean spotless!—whip your room temperature egg whites until they just start forming soft peaks. Slowly, sprinkle in the remaining 1/2 cup of sugar and the cream of tartar. Keep beating until you have stiff, glossy peaks. See how that homemade meringue topping is holding its shape? That’s the good stuff.
Immediately spoon that fluffy meringue onto the hot chocolate filling. This is one of those vital no weep meringue secrets: make sure the meringue touches the crust edge all the way around to seal the pie completely. Use a spoon to create those dramatic, high swirls. Pop it into the 350°F oven for 12 to 15 minutes until those peaks are just beautifully toasted golden brown. You’ve made a masterpiece!
Baking Tips for Perfect Meringue on Your Chocolate Meringue Pie
The most talked-about part of this entire pie is, naturally, the meringue. So many home cooks struggle with meringue weeping, and I want to give you the best baking tips for perfect meringue so you never have to worry! Remember, placing the meringue onto a hot filling and sealing the edges completely against the crust is our first line of defense against weeping. It traps the steam in the custard where it belongs.
These simple tricks are part of my no weep meringue secrets for a truly perfect finish. One of the biggest mistakes people make is shocking the pie. You need to let that gorgeous chocolate meringue pie cool slowly! We are going to let it rest on a wire rack at room temperature for at least four long hours. Putting it straight into a cold fridge causes the sugar in the meringue to draw moisture out, creating those sad little puddles on top. Remember that rich filling we made? It needs time to set up properly! If you’re wondering about other baked goods, my tips for handling dough in my bread bowl recipe actually taught me a lot about slow cooling!
If you want that gorgeous, toasted shine without making the meringue too dry in the oven, you can skip the last few minutes of baking and use a kitchen torch! But regardless of the finish, sticking to the slow cooling method is the real magic trick for stability. Don’t be tempted by other recipes out there, like that Paula Deen version over at this link; mine is designed for the everyday cook to succeed!
Ingredient Notes and Substitutions for Rich Chocolate Custard Dessert
When you’re aiming for a truly top-tier rich chocolate custard dessert like this, the quality and state of your ingredients matter so much. I need to stress the chocolate choice here: you absolutely must use unsweetened baking chocolate, chopped finely. Don’t try to substitute with chips, as they contain stabilizers that mess with the melting quality of our custard. They dissolve differently, and you won’t get that smooth, deep flavor profile.
Also, let’s talk about those egg whites again for the meringue. If you think you can cheat and use cold ones straight from the fridge, you are setting yourself up for disappointment. They won’t whip up to the proper volume because the fat in the whites tightens up when cold. Just set them out on the counter while you get the crust ready. It’s a simple step, but it’s the difference between a slightly weak topping and the towering, fluffy cloud we want on our perfect chocolate meringue pie.
The butter in the filling acts as a final richness boost and helps stabilize the cooked cornstarch base, so please use real unsalted butter!
Serving Suggestions for This Classic Chocolate Pie Recipe
Part of bringing back those truly old fashioned chocolate dessert feelings is knowing how to present it! Once your beautiful chocolate meringue pie has cooled down completely—and I mean really cooled—it’s time to think about what goes on the plate beside it. This pie is already so rich and decadent, so I love to slice it and add a little brightness.
Fresh, slightly tart berries are my go-to pairing. A few raspberries or thinly sliced strawberries cut right through the darkness of the chocolate custard so wonderfully. You could also use a very fine-mesh sieve to dust the top of the meringue lightly with unsweetened cocoa powder just before serving for an extra visual pop without adding too much sweetness.
Please, promise me you won’t serve this pie warm or piping hot! That rich chocolate custard needs time to set up properly so it doesn’t just pour out when you slice it. I find it’s absolutely perfect when it’s cool but definitely not fridge-cold. If you’re looking for another light, fresh pairing idea, check out my recent winter fruit salad recipe—it has some great citrus notes that would sing next to this pie!
Storing Your Homemade Meringue Topping and Chocolate Meringue Pie
So, you’ve successfully made the most gorgeous chocolate meringue pie right? Fantastic! Now, we need to treat this beauty carefully so the meringue doesn’t stage a sad collapse on you overnight. Remember that big lesson about gradual cooling? That applies here too! Please do not put your freshly baked pie directly into the refrigerator. That sudden cold shock is what causes moisture to sweat out of the sugar in the meringue, leading to weeping.
For the first few hours, keep your pie uncovered on the counter. Let it come completely down to room temperature—I mean, really cool—which takes about four hours. After that time, you can cover it loosely with plastic wrap, but you should still try to serve it the same day if you can for the absolute fluffiest texture. If you must refrigerate leftovers (and who can blame you?), try to take it out about 30 minutes before serving to take the chill off that rich custard base. For more tricks on making sure your toppings hold up, feel free to check out some great ideas on this site!
Frequently Asked Questions About Chocolate Meringue Pie
I know tackling a classic dessert like this can bring up a lot of confusing questions! That’s totally normal. I’ve gathered the ones I hear most often about making the best chocolate meringue pie, so you can skip the worrying and get straight to the enjoying. Look how much simpler everything becomes once you know the answers!
Can I use instant pudding instead of making the custard for this chocolate meringue pie?
You certainly *could* grab a box for convenience if you were in a real pinch, but honestly, you’d miss the entire point of this recipe. Instant pudding doesn’t cook the way this starch-thickened base does. Our focus here is achieving that deep flavor and luxurious mouthfeel of the velvety chocolate pie filling created by cooking the eggs and chocolate together. Using pudding just won’t give you that signature, rich texture we worked so hard to nail down!
What is the best way to get a golden brown, toasted homemade meringue topping?
I do it the gentle way first! Baking the pie for about 12 to 15 minutes at 350°F usually gives a lovely, even light gold color across that fluffy meringue topping. If your filling is fully set before the meringue is fully browned, I highly recommend pulling the pie out and using a kitchen torch. A torch gives you instant visual appeal and lets you toast just the tips without risking overbaking the filling underneath. It’s my secret for getting those dramatic peaks super brown without drying things out!
How long does this rich chocolate custard dessert stay fresh?
Because of the way the meringue seals the top during baking, this pie is surprisingly durable, but remember that slow cool-down! If you store leftovers covered loosely at room temperature, they are best eaten within 24 hours. If you need to keep it longer, cover and refrigerate it, but try to let it sit out on the counter for at least 30 minutes before slicing so the rich chocolate custard dessert softens up again. It keeps well for about three days total after it’s fully cooled.
If you’re looking for other straightforward recipes that fit into a busy schedule, you might want to browse my weeknight dinner ideas while this pie is cooling down!
Nutritional Estimates for Your Indulgent Sweet Treats
I know when we are making something this absolutely wonderful—a true slice of heaven—we don’t usually stop to worry about the numbers, but sometimes it’s good to have an idea of what we are enjoying! Remember, this is a special occasion chocolate meringue pie, a real treat, so it’s certainly an indulgent sweet treat. Because we use real ingredients like butter and sugar, the figures reflect that wonderful richness, of course!
Please keep in mind these are just estimates based on the specific recipe data, and they can change a bit depending on the exact brands of ingredients you grab at the store. These figures are calculated for one generous slice, which, let’s face it, is usually the perfect size anyway!
- Serving Size: 1 slice
- Calories: 380
- Sugar: 45g
- Sodium: 180mg
- Fat: 18g
- Saturated Fat: 9g
- Unsaturated Fat: 9g
- Trans Fat: 0g
- Carbohydrates: 52g
- Fiber: 1g
- Protein: 6g
- Cholesterol: 105mg
It’s quite satisfying to know that even in something so rich, we are still getting a gram of fiber, which is better than some store-bought desserts! If you’re looking for simple, energy-packed snacks for in between baking sessions, you should check out my no-bake protein balls recipe—they are fantastic for a quick boost!
Share Your Experience Making This Chocolate Meringue Pie
Wow, you did it! You’ve tackled one of the most glorious, yet technically tricky, desserts out there and ended up with a piece of pure magic. That’s what home cooking is all about—taking on the challenge and winning!
Now that your kitchen smells like chocolate heaven and the pie is cooling carefully on the counter, I really want to hear about it. Did your meringue tower up high and proud? Did that creamy chocolate custard pie filling set perfectly? Don’t keep those delicious secrets to yourself!
Please take a moment to leave a star rating right below this section. That feedback is gold for me and helps other cooks see just how reliable this process is. If you added a little pinch of espresso powder to the chocolate, or maybe used a different fruit garnish, share that twist in the comments too! Knowing how you adapted this classic chocolate pie recipe for your own family table just warms my heart.
We are building a community here at Misty Plate—a place where we encourage each other to bake beautiful, simple food. So, head over to my contact page if you have any lingering questions, but otherwise, enjoy every single, glorious bite of your flawless chocolate meringue pie. You absolutely earned it!
PrintThe Best Chocolate Meringue Pie with Silky Filling and Flawless Fluffy Meringue Topping
Make this classic chocolate meringue pie featuring a rich, velvety chocolate custard filling and a towering, perfectly golden, fluffy meringue topping. This recipe provides clear steps for a showstopper dessert.
- Prep Time: 25 min
- Cook Time: 30 min
- Total Time: 4 hours 55 min
- Yield: 8 servings 1x
- Category: Dessert
- Method: Baking
- Cuisine: American
- Diet: Vegetarian
Ingredients
- 1 (9-inch) unbaked pie crust (homemade or store-bought)
- 1 1/2 cups granulated sugar, divided
- 1/3 cup cornstarch
- 1/4 teaspoon salt
- 1 1/2 cups cold water
- 3 large egg yolks, lightly beaten
- 2 ounces unsweetened chocolate, chopped
- 2 tablespoons unsalted butter
- 1 teaspoon vanilla extract
- 3 large egg whites, at room temperature
- 1/4 teaspoon cream of tartar
Instructions
- Preheat your oven to 350 degrees F. Bake the pie crust according to package directions or until lightly golden. Let it cool completely on a wire rack.
- Prepare the Chocolate Filling: In a medium saucepan, whisk together 1 cup of the sugar, cornstarch, and salt. Gradually whisk in the cold water until smooth.
- Cook the mixture over medium heat, stirring constantly, until it thickens significantly and comes to a boil. Boil for 1 minute, stirring constantly. Remove from heat.
- In a separate bowl, whisk the egg yolks. Temper the yolks by slowly whisking about 1 cup of the hot chocolate mixture into the yolks. Then, pour the tempered yolk mixture back into the saucepan with the remaining hot chocolate mixture.
- Return the saucepan to medium heat. Cook, stirring constantly, until the mixture thickens again and bubbles slowly. Do not let it boil vigorously. Remove from heat.
- Stir in the chopped chocolate, butter, and vanilla extract until smooth. Pour this rich chocolate custard immediately into the cooled, prebaked pie shell.
- Prepare the Meringue: In a clean, grease-free bowl of a stand mixer (or using a hand mixer), beat the egg whites until soft peaks form.
- Gradually add the remaining 1/2 cup of sugar and the cream of tartar while beating continuously. Continue beating until stiff, glossy peaks form. This is your fluffy meringue topping.
- Spread the meringue over the hot chocolate filling, making sure the meringue touches the edges of the crust all around. This seals the filling and helps prevent weeping. Create decorative swirls with the back of a spoon.
- Bake for 12 to 15 minutes, or until the meringue is lightly golden brown.
- Cool the pie completely on a wire rack at room temperature for at least 4 hours before slicing. Do not refrigerate immediately, as rapid cooling can cause the meringue to weep.
Notes
- To prevent meringue weeping, make sure your mixing bowl for the egg whites is completely free of any grease or yolk residue.
- When spreading the meringue, seal it completely against the crust edge to trap steam inside the filling.
- For a toasted meringue look without returning the pie to the oven, use a kitchen torch after the pie has cooled slightly.
Nutrition
- Serving Size: 1 slice
- Calories: 380
- Sugar: 45g
- Sodium: 180mg
- Fat: 18g
- Saturated Fat: 9g
- Unsaturated Fat: 9g
- Trans Fat: 0g
- Carbohydrates: 52g
- Fiber: 1g
- Protein: 6g
- Cholesterol: 105mg