
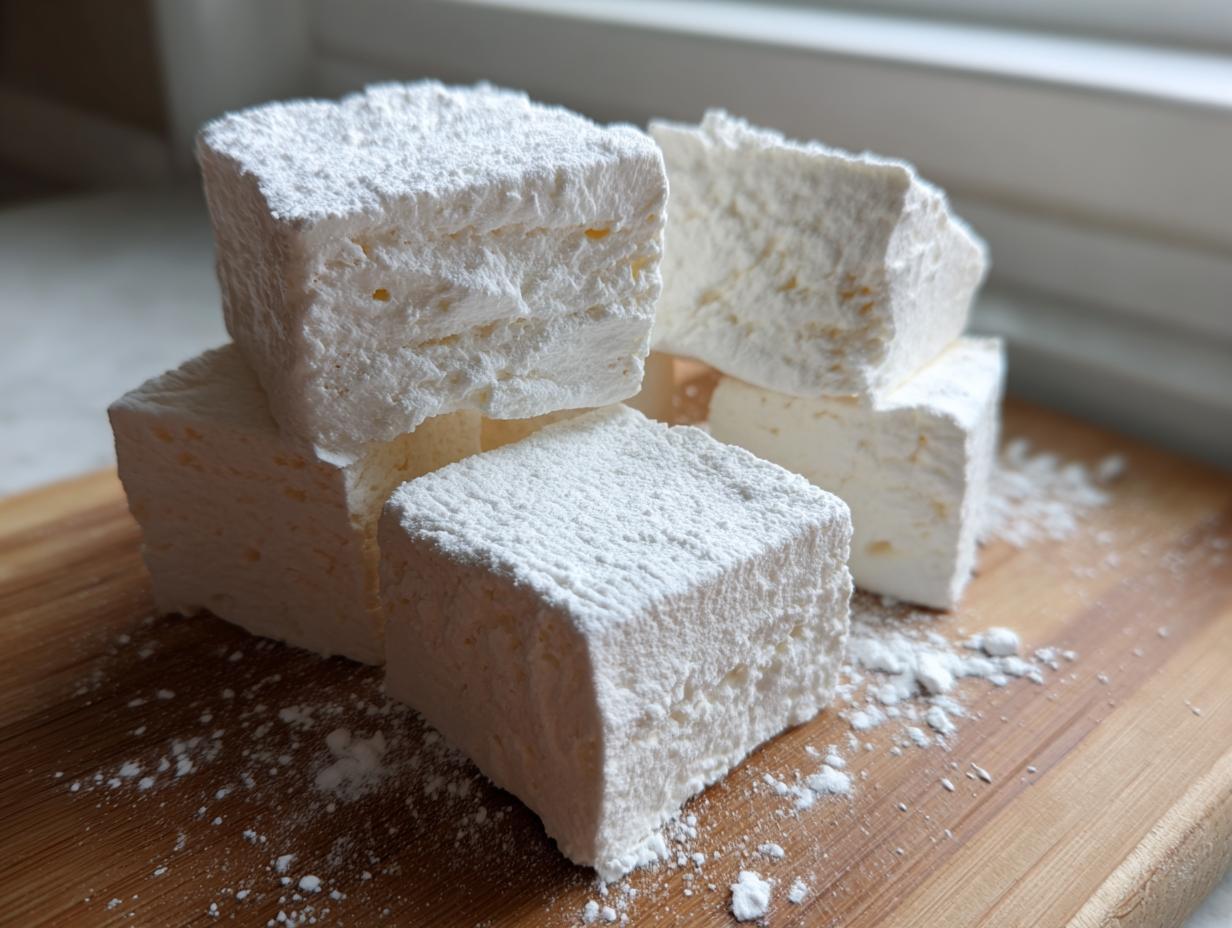
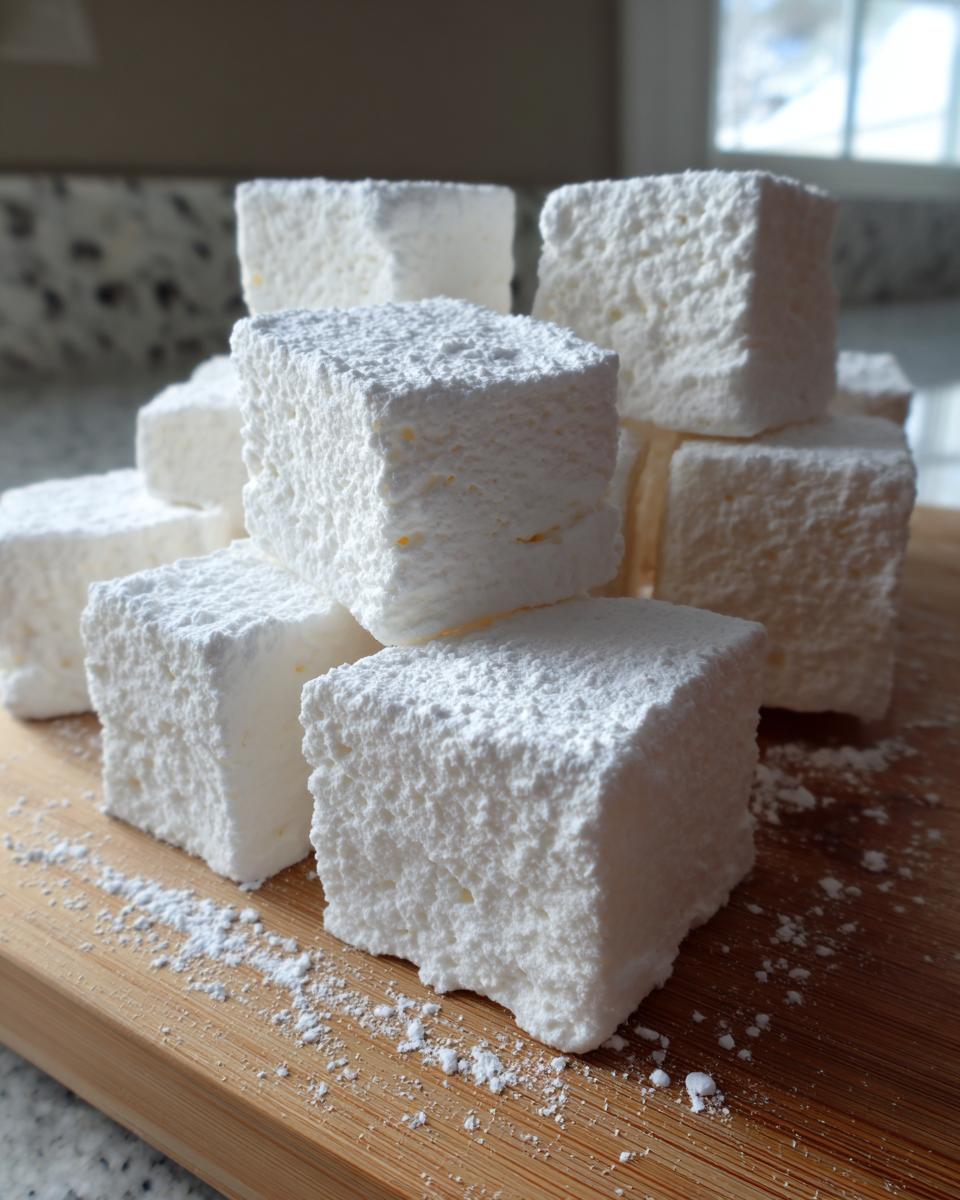
Listen, I’m going to tell you something important: store-bought marshmallows are just… fine. They work, but they don’t *sing*. The minute you taste one of these homemade marshmallows, light as air and melting instantly, you realize what you’ve been missing. For years, I thought candy making was this huge, scary hurdle, but I found the trick! This recipe creates the most unbelievably fluffy homemade marshmallows, and yes, we can even skip the corn syrup if you want pure, simple joy. Pull out your stand mixer; this is about rediscovering that simple, grounding magic Ava talks about right in your own kitchen. If you love simple sweets, make sure you check out my full collection of dessert recipes over here!
- Why This is the Best Homemade Marshmallows Recipe (Expert Tips from Ava)
- Ingredients for Fluffy Homemade Marshmallows
- How to Make Homemade Marshmallows Step-by-Step
- Tips for Perfect Homemade Marshmallows Every Time
- Using Your Homemade Marshmallows for Hot Cocoa and S'mores
- Storage and Making Homemade Marshmallows Ahead
- Gourmet Homemade Marshmallows Variations
- Frequently Asked Questions About Making Marshmallows From Scratch
- Estimated Nutrition for Homemade Marshmallows
Why This is the Best Homemade Marshmallows Recipe (Expert Tips from Ava)
I know what you’re thinking: making candy from scratch sounds fussy and frankly, intimidating. But trust me, these homemade marshmallows feel miles beyond anything you buy in a bag. The reason this is the best homemade marshmallow recipe? Stability! We are using tried-and-true candy science to give you a beautiful, stable whip. You absolutely need two things here for success: a powerful stand mixer—you simply cannot hand-whip this volume—and a reliable candy thermometer recipes. Don’t skip the temperature; it’s the real secret weapon for achieving those perfect, fluffy homemade marshmallows.
Achieving That Cloud-Like Texture in Your Homemade Marshmallows
The magic happens in your stand mixer bowl. Once that shimmering, hot sugar syrup hits the bloomed gelatin, you need speed and time. You’re not just mixing; you are incorporating massive amounts of air. Keep the mixer running on high speed for a full 12 to 15 minutes. You’ll notice the mixture transforming from liquid gold to thick, snowy white. This long whip is what prevents that gummy stickiness and creates those airy pockets that make these melt-in-your-mouth treats so incredible.
Ingredients for Fluffy Homemade Marshmallows
Okay, let’s talk about what goes into these beauties. Don’t let the list scare you; most of this is just sugar and water! But precision here is everything, especially because we are making an edible science experiment that turns into pure magic. Here is exactly what you’ll need for the softest texture.
- 3 tablespoons unflavored gelatin powder
- 1/2 cup cold water (for blooming gelatin)
- 1 cup granulated sugar
- 1/2 cup water (for syrup)
- 1/4 cup light corn syrup OR 1/2 cup granulated sugar (for no corn syrup option)
- 1/4 teaspoon salt
- 1 teaspoon vanilla extract
- 1/2 cup powdered sugar, for dusting
- 1/4 cup cornstarch, for dusting
Ingredient Notes and No Corn Syrup Marshmallows Substitution
If you are really trying to stick to the basics and avoid corn syrup, this recipe lets you do that! You just need to make one substitution: use 1/2 cup extra granulated sugar instead of the 1/4 cup of corn syrup listed. But heed this warning: if you make that switch for your homemade marshmallows, you must make sure your sugar syrup boils up to 245 degrees F, not 240 degrees F. That little bump in temperature is crucial for stability.
Also, I have to reiterate: while you might be tempted to try mixing this by hand, you truly cannot beat the volume and stiffness you get from a stand mixer. This whipped sugar candy needs that consistent, fast action to come out light and airy rather than dense and sticky.
How to Make Homemade Marshmallows Step-by-Step
Alright, let’s grab our mixing bowls and get ready to make these homemade marshmallows! Don’t rush the process, especially around the hot parts, because taking your time now guarantees that pillowy, cloud-like texture we are aiming for. We need to set up our environment before we even turn on the stove, as things move fast once that syrup is boiling!
Preparing the Pan and Blooming the Gelatin
First things first: get your 9×13 pan ready. Lightly grease it—I use a little non-stick spray—and then mix up your dusting powder. That’s the 1/2 cup powdered sugar and 1/4 cup cornstarch mixed perfectly. Dust that pan heavily! Seriously, dust it like you are burying pirate treasure. You need a thick layer of that mixture, then tap out the excess. This coating is your insurance policy against a sticky mess later.
Next, go to your mixer. Combine the gelatin powder with the 1/2 cup of cold water right in the bowl. Just toss it in. We let this sit for about 5 to 10 minutes. This is called “blooming,” and it’s essential. The gelatin wakes up and gets nice and spongy, ready to hold all that air we are about to beat into it. Don’t touch it while it blooms!
Cooking the Sugar Syrup to the Perfect Soft-Ball Stage
Now it’s time for the hot stuff, so be careful! In a saucepan, combine your granulated sugar, the 1/2 cup of water (for the syrup, not the gelatin water!), and either the corn syrup or the extra sugar if you skipped the corn syrup. Stir this gently over medium heat until the sugar dissolves completely. Once it starts bubbling, stop stirring! Resist the urge! Stirring introduces bubbles that we don’t want in our syrup.
Stick that candy thermometer right in the middle, making sure the tip isn’t touching the bottom of the pan. You are cooking this hard until it hits exactly 240 degrees Fahrenheit—that’s the official soft-ball stage. If you went the no-corn-syrup route, remember to push it up to 245 degrees F. When it hits the mark, yank it off the heat instantly. It must go straight into the mixer!
Whipping and Setting Your Soft Vanilla Marshmallows
This is the fun part! Turn your mixer on low speed first. Very, very slowly, pour that scorching hot syrup in a thin stream down the side of the bowl. Don’t pour it directly onto the whisk; that just creates a mess. Once it’s all in, crank that mixer up to high speed. You will mix this for a good 12 to 15 minutes. Seriously, don’t stop early! You want the marshmallow mixture to get very thick, super glossy, and pull away from the sides of the bowl. It should look like marshmallow silk.
When it’s almost done, toss in your vanilla extract. Then, you have to work fast because this stuff sets up quickly! Scrape that beautiful, thick batter into your prepared, dusted pan. Use an oiled spatula or oiled hands to carefully smooth the top. Give it a final, generous dusting of that cornstarch/powdered sugar mix on top. Now, the hardest part: you have to let your soft vanilla marshmallows set up completely, uncovered, for at least four hours, but I always wait until the next morning. Patience here guarantees perfect cutting later!
Once they are totally firm, flip the slab out onto a cutting board that you’ve dusted again. Use a sharp, oiled knife to cut them into squares. Toss those fresh cubes in the remaining dusting mix so they don’t stick to each other. And that’s it! You just made candy! If you want to try making apple butter to serve alongside or dip these into, I have a great stovetop recipe for that right here.
Tips for Perfect Homemade Marshmallows Every Time
Making DIY marshmallows should be fun, not frustrating! If you follow the steps, you’ll have beautiful results, but sometimes little things trip us up. The biggest rookie mistake I see with this whipped sugar candy is under-whipping. If your marshmallow doesn’t reach that stiff, glossy peak, it will never set up properly and will remain frustratingly sticky. Don’t be tempted to shave off five minutes from the mixing time!
If you find your marshmallows stick to the pan even after that heavy initial dusting, it just means you need more powder during the cutting and tossing stage. Don’t be shy! You can always brush off the excess powder later. My trick when cutting is to use a pizza cutter that I’ve dipped in a neutral oil first—it glides through the softness so cleanly. Try this technique next time when you are making skillet naan for dipping sauce, I detail the process here!
Using Your Homemade Marshmallows for Hot Cocoa and S’mores
So, you’ve successfully made these magnificent, pillowy clouds. Now what? Honestly, they are amazing eaten straight out of the pan dusted with that sugary coating, but their true calling might be in simple classic desserts. Forget those stale, waxy cubes you used to cram into your hot chocolate!
When you use these for marshmallows for hot cocoa, the experience is totally different. Because ours are made with pure gelatin and sugar, they melt down into an incredible, creamy froth, blending right into the chocolate instead of just sitting sadly on top. It’s just divine!
And S’mores? Oh my goodness. When you toast these beauties, they puff up huge and brown beautifully on the outside, but the inside turns into this liquid, sugary lava that just oozes down. If you were planning on making killer s’mores, these are your essential homemade smores ingredients. They toast faster than the store-bought ones, so keep them moving over the fire. They are perfect for dipping into something savory, too, like my incredible creamy garlic sauce if you are feeling adventurous—you can find that recipe over here!
Storage and Making Homemade Marshmallows Ahead
One of the biggest perks of making something like these homemade marshmallows is that you can absolutely make them ahead of time, which is a lifesaver when you’re planning for holiday baking or gifts! The key here is keeping the air out. Once you’ve cut your squares and tossed them in that lovely dusting powder, store them in a truly airtight container.
I never refrigerate my marshmallows, though. Cold temperatures seem to change that lovely, airy texture we worked so hard to create. At room temperature, these stay wonderfully soft and fluffy for about two weeks. The sugar and gelatin structure holds up really well!
Now, can you freeze them? Yes, you can, but honestly, I don’t love the results as much. If you absolutely must freeze them (maybe you made 5 batches—it happens!), make sure they are well-coated in the powder, then store them in a freezer-safe bag with all the air knocked out. When you thaw them, they might weep a little moisture, so you might need to give them another quick toss in fresh powdered sugar before serving, especially if you need them firm for dipping.
If you’re prepping for a party, making them two or three days ahead is perfect. They cure slightly in that container, and the flavor seems to deepen a touch. It frees up your oven and counter space when the big day arrives! If you’re looking for another easy item to make ahead for entertaining, my simple teriyaki sauce recipe is always a huge hit.
Gourmet Homemade Marshmallows Variations
Once you master the basic technique, it feels like cheating how easy it is to dress up these homemade marshmallows! This is where we turn a simple treat into something truly special, perfect for gifting or elevating a dessert board. You really only need to add your flavor element during that very last minute of mixing, right before you turn the mixer off. It’s such a simple adjustment for a big payoff!
If you love that crisp winter feeling, you have to try a peppermint version. Just substitute the 1 teaspoon of vanilla extract with 1/2 teaspoon of high-quality peppermint extract. Be careful not to overdo the extract, though; peppermint is strong! You’ll end up with gorgeous pink-and-white swirls if you add a single drop of red food coloring before turning off the mixer. They make the perfect final touch for any holiday candy platter.
For the chocolate lovers—and who isn’t one?—tossing in mini chocolate chips is just heavenly. After the marshmallows have whipped up beautifully and the vanilla is incorporated, gently fold in about 1/2 cup of mini chocolate chips with a spatula. You want to do this by hand because the mixer will just break them up. These are amazing for making the best homemade smores ingredients because the melted chips add such richness!
If you are looking for something really elegant, try a little citrus zest! About a teaspoon of finely grated orange or lemon zest mixed in with the vanilla adds such a bright note that plays beautifully off the sweetness. These light, citrusy puffs are truly gourmet marshmallows, and they look so pretty dusted with just powdered sugar. If you’re already in the holiday baking spirit, you absolutely must check out my recipe for Christmas Gooey Butter Cookies for another easy showstopper!
Frequently Asked Questions About Making Marshmallows From Scratch
I always get questions after people try this recipe for the first time because we are dealing with hot sugar, which is a little different than just creaming butter! Don’t stress, though. Most problems are simple fixes related to time or powder. If you’ve been hesitant about your first attempt because you thought making from scratch marshmallows was too complicated, these easy answers should give you the confidence boost you need to try it out!
Can I make homemade marshmallows without a stand mixer?
If you are asking this, you are probably thinking about saving your arm strength, and I totally get it! But here is my honest take: no, I really can’t recommend trying this recipe without a stand mixer. We need that mixer running on high speed for a full 12 to 15 minutes to properly incorporate the air into the gelatin and syrup. If you try to do this by hand or even with a handheld electric mixer, you just won’t achieve the volume needed. The mixture will surely become too thick before it gets light and fluffy, and you’ll end up with a very heavy, dense block instead of those melt-in-your-mouth treats.
Why are my homemade marshmallows sticky?
The primary culprit for sticky marshmallows is usually rushing the whipping process. If you stop the mixer before those full 12 to 15 minutes are up, the mixture hasn’t developed enough structure yet. It’s still liquidy, and that stickiness just pours right out onto the pan. If you whipped for the full time and they still feel gooey after setting up, you probably didn’t use enough of that powdered sugar and cornstarch dusting mix!
Remember, you need that coating on the pan, on the top of the un-cut slab, and then you need to toss the final squares in more of it. This powder is what keeps the outside dry and non-tacky. If you’re looking up various candy thermometer recipes, you’ll find that temperature is for cooking/setting the syrup, but the powder is for handling the finished fluff!
If you’re planning ahead for meals and want some easy recipes that don’t involve candy making, I’ve got a whole section of quick weeknight ideas over on the blog!
Estimated Nutrition for Homemade Marshmallows
When we transform simple ingredients into something this delicious, I know people get curious about the nutritional side. Since we are dealing with sugar and gelatin, the figures aren’t a complete surprise, but it’s good to have a baseline! Here is the estimated nutritional breakdown for one square of these homemade marshmallows, based on the recipe yield of 36 pieces.
Please keep in mind that these are estimates! Nutritional content can shift slightly depending on the brands of gelatin or sugar you use, and certainly, if you opt for the no-corn-syrup version versus the standard recipe, things will fluctuate a little bit. I always say, this is a treat made with recognizable ingredients—that’s the win right there!
- Serving Size: 1 square (1/36th recipe)
- Calories: 105
- Sugar: 25g
- Sodium: 15mg
- Fat: 0g
- Protein: 1g
- Carbohydrates: 27g
Even though the sugar content is high (it is candy, after all!), these are fat-free and cholesterol-free, which is a nice bonus. If you’re looking for some wholesome ways to start your day that are a bit more balanced than sugar-loaded treats, you should definitely browse my favorite easy breakfast recipes on the blog!
PrintThe Easiest, Fluffiest Homemade Marshmallows (No Corn Syrup Option!)
Make soft, fluffy, and pillowy homemade marshmallows from scratch. This easy recipe uses simple ingredients and is perfect for hot cocoa, s’mores, or edible gifts.
- Prep Time: 20 min
- Cook Time: 15 min
- Total Time: 4 hr 35 min
- Yield: About 36 large squares 1x
- Category: Dessert
- Method: Stovetop/Mixing
- Cuisine: American
- Diet: Vegetarian
Ingredients
- 3 tablespoons unflavored gelatin powder
- 1/2 cup cold water (for blooming gelatin)
- 1 cup granulated sugar
- 1/2 cup water (for syrup)
- 1/4 cup light corn syrup OR 1/2 cup granulated sugar (for no corn syrup option)
- 1/4 teaspoon salt
- 1 teaspoon vanilla extract
- 1/2 cup powdered sugar, for dusting
- 1/4 cup cornstarch, for dusting
Instructions
- Lightly grease a 9×13 inch baking pan. Mix the powdered sugar and cornstarch together in a small bowl. Dust the prepared pan generously with this mixture, shaking out any excess.
- In the bowl of a stand mixer fitted with the whisk attachment, combine the gelatin powder and 1/2 cup cold water. Let this mixture sit for 5 to 10 minutes to bloom.
- While the gelatin blooms, prepare the sugar syrup. In a medium saucepan, combine the granulated sugar, 1/2 cup water, corn syrup (or extra sugar), and salt. Stir over medium heat until the sugar dissolves.
- Insert a candy thermometer into the syrup mixture. Bring the syrup to a boil without stirring. Cook until the temperature reaches 240 degrees Fahrenheit (soft-ball stage). This step requires a candy thermometer.
- Once the syrup reaches 240 degrees F, immediately remove the pan from the heat.
- Turn the stand mixer on low speed. Slowly and carefully pour the hot sugar syrup down the side of the mixing bowl into the bloomed gelatin. Avoid pouring directly onto the whisk.
- Increase the mixer speed to high. Beat the mixture for 12 to 15 minutes until the marshmallow is very thick, glossy, and holds stiff peaks. The outside of the bowl should feel warm, not hot.
- During the last minute of mixing, add the vanilla extract.
- Working quickly, scrape the sticky marshmallow mixture into the prepared pan. Use a lightly oiled spatula or oiled hands to spread it evenly.
- Dust the top surface generously with the remaining powdered sugar and cornstarch mixture.
- Let the marshmallows set at room temperature, uncovered, for at least 4 hours, or preferably overnight.
- Once set, turn the marshmallow slab out onto a cutting board dusted with more of the sugar/cornstarch mixture. Use a sharp, oiled knife or pizza cutter to cut the slab into squares. Toss the cut pieces in the dusting mixture to prevent sticking.
Notes
- If you skip corn syrup, use 1/2 cup extra granulated sugar in the syrup mixture and ensure the syrup reaches 245 degrees F to compensate for the missing stabilizer.
- For gourmet marshmallows, add 1/2 teaspoon of peppermint extract instead of vanilla, or stir in 1/2 cup of mini chocolate chips during the last minute of mixing.
- You need a stand mixer for this recipe to achieve the necessary volume and stiffness.
Nutrition
- Serving Size: 1 square (1/36th recipe)
- Calories: 105
- Sugar: 25g
- Sodium: 15mg
- Fat: 0g
- Saturated Fat: 0g
- Unsaturated Fat: 0g
- Trans Fat: 0g
- Carbohydrates: 27g
- Fiber: 0g
- Protein: 1g
- Cholesterol: 0mg