
If you’ve ever craved that perfect, sharp, sour crunch of a pickle but thought, “Ugh, canning equipment? No, thank you,” then I have found our new favorite healthy homemade snack solution. Forget complicated water baths! We are diving headfirst into making the absolute best refrigerator pickles you’ve ever tasted. This Misty Plate kitchen is all about accessible joy, remember? And nothing feels simpler or more satisfying than transforming a fresh cucumber into a tangy treat. These **no cook pickles** are snappy, deeply flavorful, and ready to brighten up your sandwich game with minimal effort. Trust me, once you try this simple vinegar pickled cucumbers method, you won’t look back!
- Why This is the Best Refrigerator Pickle Recipe (Crispy & Quick)
- Ingredients for Easy Refrigerator Dill Pickles
- How to Prepare Quick Pickles Recipe: Step-by-Step
- Ingredient Notes and Substitutions for Refrigerator Pickles
- Storage and Shelf Life for Your Refrigerator Pickles
- Serving Suggestions for Homemade Dill Pickles
- Frequently Asked Questions About No Canning Required Recipes
- Tips for Perfect Kosher Dill Copycat Recipe Results
- Nutritional Estimates for Refrigerator Pickles
Why This is the Best Refrigerator Pickle Recipe (Crispy & Quick)
I get why traditional canning scares people off. It feels like a huge commitment! That’s why these **refrigerator pickles** are practically revolutionary for anyone who wants that perfect sour hit without dedicating a whole afternoon to boiling. This method isn’t just easy; it’s designed specifically to maximize flavor development while keeping that glorious snap you just can’t get sometimes from the jars on the shelf.
We are focusing on making the best homemade dill pickles without all the fuss. Here’s why you’re going to love how quickly this recipe comes together. They are just as good as any simple appetizers and snacks you’d make from scratch!
Achieving Ultimate Crunch with Refrigerator Pickles
The secret weapon here is Step 2: the initial salt soak. Seriously, don’t skip this! We’re pulling excess water out of those cucumbers before they even see the vinegar. This step is key to guaranteeing fantastic texture. When you skip the heat for the brine, like we do here for our **no cook pickles**, you keep the cells of the cucumber firm. This is how we lock in those amazing **crunchy refrigerator vegetables** that snap when you bite them.
Speed: Ready in 24 Hour Pickles Time
While canning takes days of processing, these are truly quick pickles. You get amazing results in the fridge after just one day! We call these our **24 hour pickles** because that’s when the brine has truly permeated the cucumber and the flavor really wakes up. You can sneak a taste at 12 hours, but trust me, waiting that extra night pays off big time for a truly vibrant flavor experience. It’s faster than running to the store!
Ingredients for Easy Refrigerator Dill Pickles
When making **refrigerator pickles**, the quality of what you put in really matters since we aren’t doing any intense heat processing to change the ingredients. I always lay everything out on the counter first—I call it my mise en place for pickling! It just makes the assembly process so much smoother, and you won’t forget that crucial spoonful of sugar later on. Everything needed for these **easy cucumber pickles** comes right from my standard pantry or the produce bin.
Cucumbers and Flavorings for Your Refrigerator Pickles
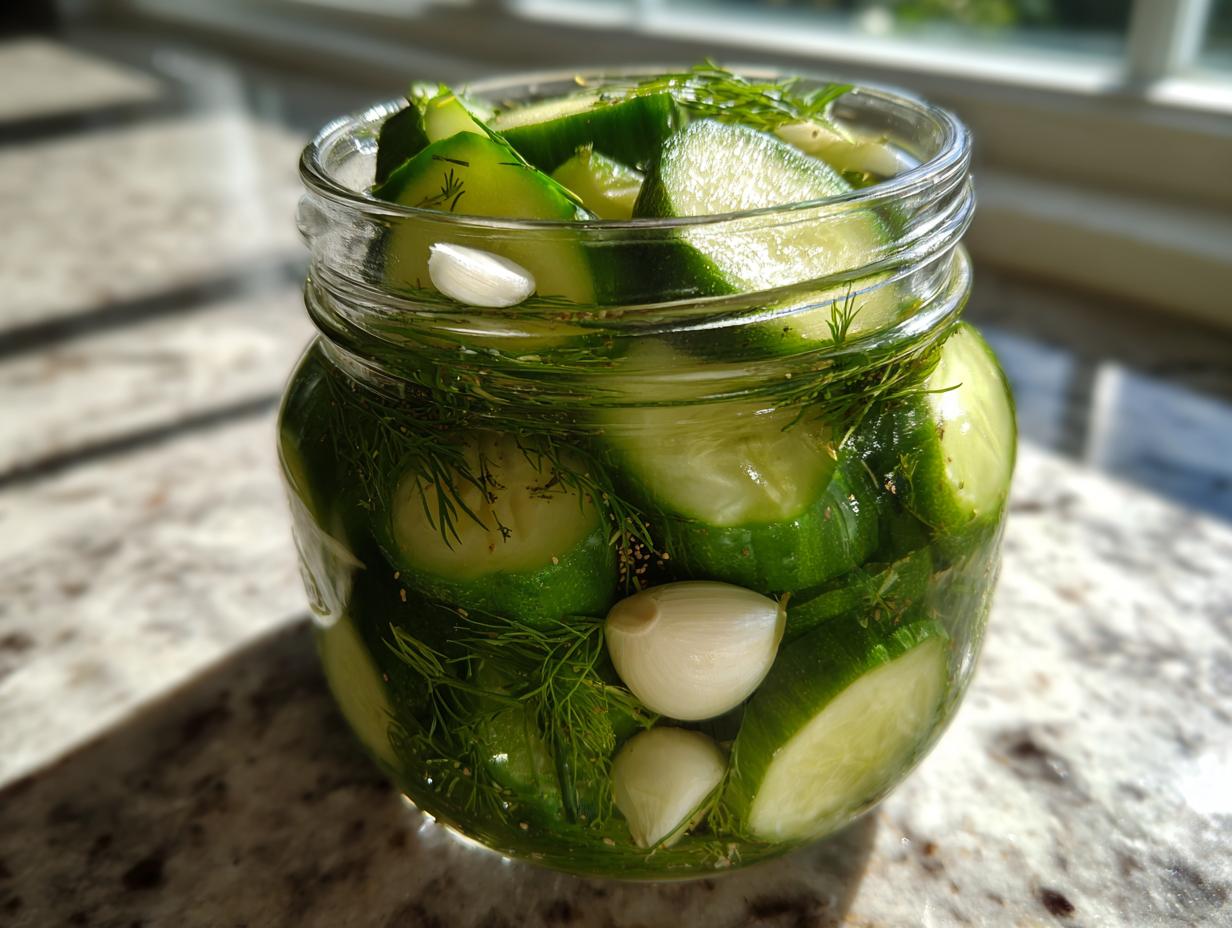
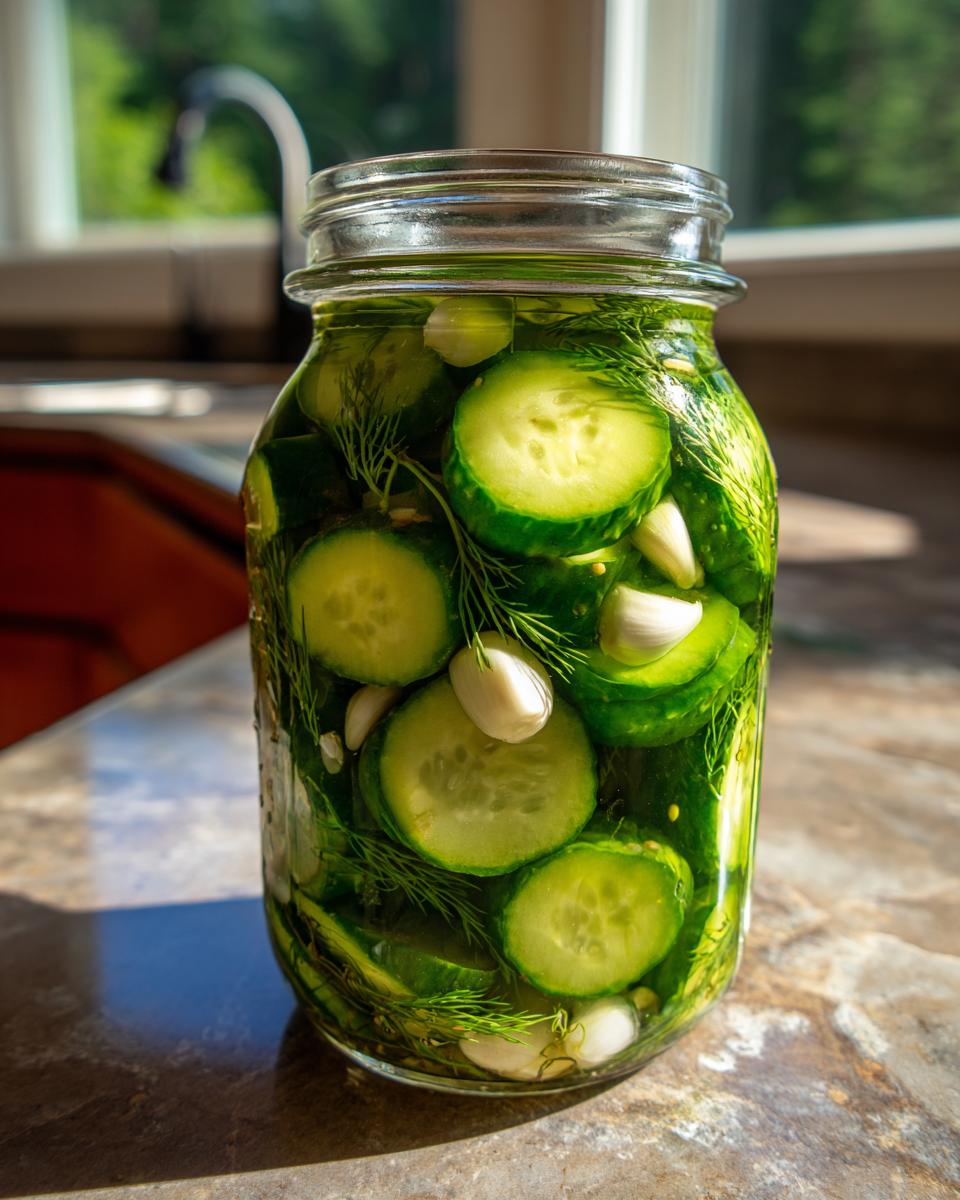
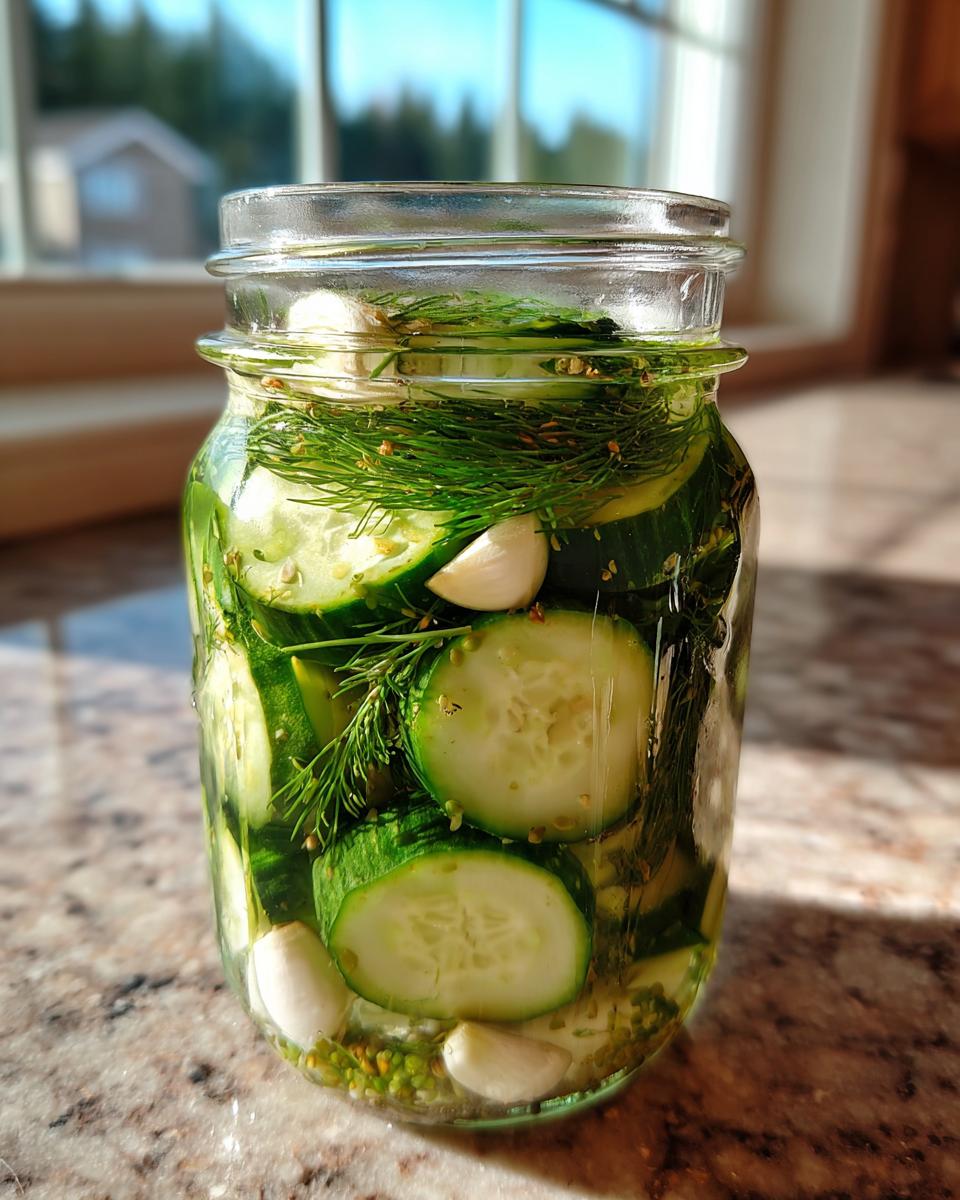
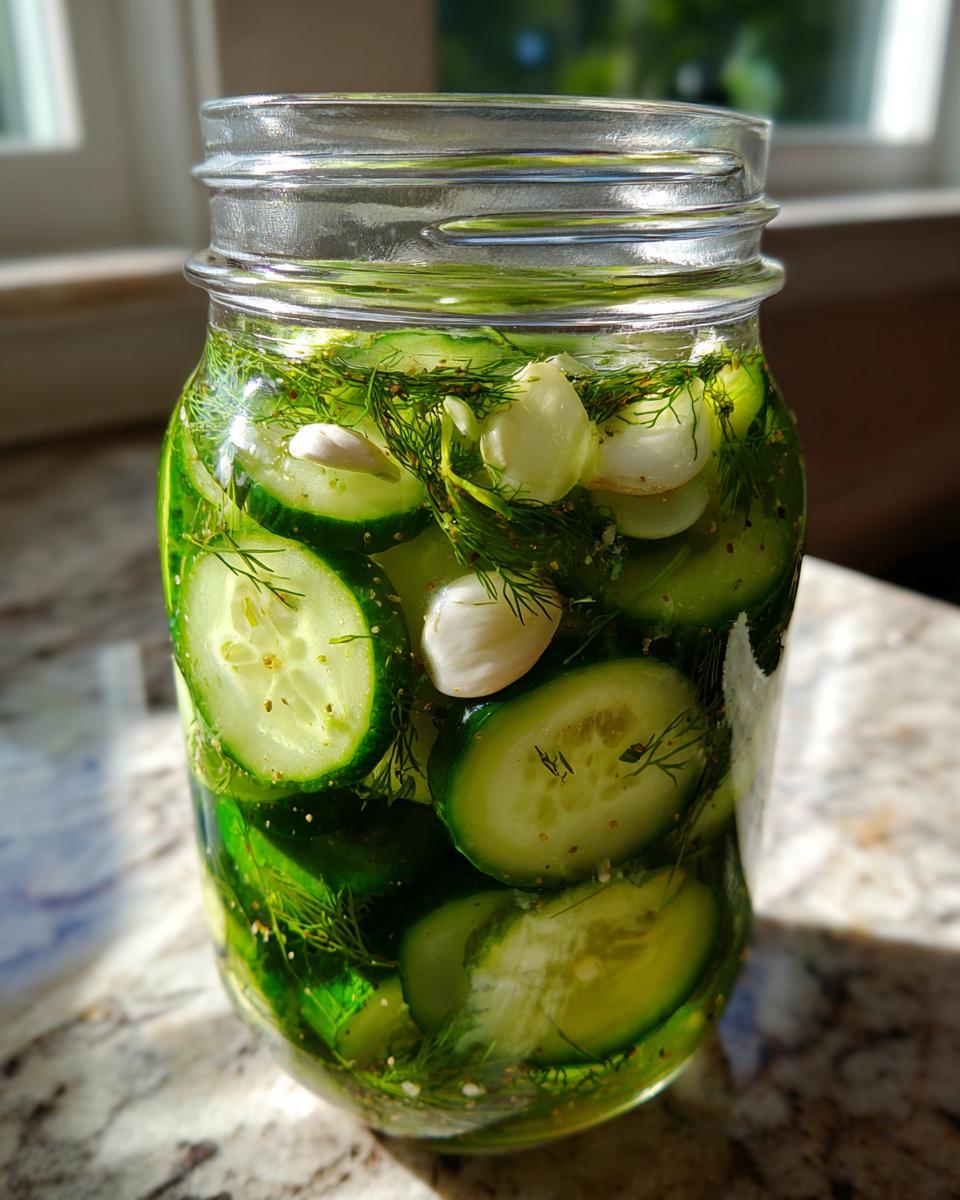
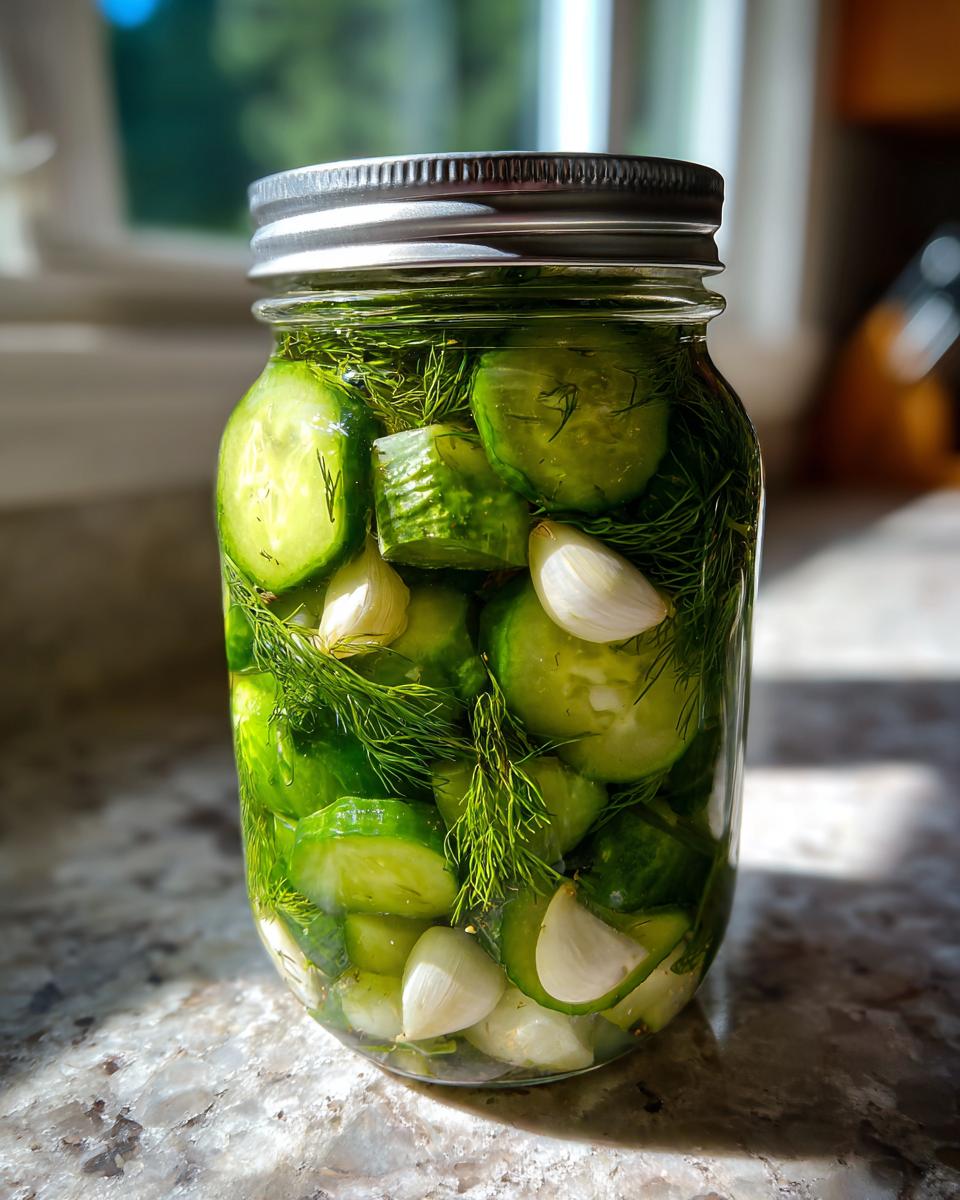
First up, the star: the cucumbers! You’ll need about two pounds of them. I always reach for Kirby or Persian cucumbers because they are smaller and generally have fewer seeds, which is key if you want those amazing, snappy **crispy pickles no canning** required. Make sure you wash them really well before slicing them uniformly—about a quarter inch thick is my sweet spot. For flavorings, we need four cloves of garlic, and you absolutely must smash them slightly before tossing them in the jar; that releases all the good oils! Then there’s the dill. I prefer using actual fresh dill heads if I can find them, as they give the best aroma, but two tablespoons of dried dill seed works perfectly fine if you’re in a pinch for these **homemade dill pickles**.
Simple Pickle Brine Components
Now for the liquid that makes it all magic! This is where our **simple pickle brine** comes together. We start with four cups of cold water to balance out the sharpness. Then, you’ll grab one and a half cups of vinegar—I use plain white vinegar most of the time, but apple cider vinegar works too if you want a slightly fruitier tang in your **vinegar pickled cucumbers**. We balance the sour with about a quarter cup of granulated sugar. This sugar isn’t just for sweetness; it rounds out the flavor beautifully. Remember, this brine isn’t boiled vigorously, so the ingredients stay bright and fresh!
How to Prepare Quick Pickles Recipe: Step-by-Step
Okay, putting together these **refrigerator pickles** is definitely where the magic happens, but don’t let that word ‘step-by-step’ intimidate you! Because this is a **no cook pickles** recipe, the steps are more about soaking and jarring than active cooking. I always make sure my jars are clean and ready to go before I even touch the cucumbers. This way, once the cucumbers soak, we can move fast and lock in that texture. We want the brightest flavor possible, so reading through these steps before you start is always my number one tip! If you start looking for weeknight dinner ideas while your cucumbers are soaking, you’ll lose precious time!
Prepping Cucumbers for Crispy Refrigerator Pickles
First things first: scrub those cucumbers like you mean it! Then we slice them. Uniform thickness is important here, so aim for about a quarter-inch thick rounds. Next is the soak—this is your insurance policy for **crispy pickles no canning** required. In a big bowl, dissolve that whole half-cup of kosher salt into four cups of cold water. Toss your slices in and let them hang out for one full hour. Don’t stir them around much! When that hour is up, drain them well and give them maybe a minute under cold running water just to rinse off the grit. Drain them aggressively afterward!
Making the No Cook Pickles Brine
While those guys are soaking, we whip up the brine, which is super straightforward. In a small saucepan—and I mean small, because we aren’t making gallons—combine the vinegar, sugar, peppercorns, and one cup of fresh water. You’ll heat this mixture over medium heat, just stirring until the sugar disappears. Warning: Do not boil this liquid! We are just dissolving the sugar, that’s it. Once it’s clear, take it right off the burner and let it sit on the counter until it is completely cool to the room temperature. This cooling step is non-negotiable for our **no cook pickles**!
Jarring and Chilling Your Homemade Dill Pickles
Now, grab your two clean pint jars. Pack those rinsed cucumbers in tightly! Wedge your smashed garlic and dill heads right between the layers until the jar is full, leaving about half an inch of space at the top. Now you pour that perfectly cooled brine over the top, making sure everything is submerged. Seal those jars up tight and just leave them on the counter for an hour to get acclimated. Then, right into the fridge they go! Don’t even look at them for 24 hours. That chilling time is essential for these **homemade dill pickles** to develop their best flavor.
Ingredient Notes and Substitutions for Refrigerator Pickles
I know when you are just trying to make a simple batch of **refrigerator pickles**, sometimes you can’t find the exact item listed. Don’t panic! This recipe is incredibly forgiving, but knowing a few tricks helps you nail that perfect crunch every time. Since we aren’t canning, freshness is paramount, especially regarding the cucumbers themselves. We want the best results, making this feel like the absolute **best refrigerator pickle recipe** available! My trip to the market inspired me to try out my easy homemade naan bread recipe last week, and the fresh produce haul made me think about how great fresh pickles would be alongside it!
I’ve learned a few little secrets over the years that make a huge difference, especially regarding texture. If you’re looking to whip up some **quick pickles recipe** goodness tomorrow, these little notes should help you shop smarter or substitute confidently without losing that snappy texture we worked so hard for in the brine steps.
Choosing Cucumbers for Vinegar Pickled Cucumbers
Listen, you *can* use the big, standard slicing cucumbers from the grocery store, but honestly? Don’t. When we talk about making truly crunchy **vinegar pickled cucumbers**, we need the right canvas. Pickling cucumbers—like Kirbys—are bred to be firm. They have thinner skins and fewer seeds, which means less mush potential once they sit in the brine. If you grab those big ones, they tend to soften way faster, so you’d never get that fantastic texture promised in **crispy pickles no canning** recipes. Stick to the small ones if you can find them!
Now, here’s the optional insider secret for ultimate crunch, which is sometimes used for **kosher dill copycat recipe** perfection: if you are really determined, you can add just half a teaspoon of pickling lime to that initial salt and water soak—Step 2. It’s an amazing fixative. But, and this is important, you must rinse those cucumbers for ages afterward. If you’re nervous, just trust the salt soak; it does most of the heavy lifting for us!
Sweet and Tangy Pickles Variation
If you’re craving something that feels a little more special than standard dill, maybe you want that classic deli flavor that screams summer, we can easily pivot this recipe. This recipe leans savory, but turning it into a **bread and butter pickles recipe** is super easy. You just need to tweak the sugar ratio. Instead of using only a quarter cup of sugar in the brine, bump that up to a scant third of a cup. That small addition gives you those beautiful, **sweet and tangy pickles** that are fantastic on burgers or alongside pulled pork. It’s the same easy process, just a little sweeter on the finish!
We don’t change the vinegar or the salt ratio when we make this adjustment. The salt is still needed to draw the water out and keep them crisp, and the vinegar stays the same for the perfect level of tang. So, next time you want variety in your **fridge vegetable prep**, just adjust that sugar level slightly. Easy peasy, just like our philosophy here at Misty Plate dictates!
Storage and Shelf Life for Your Refrigerator Pickles
This is the part where we need to talk seriously, because these are **refrigerator pickles**, not shelf-stable canned goods. That initial crunch is amazing, but honestly, it’s a temporary gift! Because we used a **no cook pickles** method and didn’t jar them up with that intense heat treatment, they are still technically considered fresh. Because of this, they absolutely must stay tucked away in the cold environment of the fridge where they are currently chilling.
The real quality sweet spot for these **easy cucumber pickles** is definitely in the first week. The cucumbers are at their absolute crispiest then—that satisfying *snap* is right there. After about 10 days, you’ll notice they start to get a little softer. This is totally natural for easy snack recipes that rely on cold brine rather than processing!
We found that while they are perfectly safe to eat for longer, you should aim to finish your batch within three to four weeks for the absolute best texture. If you’re making a big batch of these **homemade dill pickles**, try to use up a quart within two weeks and keep the rest tucked in the back! Always make sure your jars are sealed tightly after every visit to the fridge, too. Keeping them cold is the best way to manage the shelf life of your beautiful **refrigerator pickles**.
Serving Suggestions for Homemade Dill Pickles
Okay, you’ve waited the 24 hours. The aroma coming out of that jar when you first crack the seal is just incredible, right? Truly better than anything you buy! Now that you have these gorgeous **refrigerator pickles**, the question is: what do you do with them besides stand in front of the fridge eating them straight out of the jar? (Guilty, I do that all the time.) But these deserve a proper spotlight on your plate!
These tangy delights are perfect for dressing up everyday meals, making them feel a little special without needing a huge time commitment. That’s the Misty Plate promise—simple food making a big difference. If you’ve been looking for more inspiration on easy homemade teriyaki sauce, you know I love things that pack a punch, and these pickles deliver that punch perfectly!
They fit right into our philosophy of making everyday food feel celebratory. Try integrating these **homemade dill pickles** into these simple applications:
- The Ultimate Sandwich Companion: Layer these thin slices on any burger or deli sandwich. They provide that necessary acidic cut-through for rich meats and cheeses. If you’re making a grilled cheese, tuck a few slices inside before grilling—it melts beautifully!
- The Perfect Side for Healthy Homemade Snacks: Forget reaching for processed chips! A handful of these crisp **refrigerator pickles** makes for a wonderfully satisfying, low-calorie, and healthy homemade snack. They’re tart, cooling, and incredibly refreshing on a hot afternoon.
- Chopped for Toppings: Dice them up finely! They become amazing relish. Toss the chopped pickles into tuna salad, chicken salad, or fold them right into creamy pasta salads for a bright burst of flavor. This is one of my favorite ways to use up the last few pickle ends at the bottom of the jar.
- Snack Platter Heroes: They are essential additions to any cheese board or charcuterie situation. Their sharpness cuts through creamy cheeses and fatty salami like a dream. They elevate simple crackers and cheese into something truly gourmet with basically zero effort on your part.
Frequently Asked Questions About No Canning Required Recipes
It’s smart to ask questions when you’re trying a new method, especially when we are skipping traditional canning steps. That’s how we learn to cook with confidence! Since these are **refrigerator pickles** and not shelf-stable, readers often have concerns about texture and timing. We want every batch of **no canning required recipes** to be a massive success for you. Here are the things people ask me most often about making these quick pickles!
How long until my refrigerator pickles are ready to eat?
Oh, I know waiting is the hardest part! You can technically eat them after maybe 6 to 8 hours, but trust me, they won’t have that deep, satisfying punch yet. For the best results, especially if you are aiming for that deeply flavored **kosher dill copycat recipe** vibe, you absolutely need to wait a full 24 hours. That’s when the vinegar and dill truly marry the cucumber flavor. Think of them as **24 hour pickles**—it’s worth the patience for that perfect flavor payoff!
Can I use regular cucumbers instead of pickling cucumbers?
Yes, you totally can, but I’m going to be honest here: the texture won’t be quite the same. When I test out **easy cucumber pickles** with the big, standard slicing cucumbers, they soften much faster. Pickling varieties, like the Kirbys we recommend, are just genetically firmer. If you have to use the big ones, make sure you don’t skip the salt soak! They will still taste delicious—tangy and great in the fridge—but don’t expect the same rock-hard snap you get from the thinner-skinned versions. It’s still a win for a quick snack, though!
What does the salt soak do for these quick pickles recipe?
This initial soak is probably the most important step for nailing the texture in this **quick pickles recipe**! When you soak the sliced cucumbers in salt water for that hour, the salt creates an osmotic reaction. It literally draws the excess water out of the cucumber cells. Why is that amazing? Because that step replaces the tough processing time needed in canning! Removing that water beforehand is the secret to making them truly crunchy. It ensures that when the brine goes in, the cucumber stays firm instead of getting soggy. It’s the ultimate insurance policy for **crunchy refrigerator vegetables**!
We want you to feel totally confident whipping up these homemade treats anytime you need a refreshing side dish. If you’re looking for other super simple meals, you might want to check out my tips for easy protein balls no bake recipe when you need a quick grab-and-go item!
Tips for Perfect Kosher Dill Copycat Recipe Results
Now that we know the basics of making excellent **refrigerator pickles**, let’s talk about elevating them from just ‘good’ to ‘Wait, did you buy these?’ We are aiming for that deep, garlicky, herbaceous flavor profile that makes the classic deli spears so addictive—that’s the real **kosher dill copycat recipe** quality we crave. Since this is still a fresh, no-cook method, our ingredient placement inside the jar matters a lot more than when you are boiling everything to death!
Getting the ratios of dill and garlic right is what separates standard **vinegar pickled cucumbers** from the stuff you dream about. I sometimes use these tips when I’m feeling fancy, even when I’m just making a small batch for snacking after making a batch of that amazing Big Mac sauce copycat recipe. Here are the little tricks I’ve picked up that ensure my **homemade dill pickles** taste authentic.
For those of you wanting to explore more great resources on this style, I always check out what others are doing, like this great recipe I saw from Little Home in the Making. It’s good to cross-reference!
Here is how I guarantee that classic bold flavor in my **refrigerator pickles**:
- Garlic Against the Glass: Always place your smashed garlic cloves directly against the inside wall of the jar, near the bottom. When they sit against the glass, the essential oils and flavor infuse more directly into the brine surrounding the cucumbers. Don’t just toss them in the middle; press them onto the glass sides before you layer the cucumbers in.
- Dill Placement Matters: Whether you are using fresh heads or dried seed, I try to layer the dill strategically. Put a small pinch of dill right at the very bottom, then layer your cucumbers, add another layer of dill in the middle, and finish with your last bit of dill right on top, just under the lid. This ensures the dill aroma permeates the entire jar top-to-bottom during the 24-hour chill time.
- The Peppercorn Distribution: Whole black peppercorns are key for that subtle bite. Instead of dumping them all in one clump, try to distribute the required amount throughout the jar layers, just like you do with the dill. This prevents one slice from getting overloaded with spice while another tastes only of cucumber.
- Vinegar Choice for Tang: For the absolute sharpest, closest **kosher dill copycat recipe** flavor, stick to plain, distilled white vinegar and not apple cider vinegar. White vinegar has a cleaner, sharper acid profile that really lets the dill and garlic shine through without adding the slight sweetness or color that cider vinegar brings.
Nutritional Estimates for Refrigerator Pickles
Now, I always like to keep track of what we’re eating, even when it comes to something as simple as my favorite batch of **refrigerator pickles**. I want to be clear that the numbers below are just my best estimates based on the ingredients listed in the recipe card, factoring in the serving size of about four slices.
When you make these **easy cucumber pickles** at home without the heavy oils or sugars found in some store-bought versions, you get a really straightforward, low-calorie snack filled with that wonderful vinegar tang. This information is just a guide, of course, because the exact brand of vinegar or cucumber you use can shift these figures a little, but it should give you a great ballpark idea for enjoying these **homemade dill pickles**!
Here is what I generally calculate for one serving size of our delicious **refrigerator pickles**:
- Serving Size: 4 slices
- Calories: 15
- Sugar: 2g
- Sodium: 350mg (Yes, pickles are salty, but it’s worth it for the flavor!)
- Fat: 0g
- Saturated Fat: 0g
- Carbohydrates: 4g
- Protein: 0g
See? That’s a wonderfully light side dish or easy snack recipe! We keep the fat completely out because we aren’t frying anything, and since we only use a tiny bit of sugar to balance the brine, the overall sugar content stays low for these **no cook pickles**. Enjoy knowing you are tossing back one of the healthiest, crunchiest snacks around!
PrintEasy Crunchy Refrigerator Dill Pickles (No-Cook Method)
Make crisp, tangy homemade refrigerator pickles without boiling brine or canning. This simple recipe yields the best refrigerator pickle recipe, ready in 24 hours for a healthy homemade snack.
- Prep Time: 20 min
- Cook Time: 5 min
- Total Time: 1 hour 25 min (plus 24 hours chilling)
- Yield: 2 pints 1x
- Category: Side Dish
- Method: No-Cook Brining
- Cuisine: American
- Diet: Vegetarian
Ingredients
- 2 pounds pickling cucumbers (Kirby or Persian), sliced 1/4 inch thick
- 1/2 cup kosher salt
- 4 cups cold water
- 1 1/2 cups white vinegar or apple cider vinegar
- 1/4 cup granulated sugar
- 2 tablespoons whole black peppercorns
- 4 cloves garlic, smashed
- 4 fresh dill heads or 2 tablespoons dried dill seed
Instructions
- Wash cucumbers well. Slice them into uniform 1/4-inch thick rounds.
- In a large bowl, dissolve the kosher salt into the 4 cups of cold water. Add the sliced cucumbers and let them soak for 1 hour. This step helps keep the pickles crisp.
- Drain the cucumbers completely and rinse them under cold running water for 1 minute. Drain again.
- While cucumbers soak, prepare the brine: In a medium saucepan, combine the vinegar, sugar, peppercorns, and 1 cup of fresh water. Heat over medium heat, stirring until the sugar dissolves. Do not boil. Remove from heat and let the brine cool to room temperature.
- Pack the rinsed cucumbers, smashed garlic cloves, and dill heads (or seed) tightly into two clean pint-sized jars, leaving about 1/2 inch of headspace.
- Pour the cooled brine over the cucumbers in the jars, ensuring all cucumbers are submerged. Discard any excess brine if necessary.
- Seal the jars with lids. Let the jars sit on the counter for 1 hour, then transfer them to the refrigerator.
- Allow the refrigerator pickles to chill for at least 24 hours before eating for best flavor and crunch. They are ready for quick pickles enjoyment.
Notes
- For extra crisp pickles, you can add 1/2 teaspoon of pickling lime to the initial salt soak, but rinse extremely well afterward.
- These no cook pickles are best eaten within 3 to 4 weeks for optimal texture.
- If you prefer a sweeter profile, increase the sugar to 1/3 cup for a bread and butter pickles recipe style.
Nutrition
- Serving Size: 4 slices
- Calories: 15
- Sugar: 2
- Sodium: 350
- Fat: 0
- Saturated Fat: 0
- Unsaturated Fat: 0
- Trans Fat: 0
- Carbohydrates: 4
- Fiber: 0
- Protein: 0
- Cholesterol: 0