

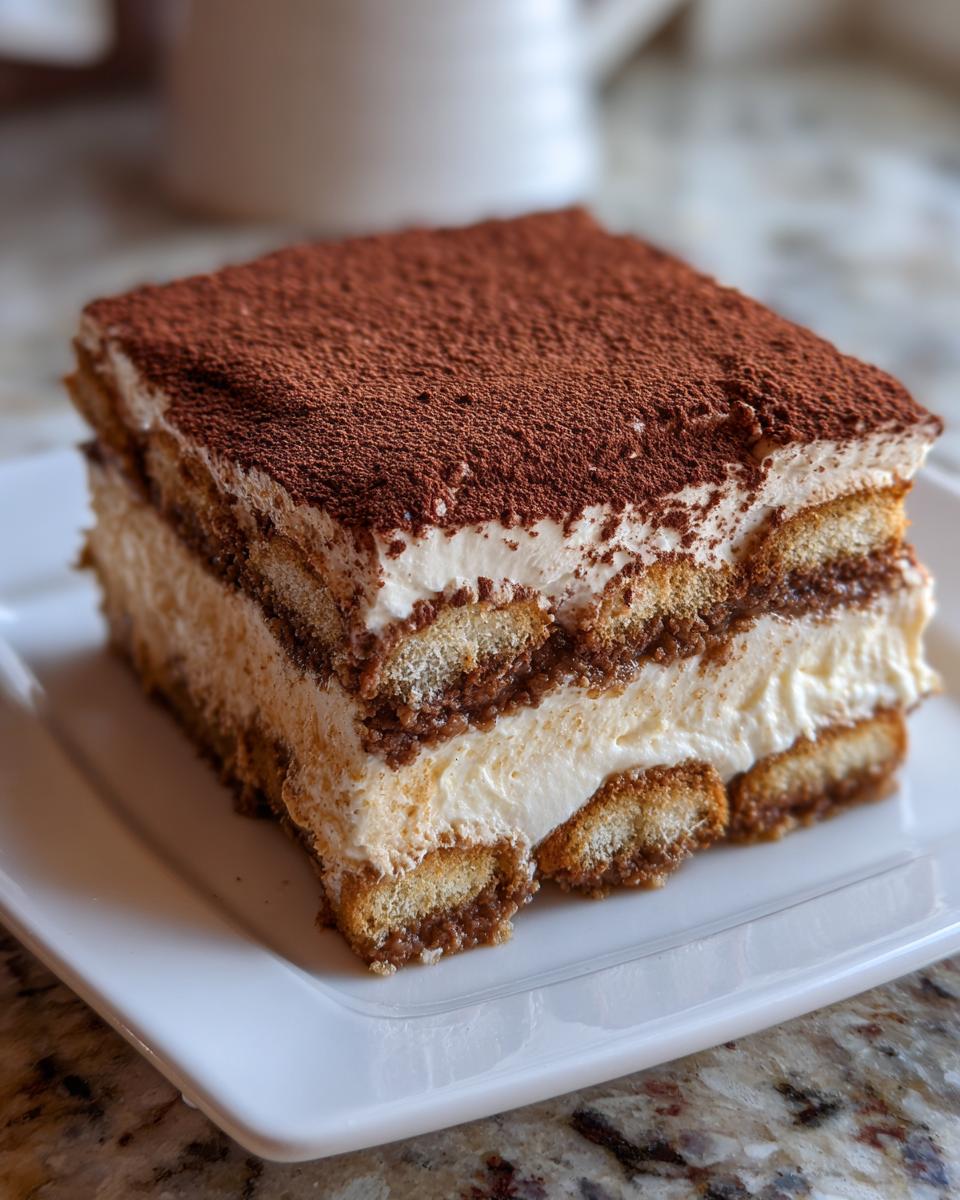
You know those nights? When you’ve hosted, cooked all day, and now you realize you promised something truly special for dessert, but the thought of turning the oven on makes you want to hide? I live for those moments now, much like I did when I was rushing through that marketing career—I needed food that felt like love and memory without demanding hours of focus. That’s why I perfected this tiramisu recipe. Forget fussy techniques or worrying about raw eggs; this is my go-to Easy, Authentic No-Bake Tiramisu Recipe (No Raw Eggs Required). It sets up beautifully in the fridge and delivers that rich, coffee-kissed flavor every single time. Trust me, this simple method makes you look like a pastry genius!
- Why This Easy Tiramisu Recipe Stands Apart
- Gathering Ingredients for Your Tiramisu Recipe
- Step-by-Step Instructions for the Best Tiramisu Recipe
- Tips for an Impressive Dinner Party Dessert Tiramisu Recipe
- Ingredient Notes and Substitutions for Your Mascarpone Cream Dessert
- Serving Suggestions for This Classic Italian Dessert
- Storage and Reheating Instructions for Homemade Tiramisu Guide
- Frequently Asked Questions About This Tiramisu Recipe
- Estimated Nutritional Data for This Decadent Coffee Dessert
Why This Easy Tiramisu Recipe Stands Apart
When I’m developing a recipe, especially for a classic like Tiramisu, I’m always balancing authenticity with real-life timing. This particular version cuts out all the unnecessary stress while keeping that incredible, decadent flavor profile intact. It’s the perfect no bake dessert recipe for when you need something stunning on a timeline.
- It skips the oven entirely—hello, no-bake simplicity!
- It uses a special technique to ensure perfect creaminess without any worry.
- The flavor is deeply Italian, focusing on high-quality coffee and cheese.
No Raw Eggs: Food Safety and Peace of Mind
This is a huge one for me when I bake for guests, especially if I’m running late. We aren’t skipping the yolks; that’s where the richness comes from! Instead, we whisk the egg yolks vigorously with the sugar until they get pale and thick. That friction is basically doing a little pre-pasteurization job right in the bowl. Then, we fold that mixture into the creamy mascarpone and gently incorporate the whipped cream. It sets up perfectly in the fridge, giving you that silky mouthfeel you want, worry-free.
The Secret to an Authentic Tiramisu Recipe Flavor
You cannot cheat coffee in a good Tiramisu. You absolutely must use strong, cooled espresso—none of that weak drip brew! That bold, slightly bitter kick is what balances the richness of the mascarpone cream. Also, please, use good quality mascarpone. We aren’t using cream cheese here; we need that pure, slightly sweet dairy flavor. When you dip the ladyfingers, you want a quick dunk—just a second on each side. Soggy Savoiardi biscuits are a dessert crime; we’re looking for layers that hold their structure.
Gathering Ingredients for Your Tiramisu Recipe
Since this tiramisu recipe is no-bake, the magic really comes down to having great components ready to go. There’s no oven to hide behind, so quality matters! When you shop, grab the best strong espresso you can find—seriously, this is the heartbeat of the dessert. Make sure your mascarpone has time to soften up on the counter too; cold mascarpone fights the mixer and gives you lumps, which we definitely don’t want in this luxurious mascarpone cream dessert.
Here is everything you’ll need to make 8 generous servings of this incredible treat:
- One and a half cups of very strong brewed espresso or coffee, cooled completely.
- One-quarter cup of coffee liqueur or dark rum—this is optional, but adds such a lovely warmth!
- Two large egg yolks.
- One-half cup of granulated sugar.
- Eight ounces of mascarpone cheese, softened right up to room temperature.
- One cup of heavy whipping cream, kept nice and cold.
- One teaspoon of vanilla extract.
- One full package (about 7 ounces) of ladyfingers—the dry Savoiardi biscuits work best here.
- Unsweetened cocoa powder for dusting everything perfectly on top.
If you need other simple recipes that use minimal pantry staples, check out my guide to making creamy garlic sauce!
Step-by-Step Instructions for the Best Tiramisu Recipe
Okay, now for the fun part! Putting it all together is surprisingly fast, which is why this is my favorite tiramisu recipe when I’m short on time but need something impressive. Remember, the oven stays off! We’re building layers of flavor here, so focus on gentle handling once that lovely cream is made. If you need a recipe for making bread ahead of time, I have a great skillet naan recipe you can check out while your tiramisu chills.
-
Preparing the Coffee Soaked Ladyfingers
First things first, let’s get that coffee ready. Make sure your espresso or strong coffee is completely cool before you add your liqueur, if you’re using it. Pour this mixture into a shallow bowl. Now, this is important: dip each ladyfinger into the coffee bath *very* quickly—think one second per side! You want them moisturized, not swimming; soggy biscuits melt right into the dish.
-
Creating the Safe Mascarpone Cream Dessert Filling
In your first bowl, grab those egg yolks and sugar. You’ll whisk these together relentlessly until they look pale yellow and ribbon-like; this friction is what we are relying on for safety, giving you that smooth paste before you fold in the softened mascarpone, just until combined. Do not beat it into submission! In a separate, clean bowl, whip your cold heavy cream and vanilla until they hold stiff peaks—that’s what gives us that beautiful airiness for the quick creamy dessert filling. Once the mascarpone base is smooth, gently fold in one-third of the whipped cream to lighten the load, then fold in the rest until you see no streaks. It should feel cloud-like.
-
Assembling and Chilling Your Layered Italian Cake
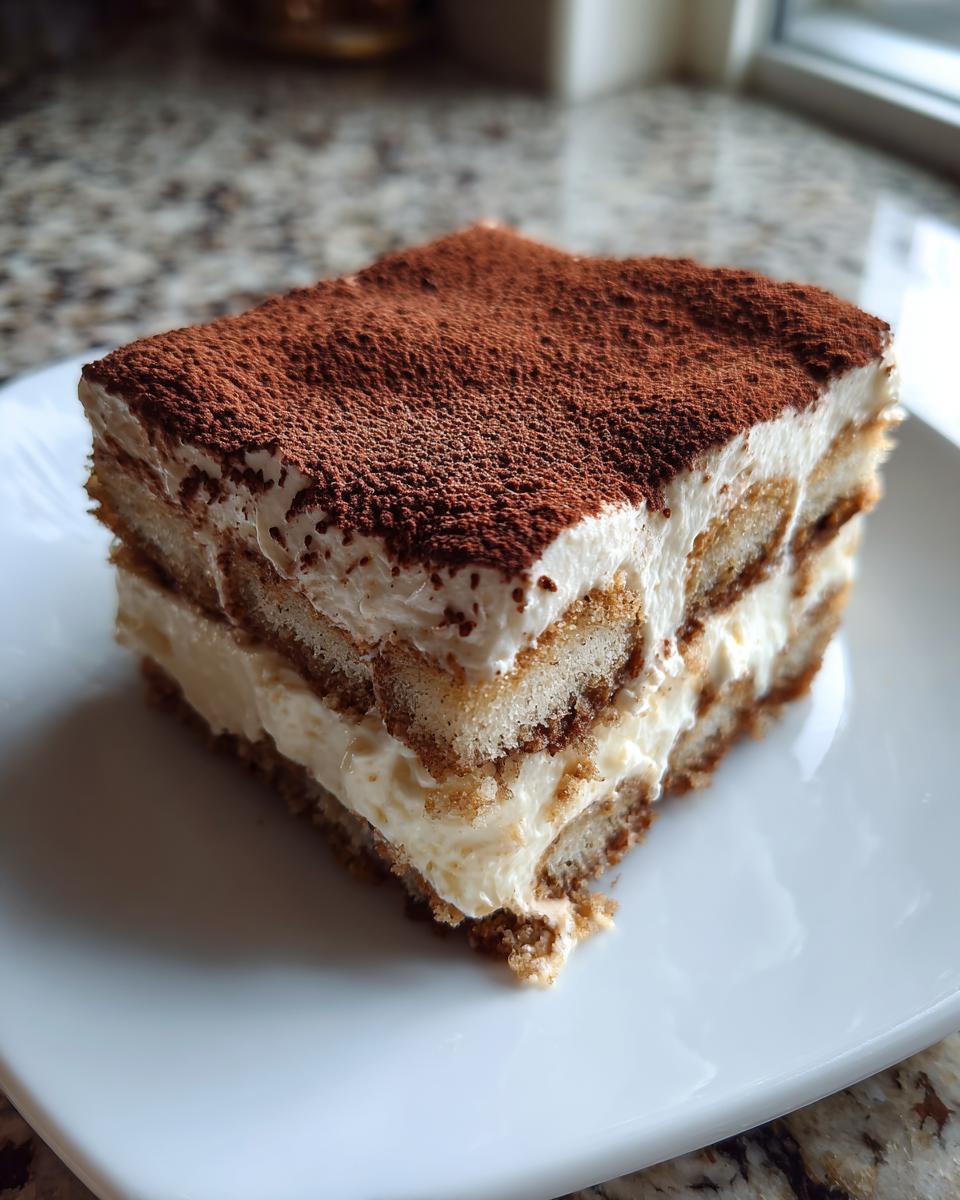
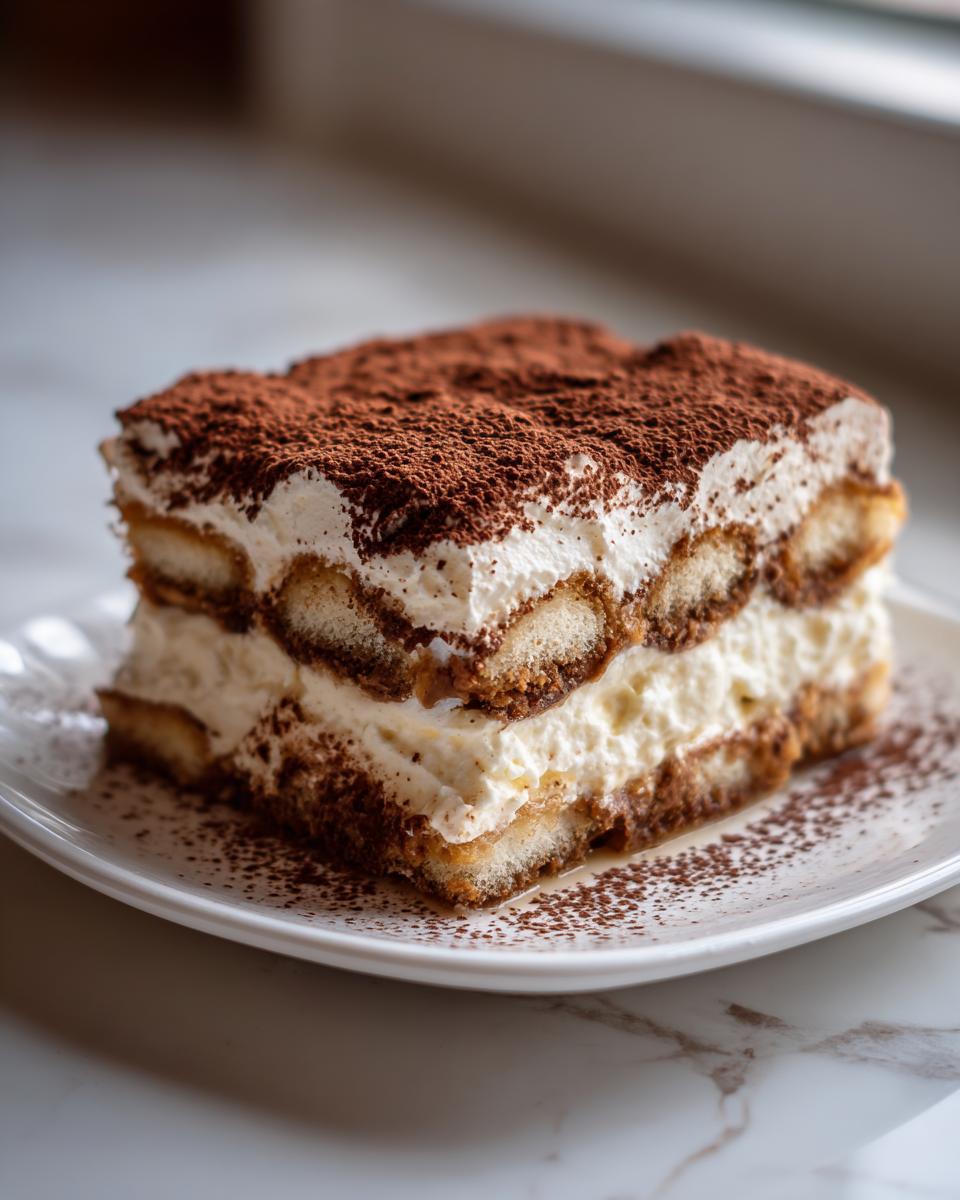
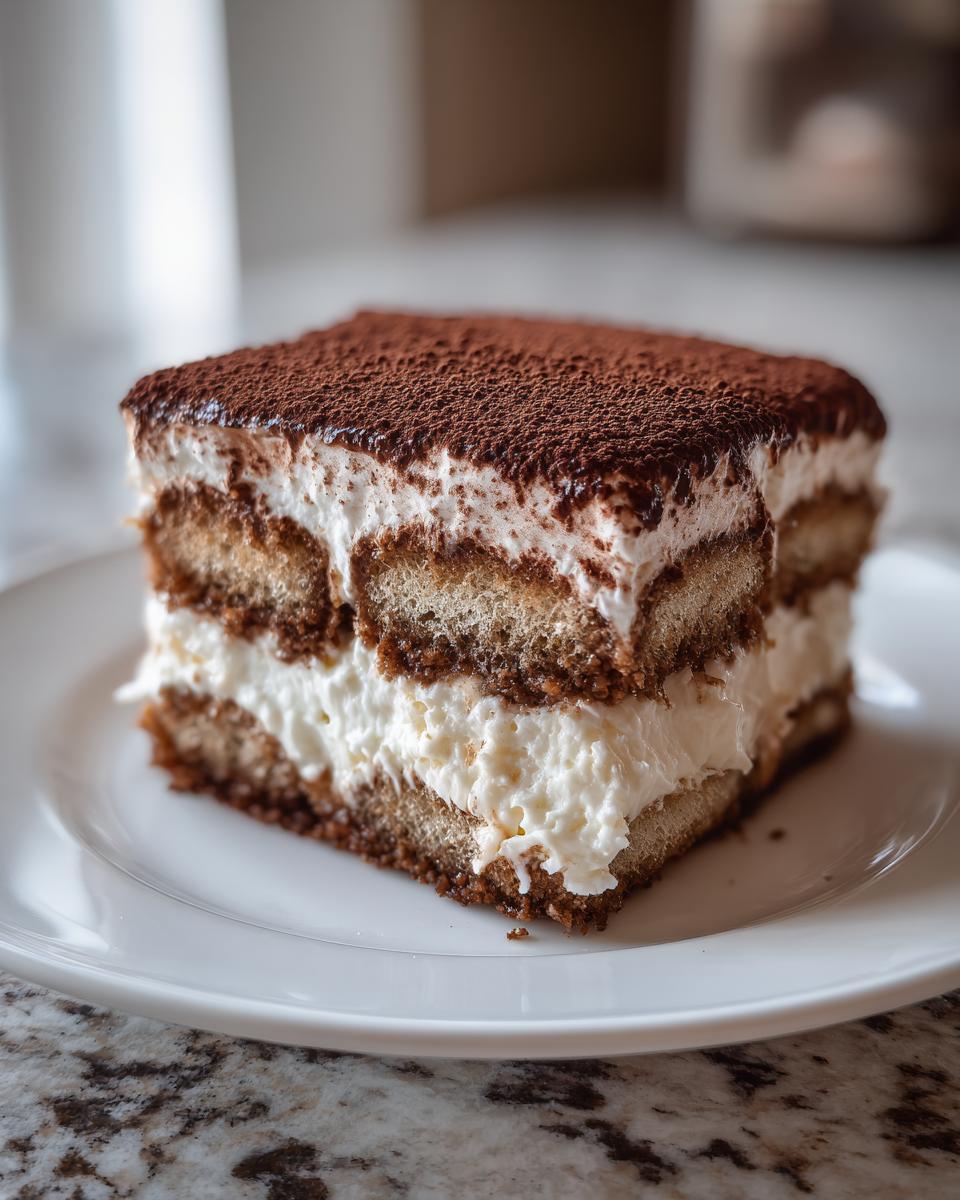
Time to build! Lay your freshly dipped ladyfingers across the bottom of your dish. Top that layer evenly with half of your gorgeous mascarpone cream. Now, repeat the dipping and layering process with a second set of coffee-soaked biscuits, and finish by spreading the rest of the cream beautifully over the top to seal it all in. Cover your dish tightly with plastic wrap. This is non-negotiable: you must refrigerate this for a minimum of 6 hours. Honestly, if you can let this make ahead dessert sit overnight, the flavors really deepen into that perfect Italian profile.
Tips for an Impressive Dinner Party Dessert Tiramisu Recipe
If you want this tiramisu recipe to be the star of the evening, it really comes down to mastering the texture and timing. Since this is a make ahead dessert, you actually have less to worry about on party day, but those prep details matter! I always make sure my coffee dip is perfected first. For a truly authentic flavor, remember to use high-quality espresso—it’s worth the effort to make this showstopper count. Some folks like to see how the pros do it; for inspiration on that rich coffee flavor, I always scroll through Natasha’s Tiramisu for comparison.
If you’re prepping other items, like a quick homemade preserve, you can check out my recipe for stovetop apple butter while you wait for the chilling phase to finish!
Achieving Perfect Coffee Soaked Ladyfingers
We talked about this before, but it bears repeating because it trips up so many people! Those ladyfingers need just a lightning-fast dip in the espresso mixture—literally one second per side! If you leave them soaking even a moment too long, they turn into mushy, sad layers when they rest. We want structure and moisture, not a Tiramisu soup!
The Importance of Resting Time for This Tiramisu Recipe
You cannot rush the chill time. Six hours is the bare minimum, but honestly, overnight is when this Classic Italian Dessert truly sings. While chilling, the liquids absorb, the cream firms up beautifully, and all those strong espresso flavors marry with the sweet mascarpone. It transforms from a dish of assembly into a real cohesive, decadent treat. Don’t even think about slicing into it early!
Ingredient Notes and Substitutions for Your Mascarpone Cream Dessert
For this mascarpone cream dessert, I really urge you to stick close to the core ingredients. When you’re aiming for that classic, authentic taste, the quality of your dairy and coffee is everything. But I know life happens, and you might need a little swap here or there! If you’re skipping the alcohol in the coffee soak—totally fine, especially if you’re serving little ones—don’t just add plain water. Instead, I always suggest boosting that coffee flavor by adding about a teaspoon of almond extract to your cooled espresso mixture. It gives you that lovely aromatic background note that rum or liqueur usually provides!
If you struggle to find mascarpone, you *can* try a mix of cream cheese and heavy cream, but honestly, the texture won’t be the same; mascarpone is key to that light, velvety feel in this best tiramisu recipe. For a small batch of something else savory, make sure you bookmark my recipe for homemade teriyaki sauce!
Serving Suggestions for This Classic Italian Dessert
After all that effort layering your Classic Italian Dessert, you want to serve it in style, right? Because Tiramisu is so rich and decadent—all that creamy mascarpone and deep espresso—you don’t need much else on the plate. My favorite thing to set beside a square is just a splash of bright color. A few fresh raspberries or thinly sliced strawberries on the side cut through that richness beautifully.
And naturally, Tiramisu demands a partner in beverage! Serve it up with a tiny, strong shot of hot espresso or maybe a Limoncello if you’re carrying on with the Italian theme later in the evening. It truly makes the final course feel so complete and elegant. If you are looking for something lighter for a brunch dessert, you should definitely try my winter fruit salad recipe!
Storage and Reheating Instructions for Homemade Tiramisu Guide
Because this is a wonderful, glorious, no-bake dessert, there’s no reheating involved—which is great news for busy hosts! The trick here is keeping that lovely creamy top from drying out in the fridge. You must cover your dish tightly with plastic wrap, pressing it right down onto the surface of the cocoa powder if you can manage it without smudging. It needs to stay cold, too. This homemade tiramisu guide works best when refrigerated for up to three days. After that, the ladyfingers can start to get a little too soft for my liking. To make another great make-ahead snack, you should peek at my recipe for easy no-bake protein balls!
Frequently Asked Questions About This Tiramisu Recipe
I know when you’re finally committing to a big dessert like this, you want to get it perfect! I’ve gathered all the common worries I hear about making this Decadent Coffee Dessert. Hopefully, these quick tips help you feel totally confident serving up this stunning, layered Italian cake.
Can I make this Easy Tiramisu without any alcohol?
Absolutely, yes! If you aren’t using the rum or liqueur in that coffee soak, don’t just use plain water. To maintain that depth of flavor that makes this an Authentic Tiramisu, I highly recommend just brewing an extra little splash of espresso and adding it to your cooled coffee. Or, if you want that aromatic complexity back, try adding just one teaspoon of almond extract to the coffee mixture. It really rounds out the flavor nicely!
How far in advance can I make this Make Ahead Dessert?
This is the beauty of a great make ahead dessert! You must let it chill for a minimum of 6 hours so those layers firm up and the coffee soaks properly into the ladyfingers. But if you are planning a big party or just want zero stress the next day, I bake mine the day before. Letting this sit overnight—so about 12 to 24 hours—is actually when it achieves peak flavor and texture. It tastes even better the next day, I swear!
What is the best way to dust the cocoa powder?
You should wait to dust the cocoa until the absolute last minute, right before slicing and serving. If you dust it on too early, the moist air in the fridge will cause the cocoa powder to absorb moisture and turn dark, sometimes almost black, and get damp. Use a very fine-mesh sieve to gently dust an even, beautiful layer over the top. It gives you that wonderfully professional finish on your Homemade Tiramisu Guide!
If you are scouting around for more simple ideas for your weekly menu, I have a whole section dedicated to easy weeknight dinner ideas!
Estimated Nutritional Data for This Decadent Coffee Dessert
I always want to be upfront with you all about what we’re enjoying! Since this decadent coffee dessert is made with rich mascarpone and sugar, it’s certainly a treat. Keep in mind that these numbers are just estimates based on standard recipe yields and ingredient sourcing. These figures are based on 8 servings, so portion control is how we keep things balanced for the week!
- Serving Size: 1 slice
- Calories: 380
- Total Fat: 24g
- Sugar: 25g
- Protein: 7g
If you need something filling but much quicker for lunch, you should totally check out my ideas for quick healthy lunch ideas!
PrintEasy, Authentic No-Bake Tiramisu Recipe (No Raw Eggs Required)

Make this classic Italian dessert without turning on your oven or using raw eggs. This simple, creamy tiramisu recipe layers coffee-soaked ladyfingers with rich mascarpone filling for an impressive make-ahead treat.
- Prep Time: 25 min
- Cook Time: 0 min
- Total Time: 6 hr 25 min
- Yield: 8 servings 1x
- Category: Dessert
- Method: No-Bake
- Cuisine: Italian
- Diet: Vegetarian
Ingredients
- 1 1/2 cups strong brewed espresso or coffee, cooled
- 1/4 cup coffee liqueur or dark rum (optional)
- 2 large egg yolks
- 1/2 cup granulated sugar
- 8 ounces mascarpone cheese, softened to room temperature
- 1 cup heavy whipping cream, cold
- 1 teaspoon vanilla extract
- 1 package (7 ounces) ladyfingers (Savoiardi biscuits)
- Unsweetened cocoa powder, for dusting
Instructions
- Prepare the coffee soak: In a shallow bowl, combine the cooled espresso and coffee liqueur or rum, if using. Set aside.
- Make the mascarpone cream: In a medium bowl, whisk the egg yolks and granulated sugar together until the mixture is pale yellow and thick. This process pasteurizes the yolks slightly with friction.
- Gently fold the softened mascarpone cheese into the egg-sugar mixture until just combined and smooth. Do not overmix.
- In a separate, clean bowl, beat the cold heavy whipping cream and vanilla extract with an electric mixer until stiff peaks form.
- Gently fold one-third of the whipped cream into the mascarpone mixture to lighten it. Then, fold in the remaining whipped cream until no streaks remain, creating a light, airy cream.
- Assemble the tiramisu: Quickly dip one ladyfinger at a time into the coffee mixture, ensuring it is coated but not soggy. Arrange a single layer of dipped ladyfingers in the bottom of an 8×8 inch baking dish or a similar-sized serving dish.
- Spread half of the mascarpone cream evenly over the layer of ladyfingers.
- Repeat the process: Dip and arrange a second layer of coffee-soaked ladyfingers over the cream.
- Top with the remaining mascarpone cream, spreading it evenly to cover the top layer.
- Cover the dish tightly with plastic wrap and refrigerate for at least 6 hours, or preferably overnight, to allow the flavors to meld and the dessert to set. This is a key step for a make-ahead dessert.
- Before serving, dust the top generously with unsweetened cocoa powder using a fine-mesh sieve. Slice and serve this impressive dinner party dessert.
Notes
- For a truly authentic flavor, use high-quality espresso.
- If you skip the alcohol, add 1 teaspoon of almond extract to the coffee soak for depth.
- Chill time is essential; this no-bake dessert improves significantly after setting overnight.
Nutrition
- Serving Size: 1 slice
- Calories: 380
- Sugar: 25g
- Sodium: 85mg
- Fat: 24g
- Saturated Fat: 14g
- Unsaturated Fat: 10g
- Trans Fat: 0.5g
- Carbohydrates: 35g
- Fiber: 1g
- Protein: 7g
- Cholesterol: 120mg